
"The Dress", i.e. Sewing my daughter's Homecoming dress
Sometime back in August, I realized that I needed to think about Homecoming. I have made my daughter lots of dresses for various occasions, including two she’s worn for Eighth Grade Formal, Church Prom, and Homecoming last year. But I knew that this one needed to be a step above. I want her to feel comfortable, beautiful, and not have her outfit look homemade. Plus, when she was a baby and I began sewing for her, I determined that I wanted to become good enough at sewing that I could one day sew her formal dresses. My mom sewed a couple of mine, and while it was very stressful for her, it was something I remember with fondness and love for the effort she put in. Once I didn’t like how I looked in the first and so she sewed a whole new dress in a week!
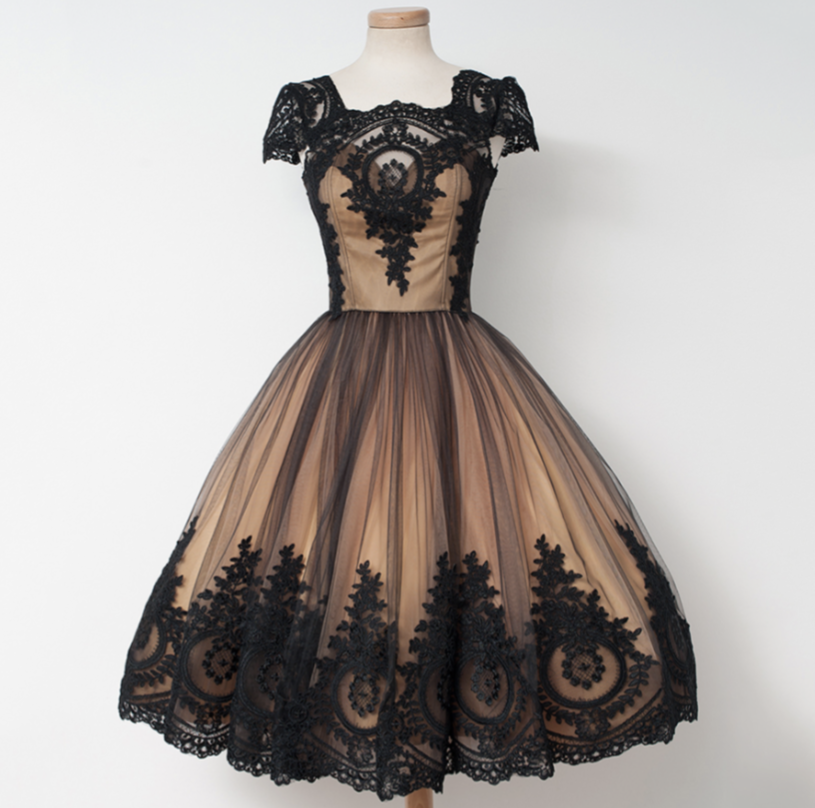
My daughter quickly came back to me with the picture on the left. This dress could be purchased for $148, custom tailored for $20 and shipped for $25, so $193 total. Even though that’s a great price for a formal, I was still planning on making it. Plus, I enjoy stretching my skills. I knew this would stretch them incredibly, and it did, but I was excited. My goal was to make it for less than $200.
We easily found almost the identical lace on Etsy. It had extra designs other than the border, but the border was the most important part. I ordered it with plenty of time to arrive from China. I also found a pretty good visual match for the bodice in this pattern for a corset-style bodice with zipper.
The pattern, however, had some issues. It was laid out in a way that you couldn’t grade. It had no seam allowance posted. It also linked to a youtube video about fitting, which was very helpful. However, the video required the bust and waist to be marked on the pattern. I emailed and she told me the seam allowance and that the bust was marked and the waist was located at the bottom of the pattern. The bust was marked on only one piece, and just by looking at the pieces, I could tell the waist was actually two inches above the bottom. So I made my own marks and went on from there.
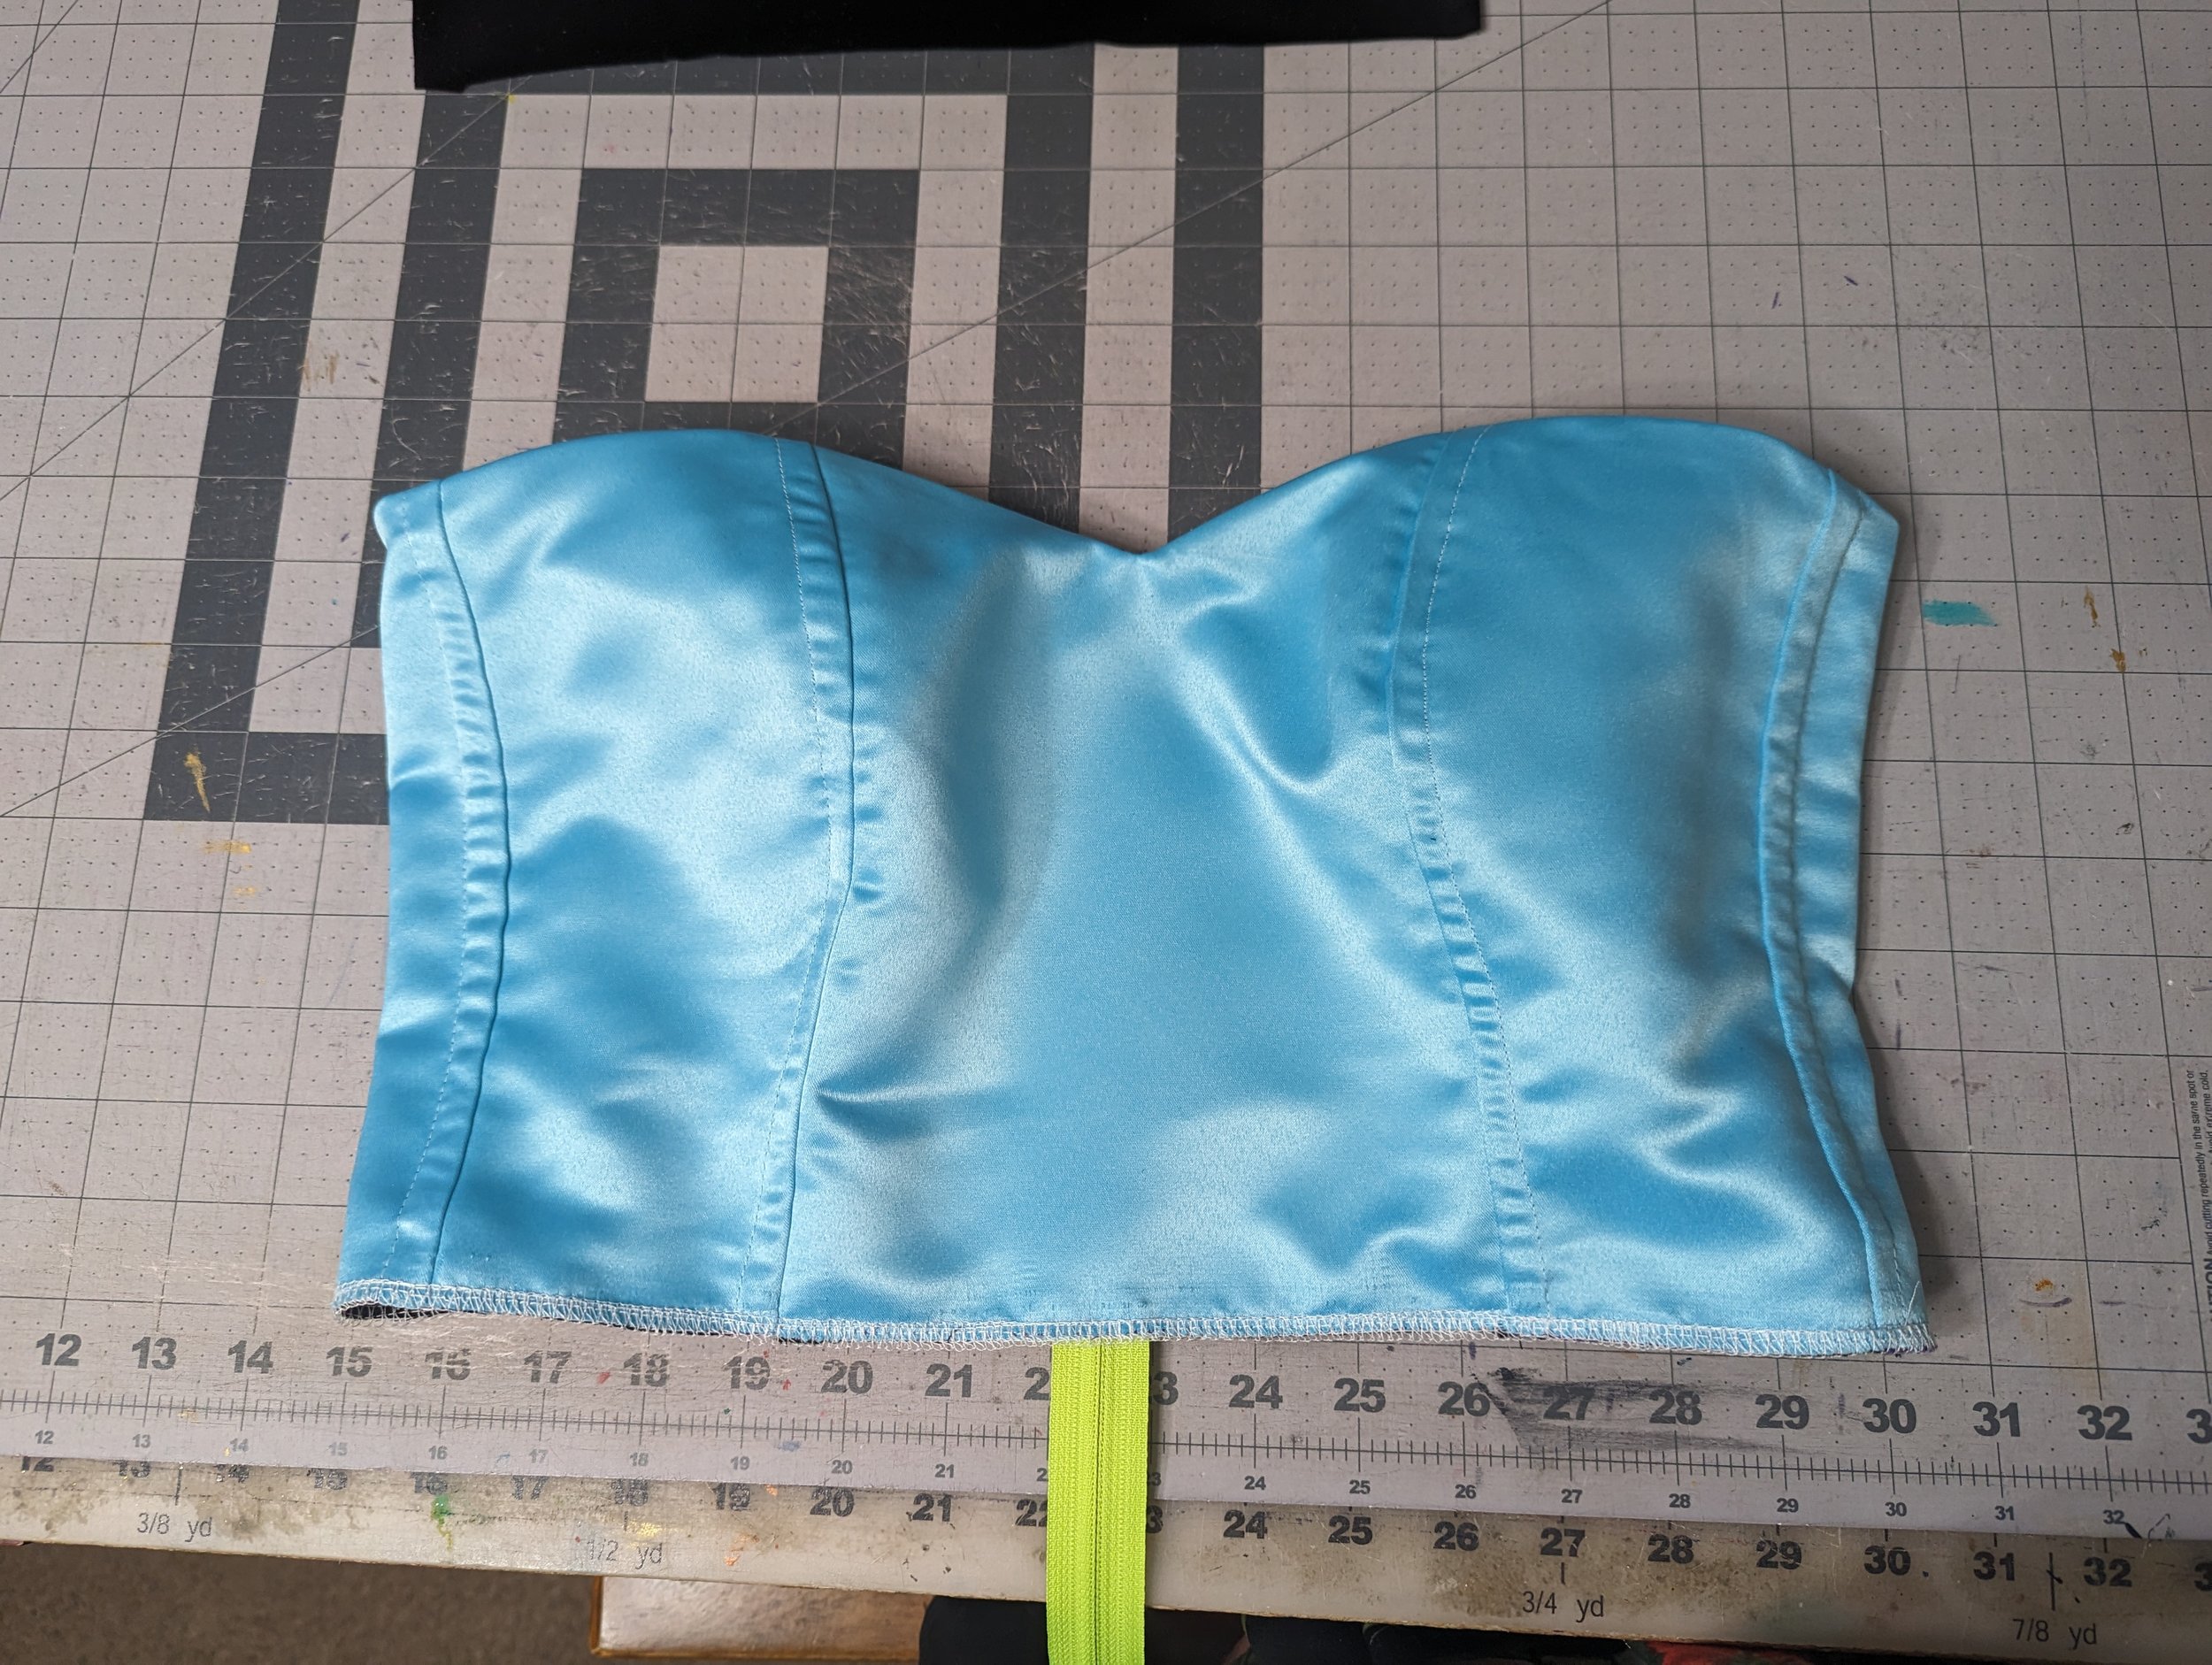
Bodice 1 had a few issues.
I messed up and added twice the amount I needed to the pattern pieces at the waist.
I followed the pattern instructions for where to place the boning (between seams), and it wasn’t great.
It felt floppy and that made it look very amateur. Plus the pattern didn’t have me staystitch the neckline and I could tell that would be an issue.
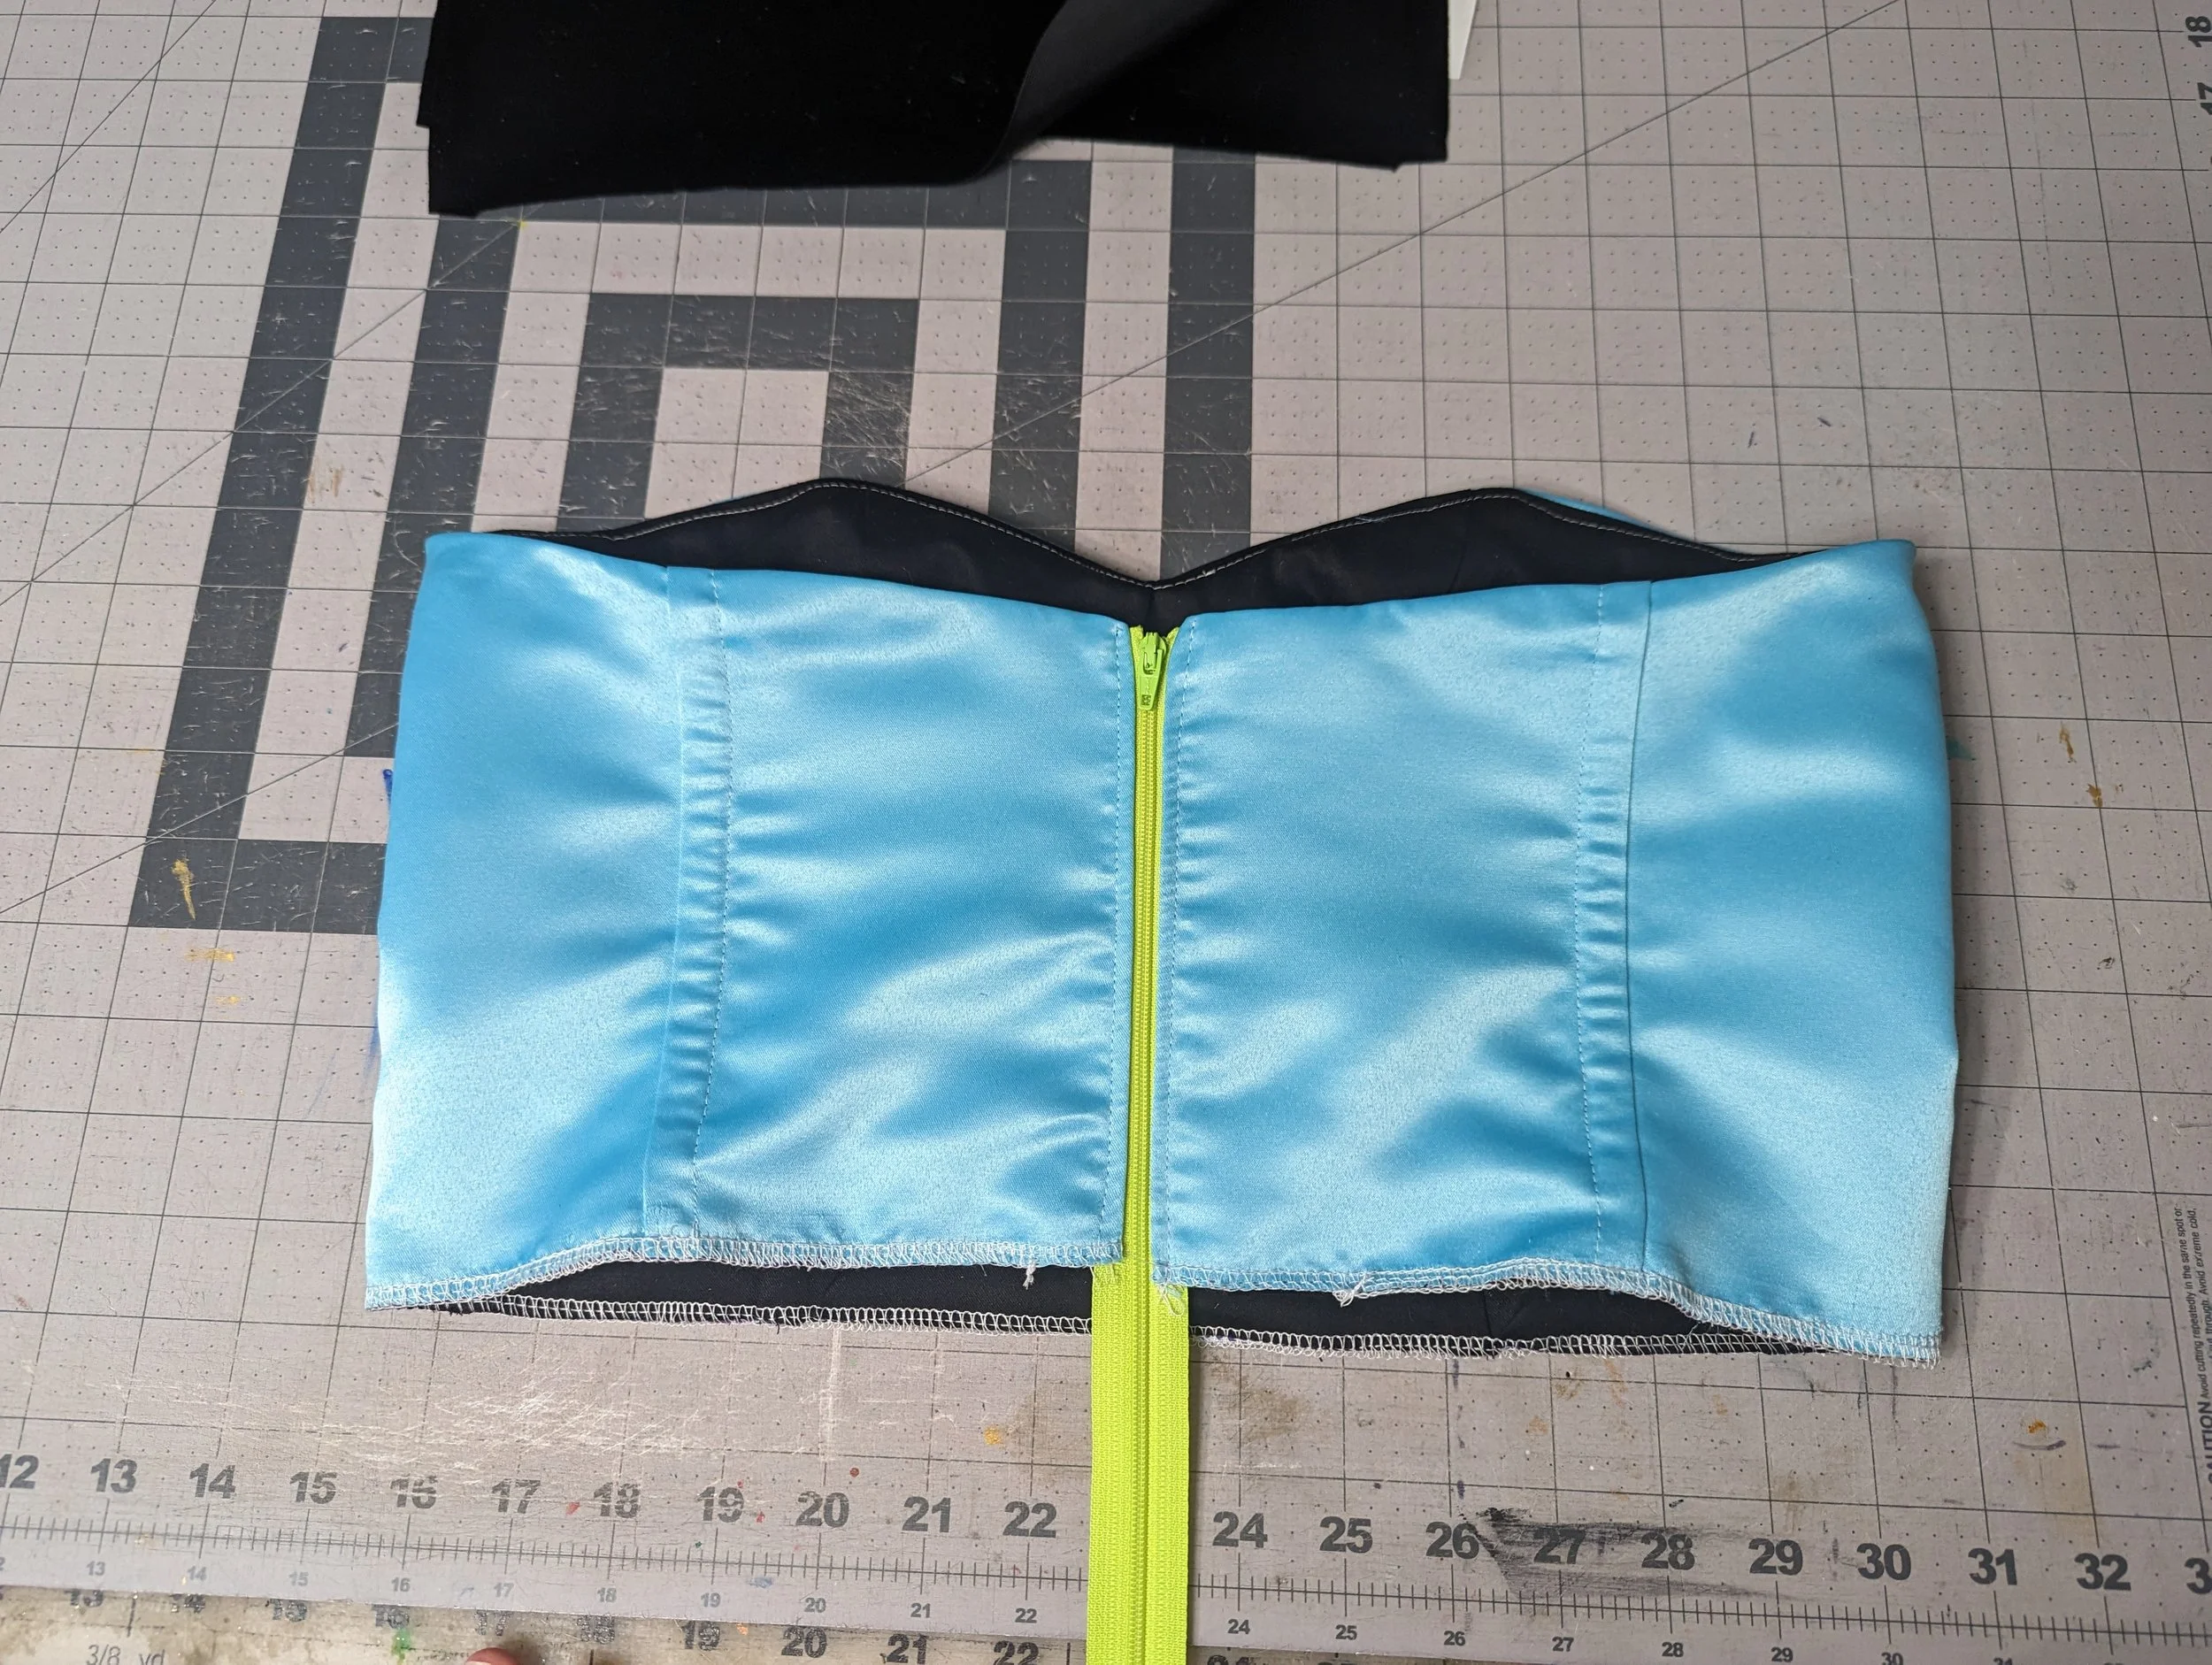
I did some research and determined that I wanted to underline the satin for the next one. I also subtracted an inch at the bottom for her short height, and decided to eliminate the front seam.
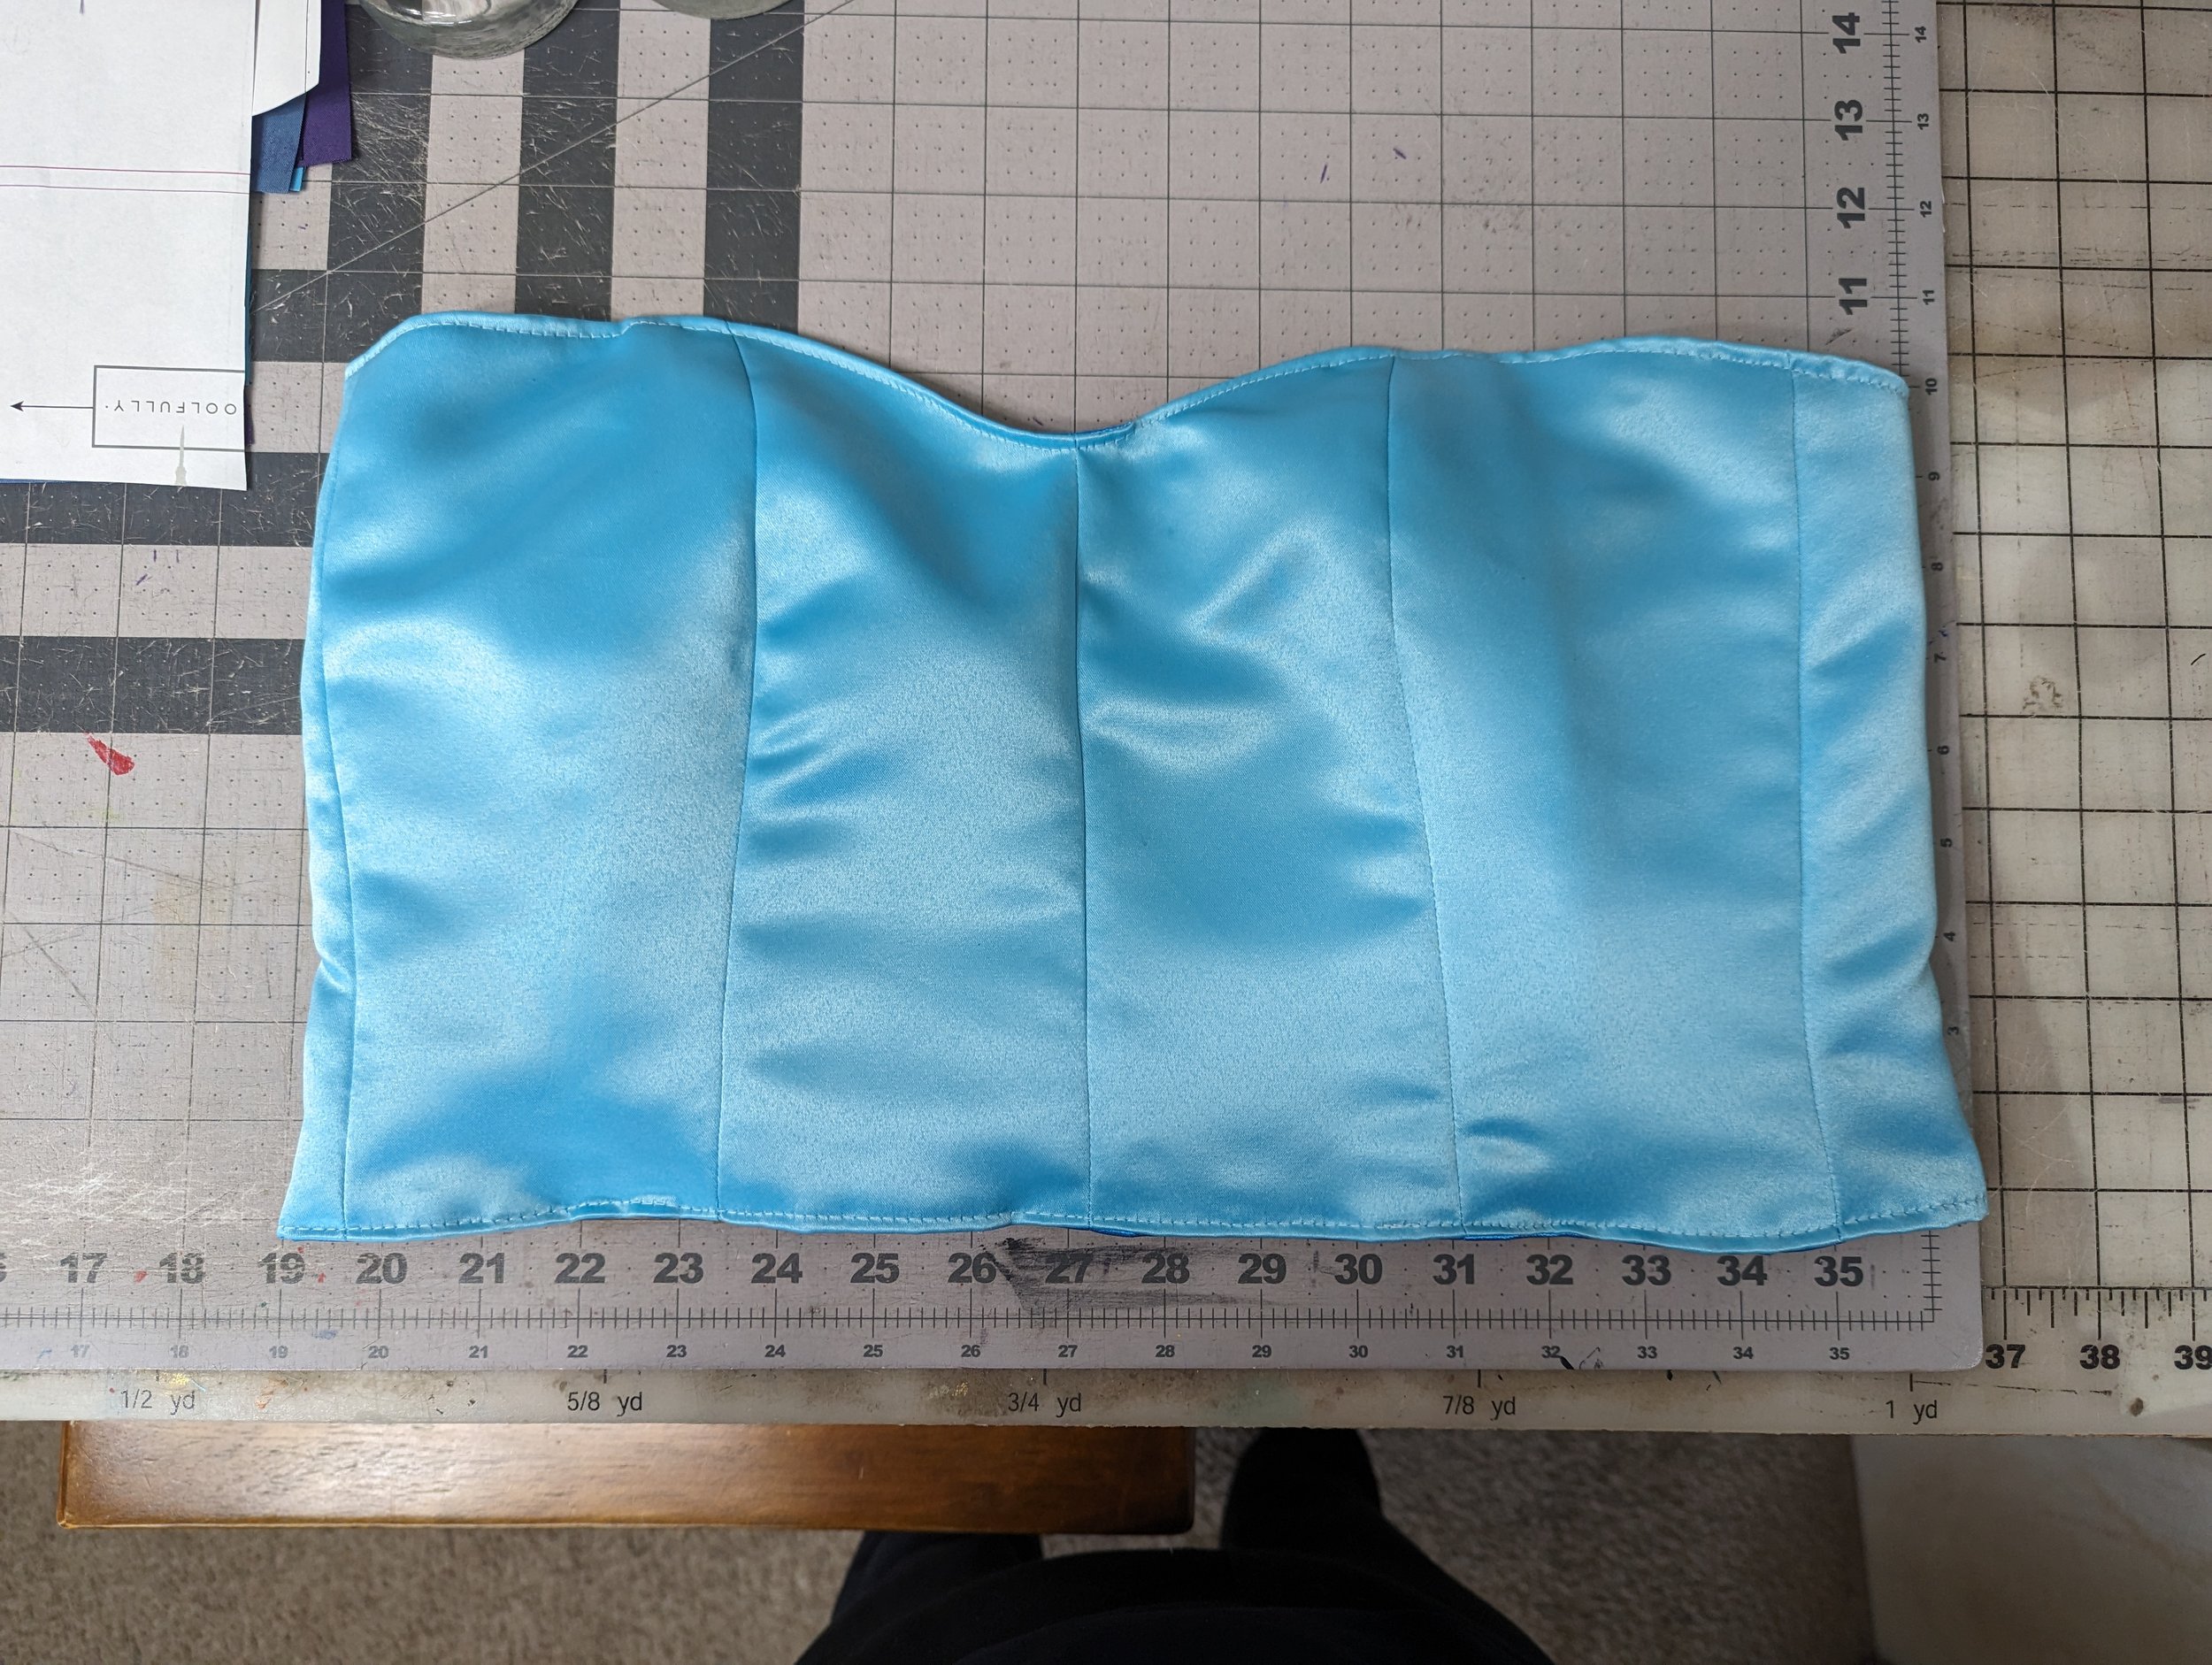
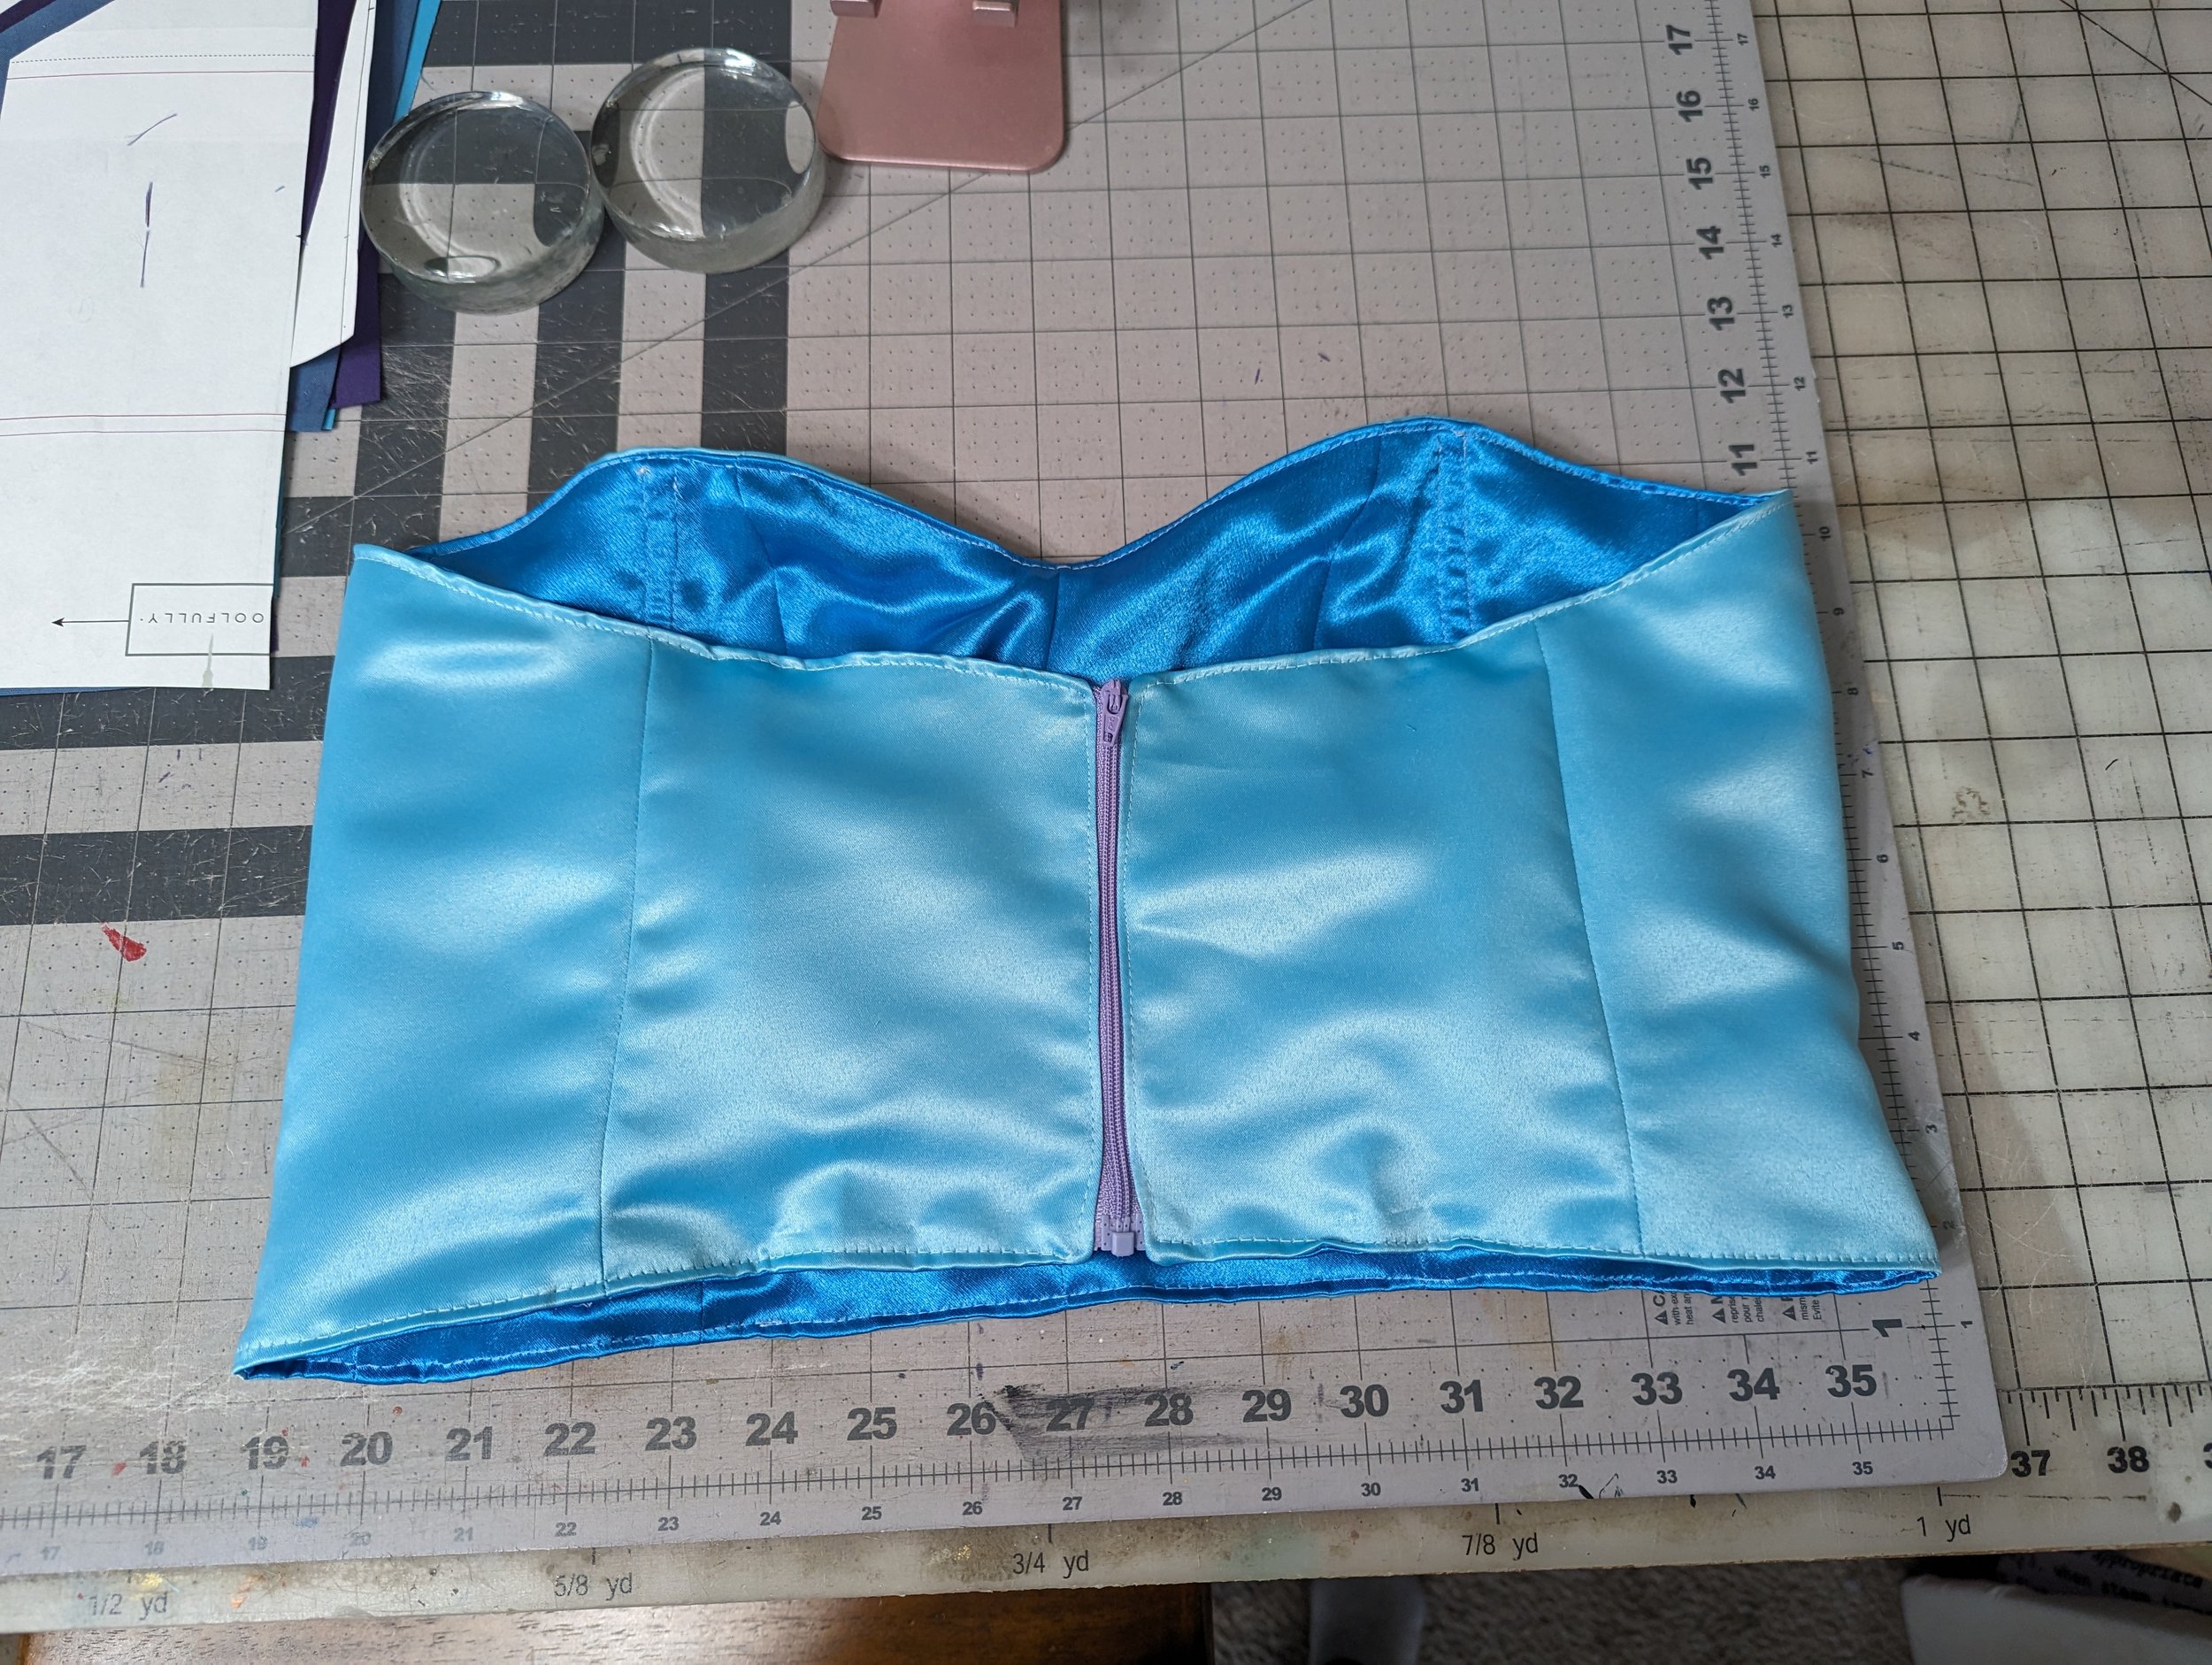
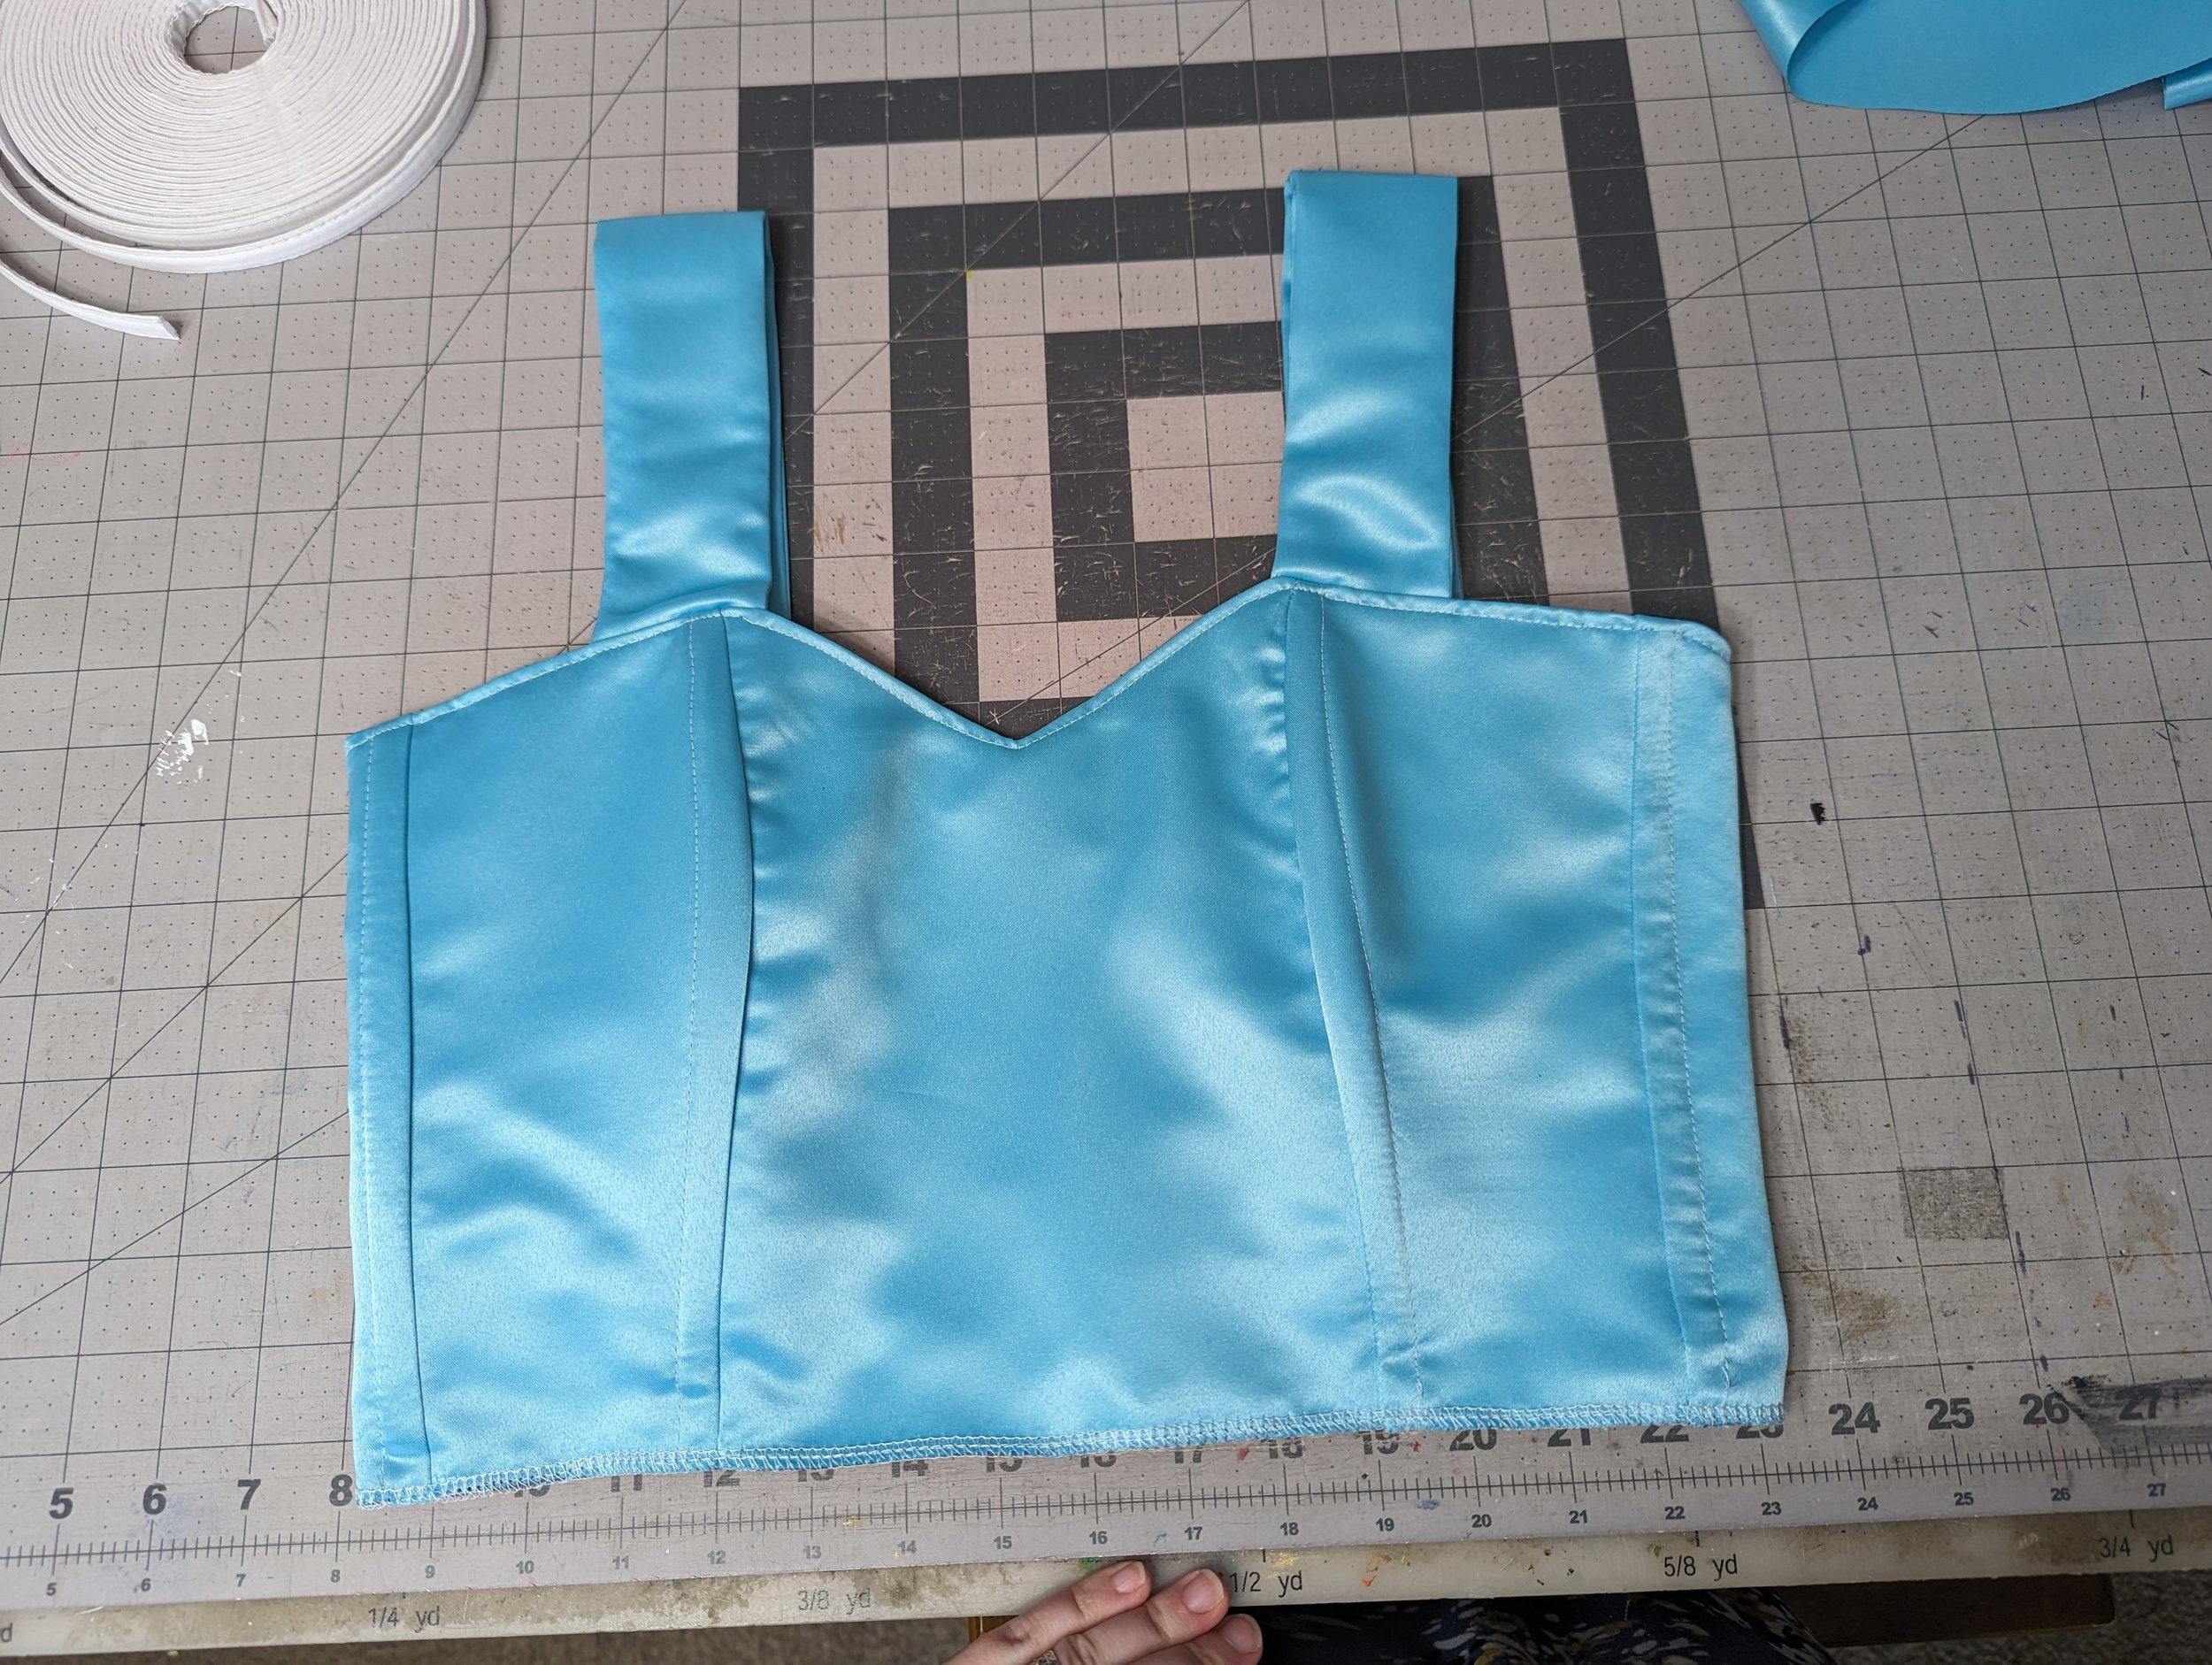
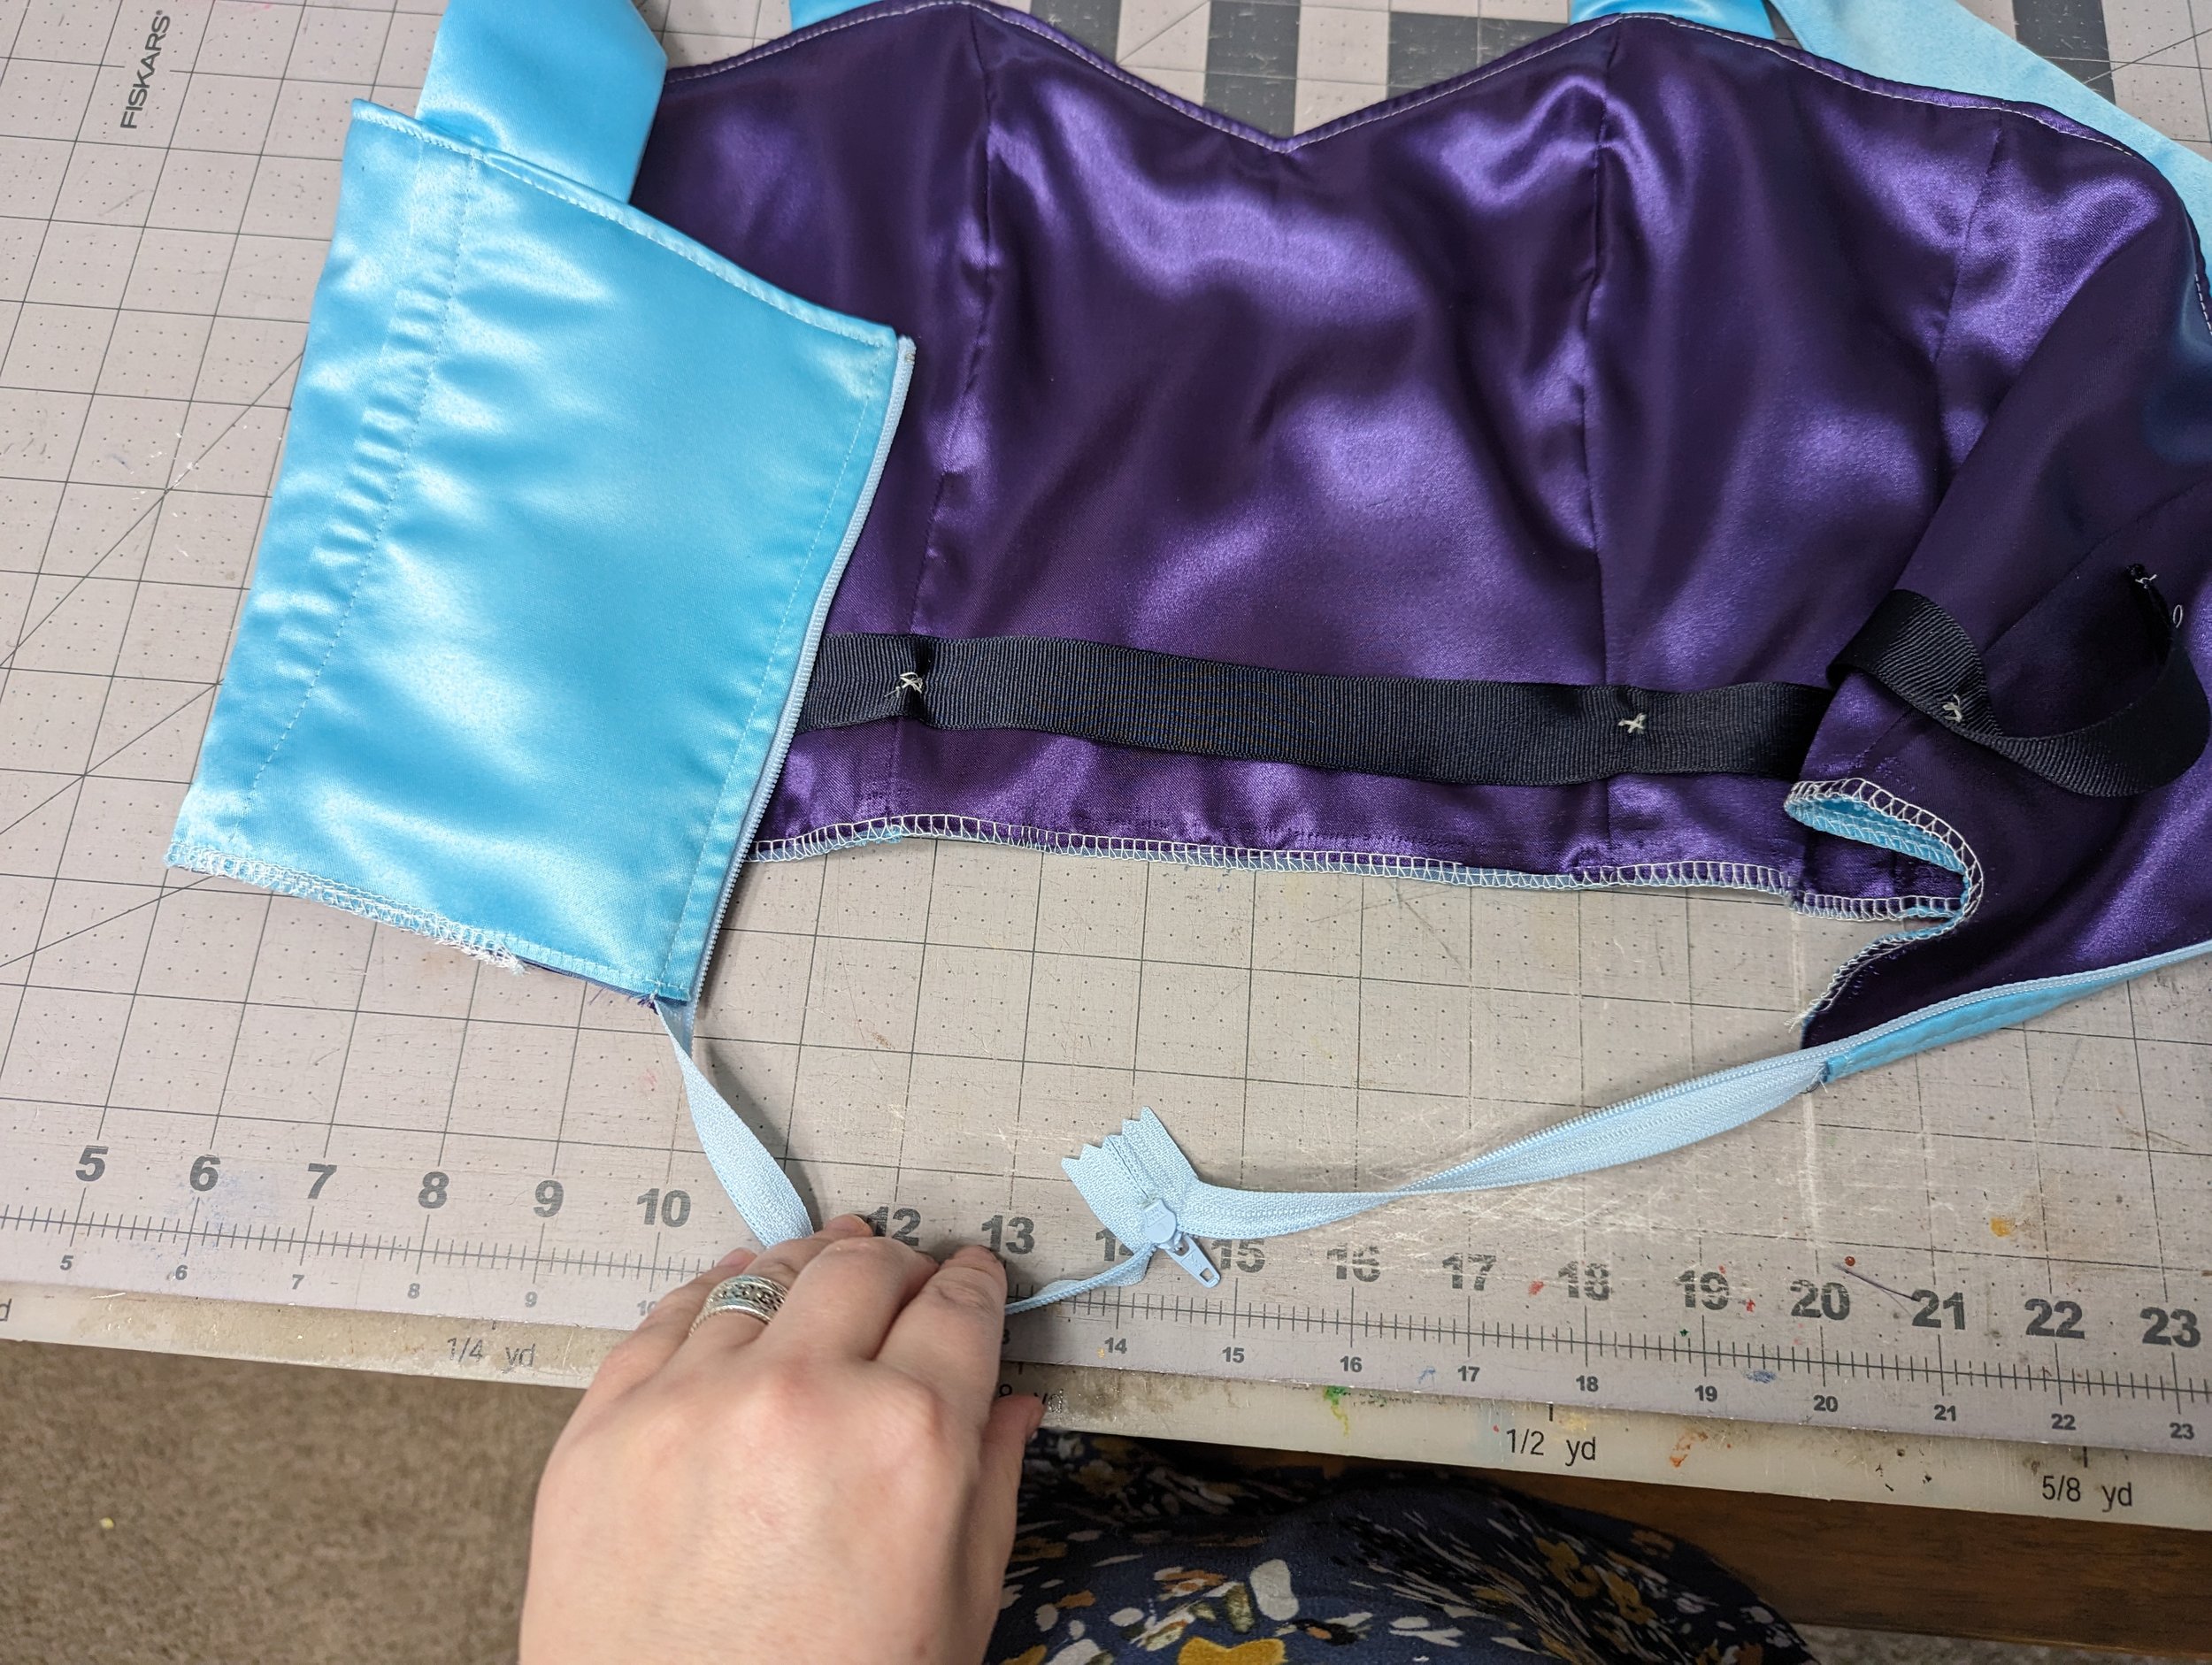
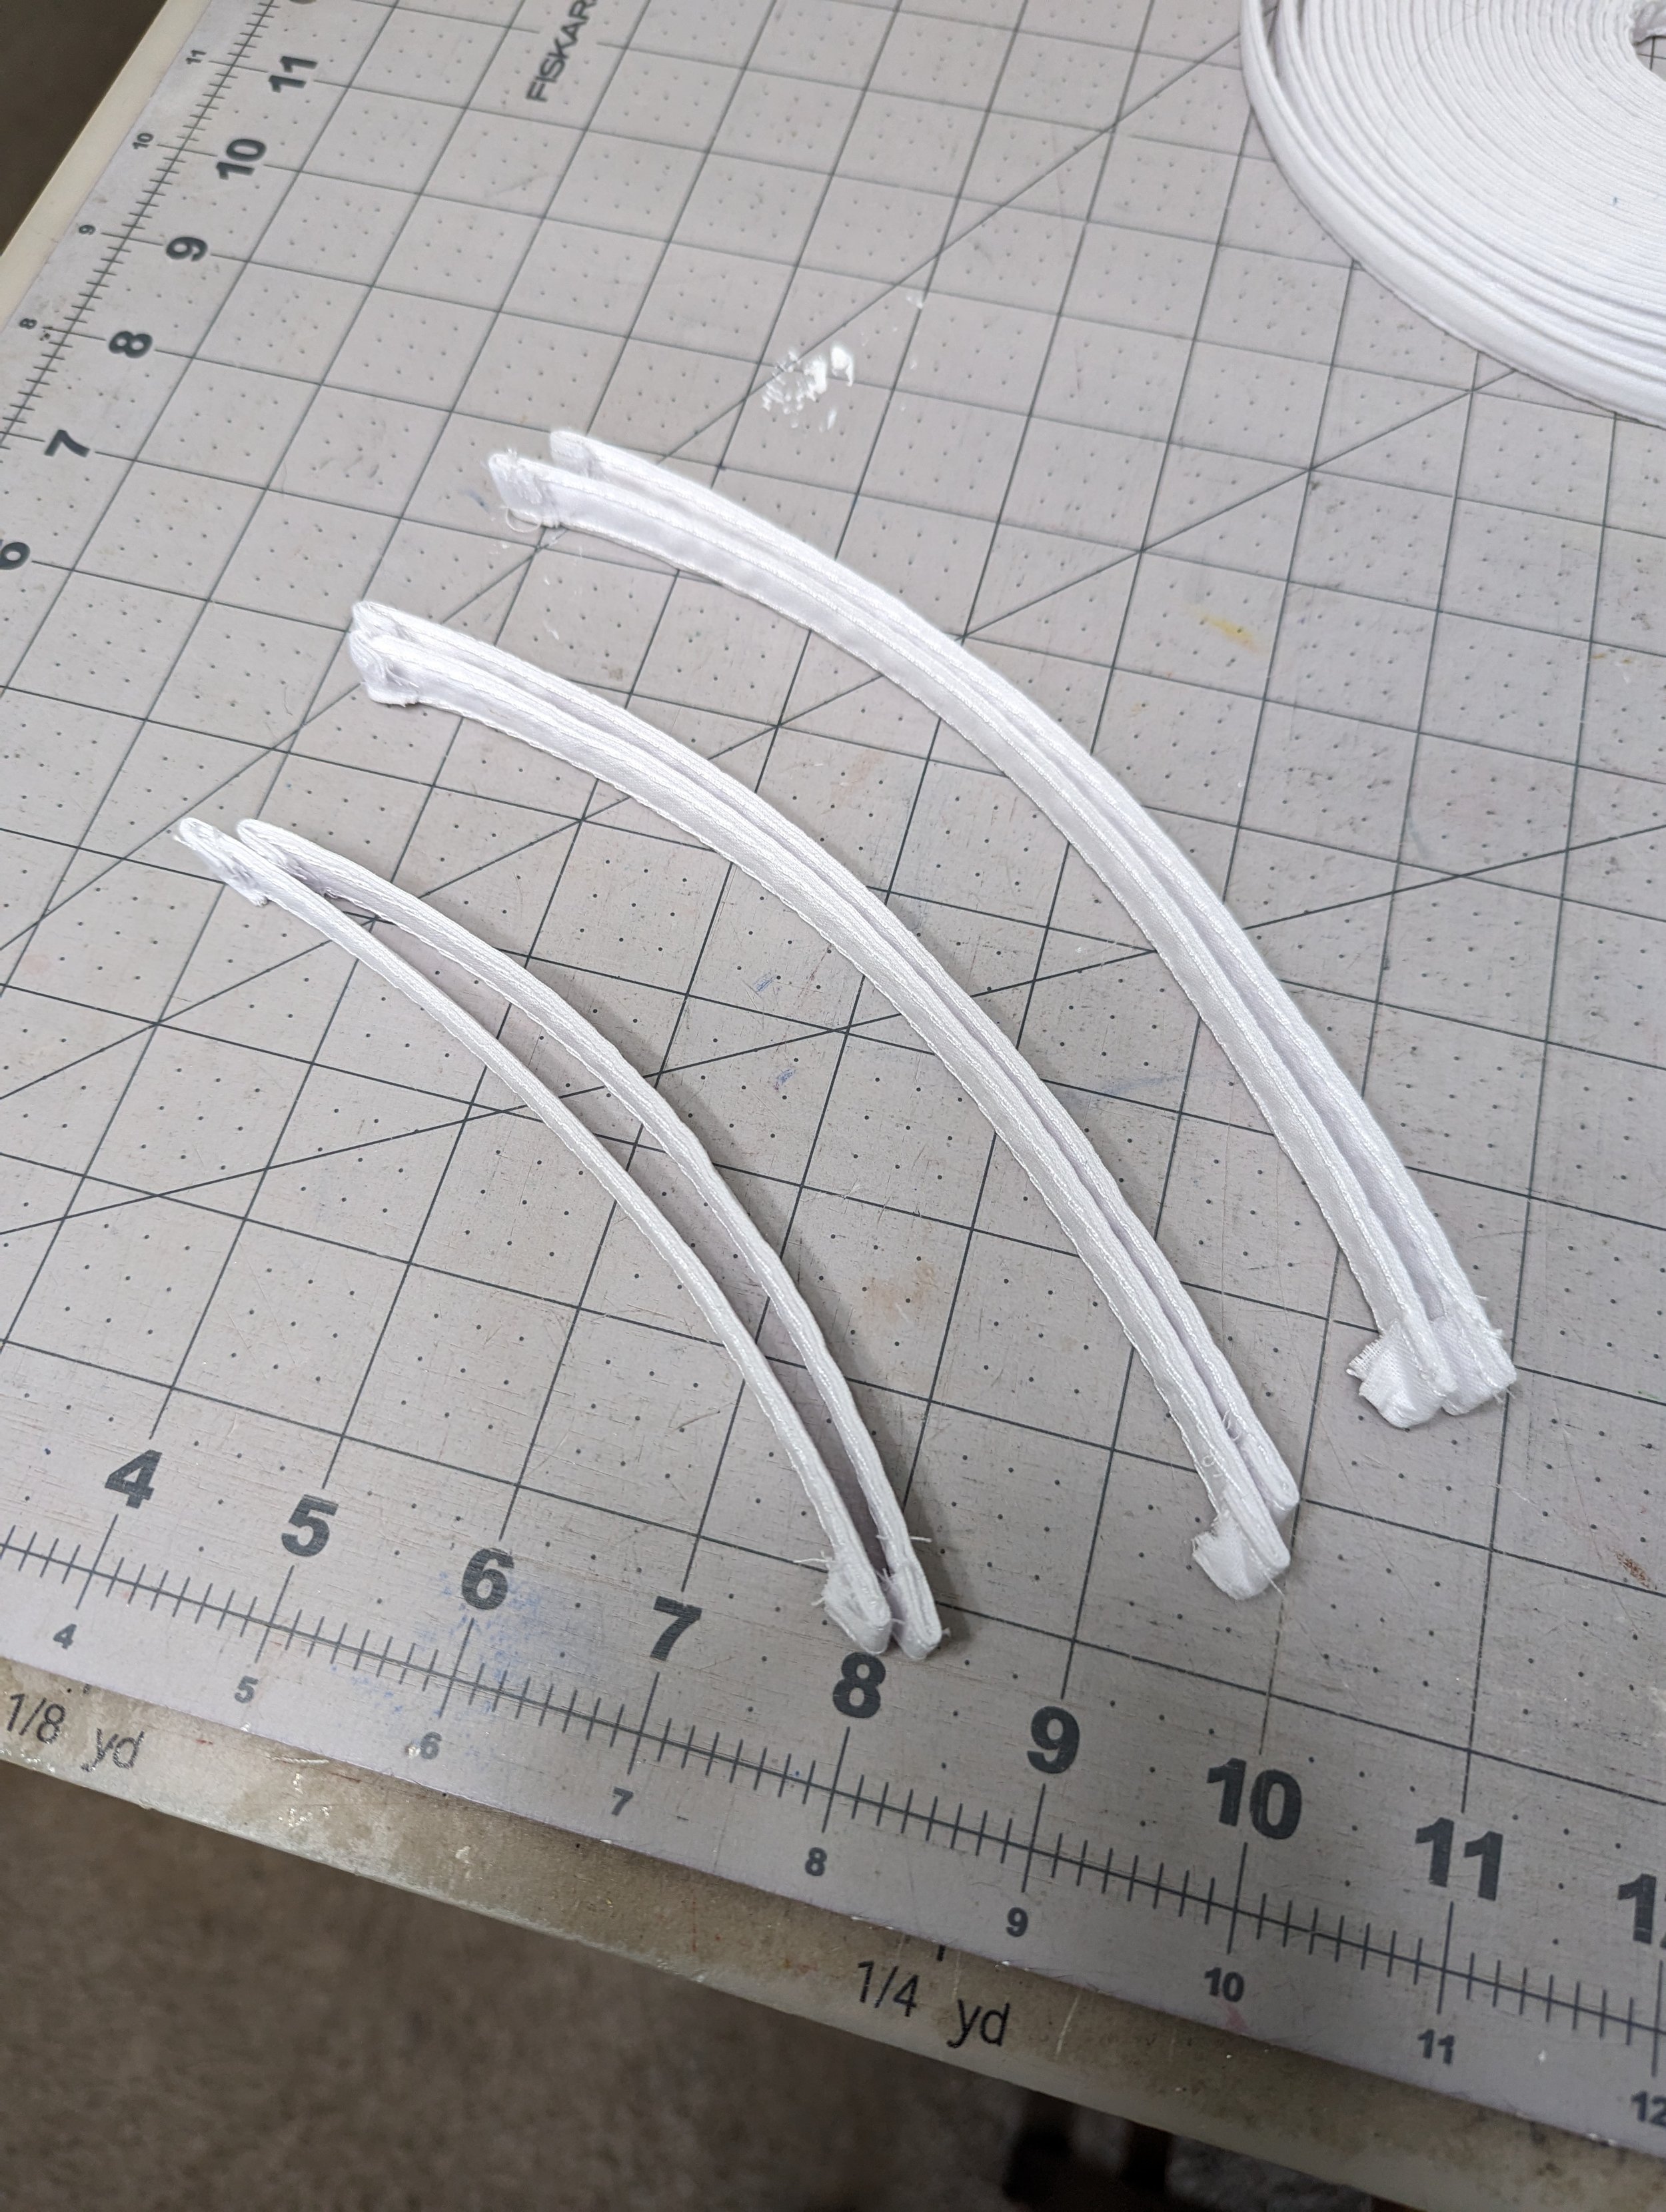
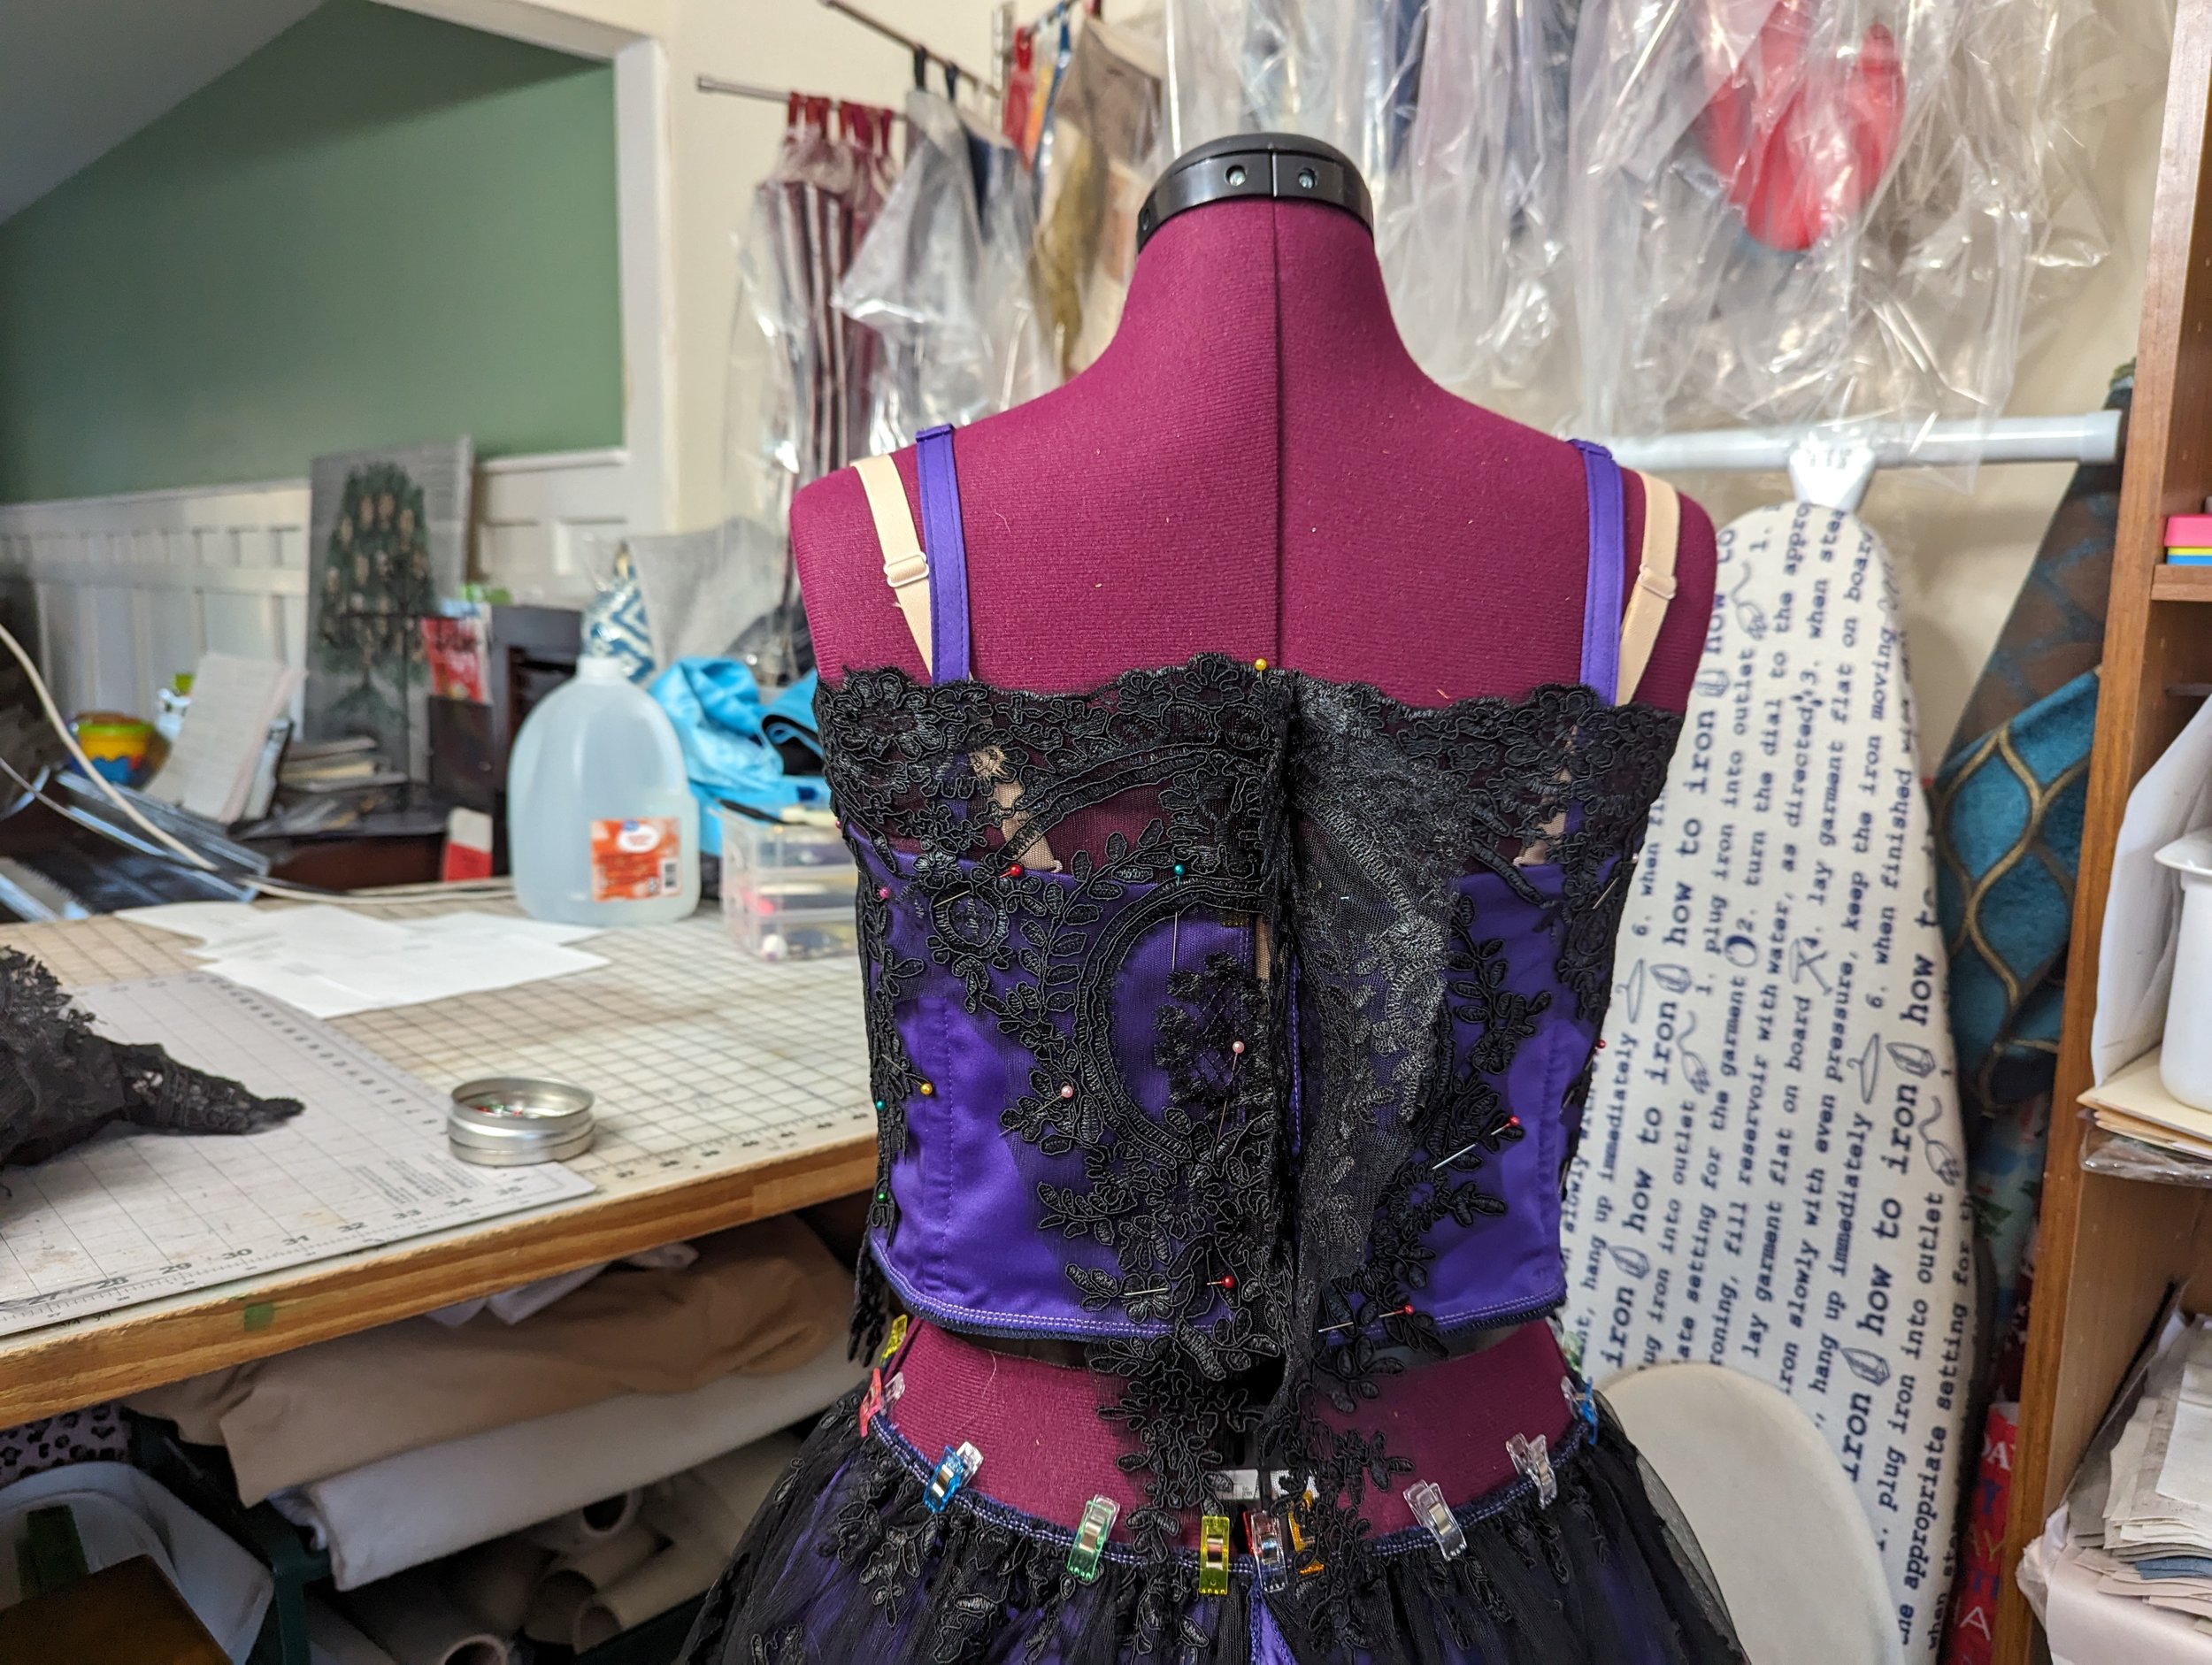
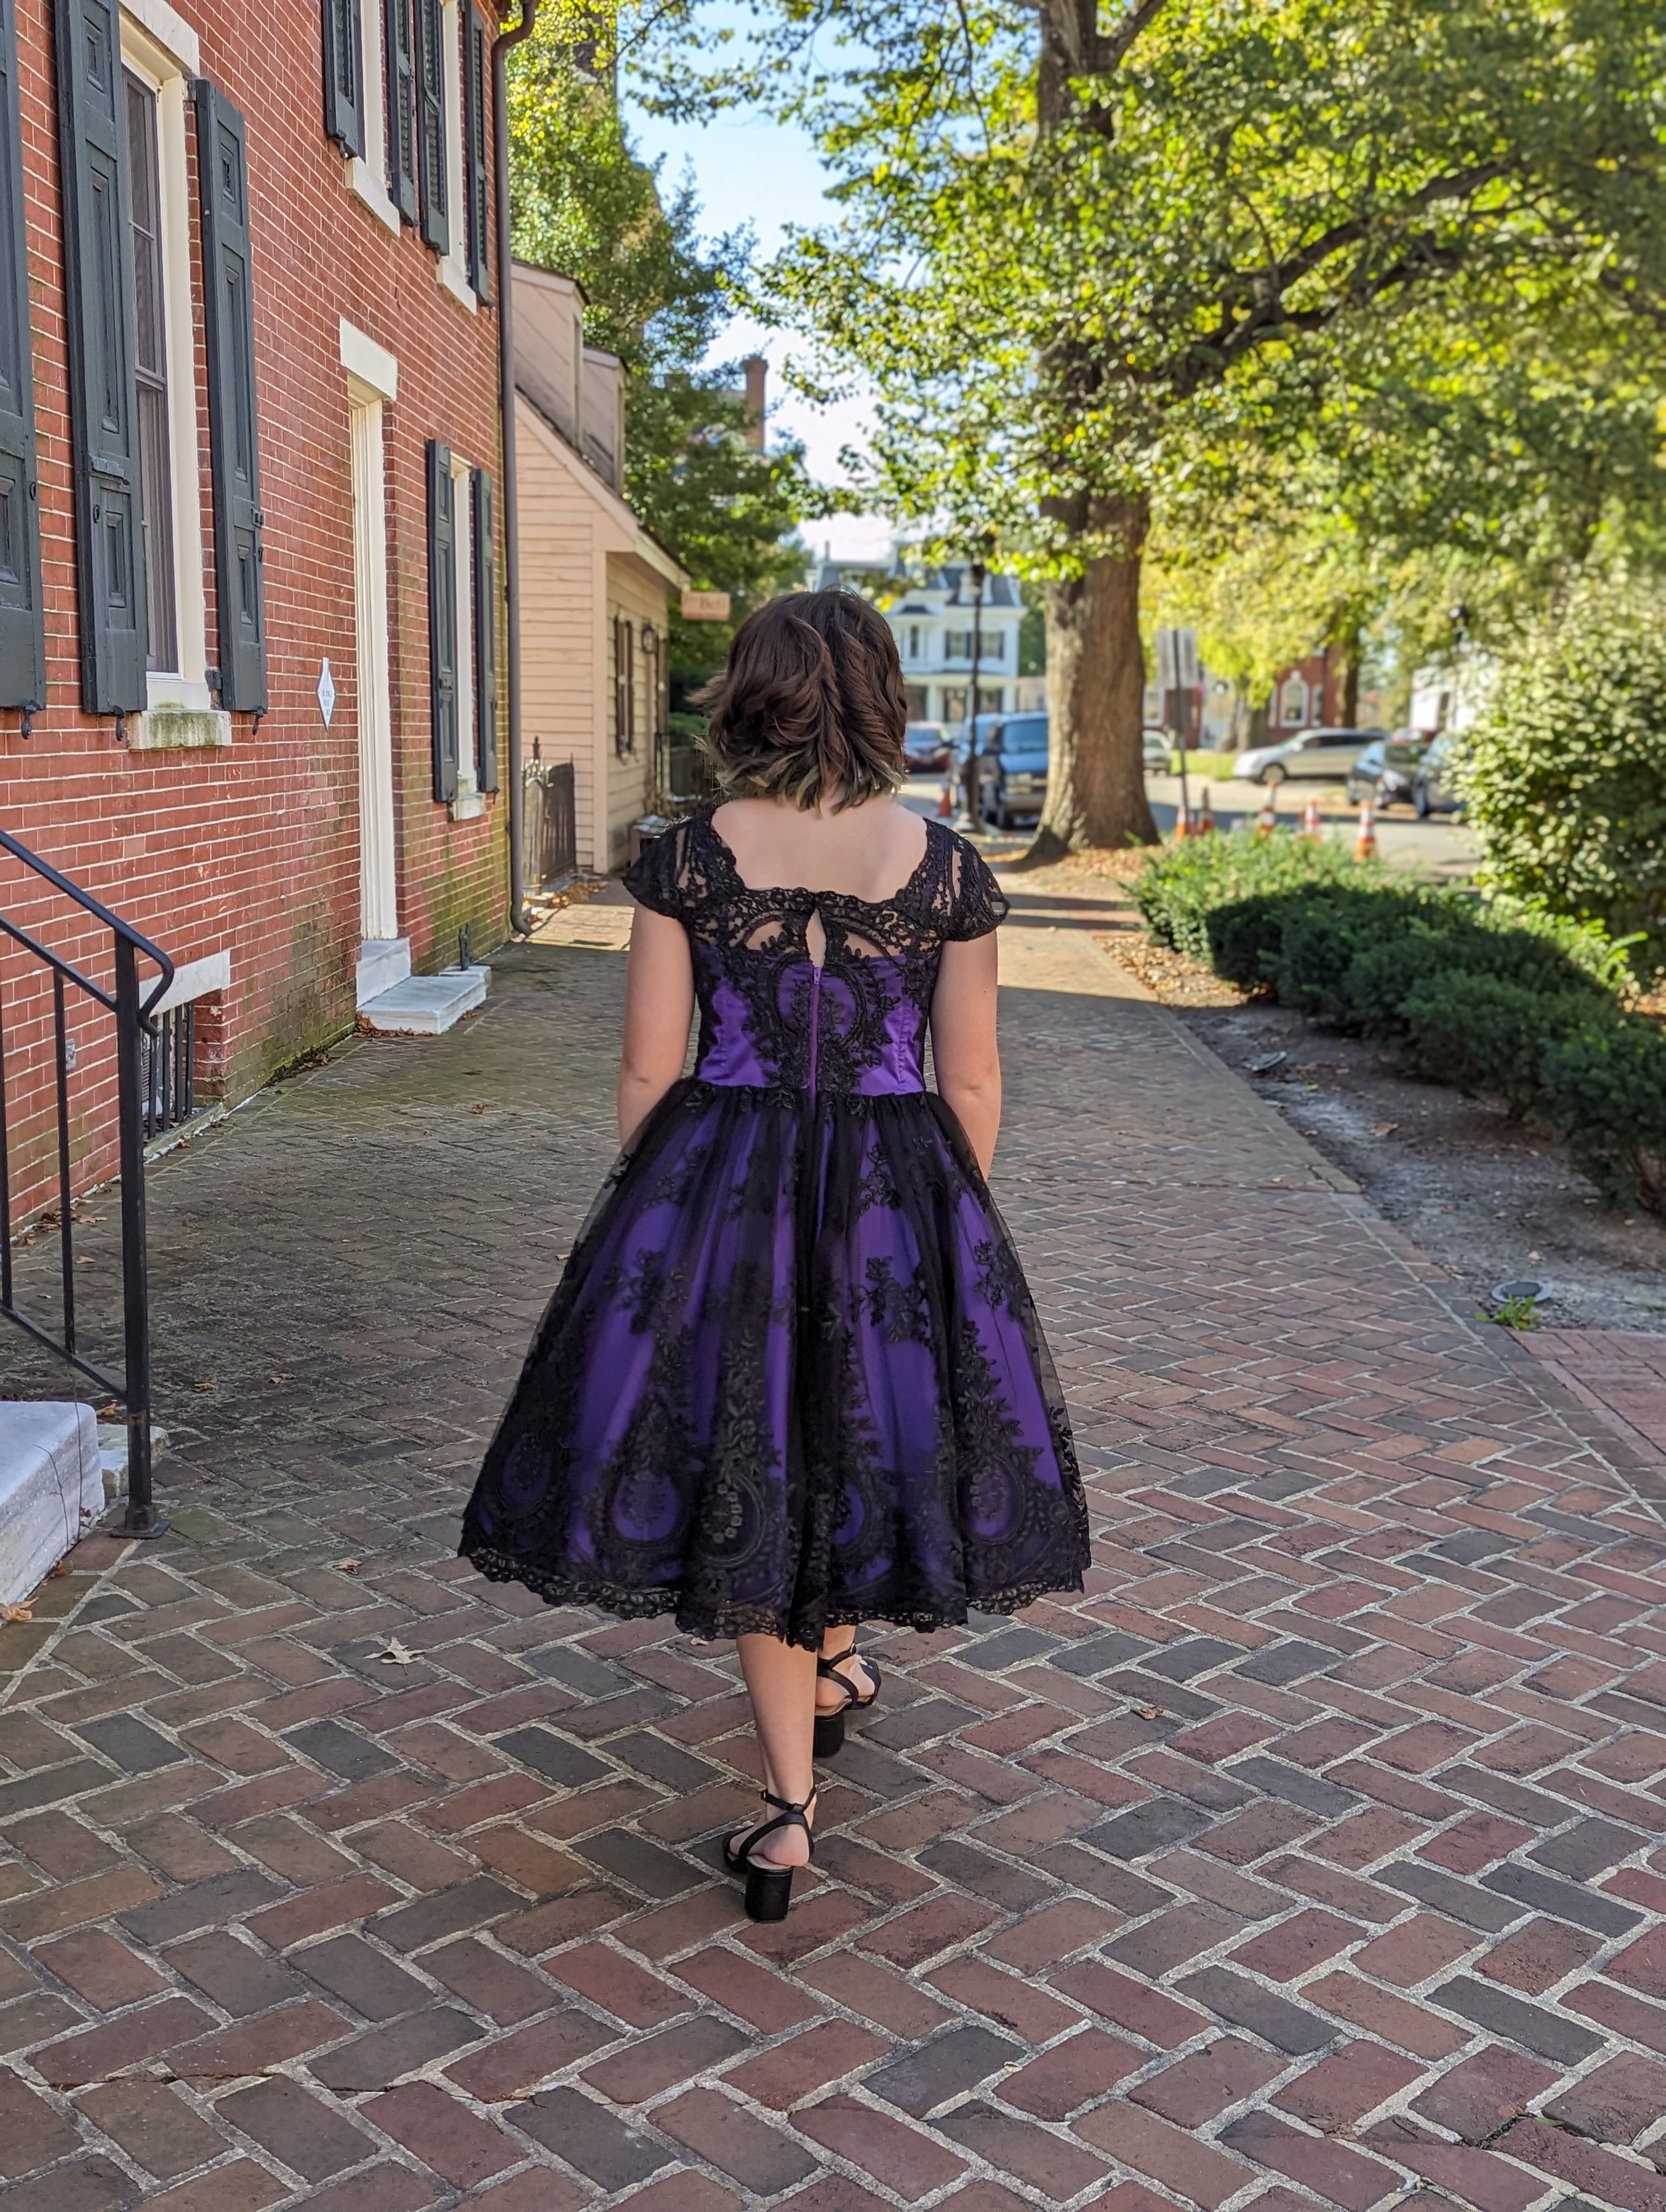
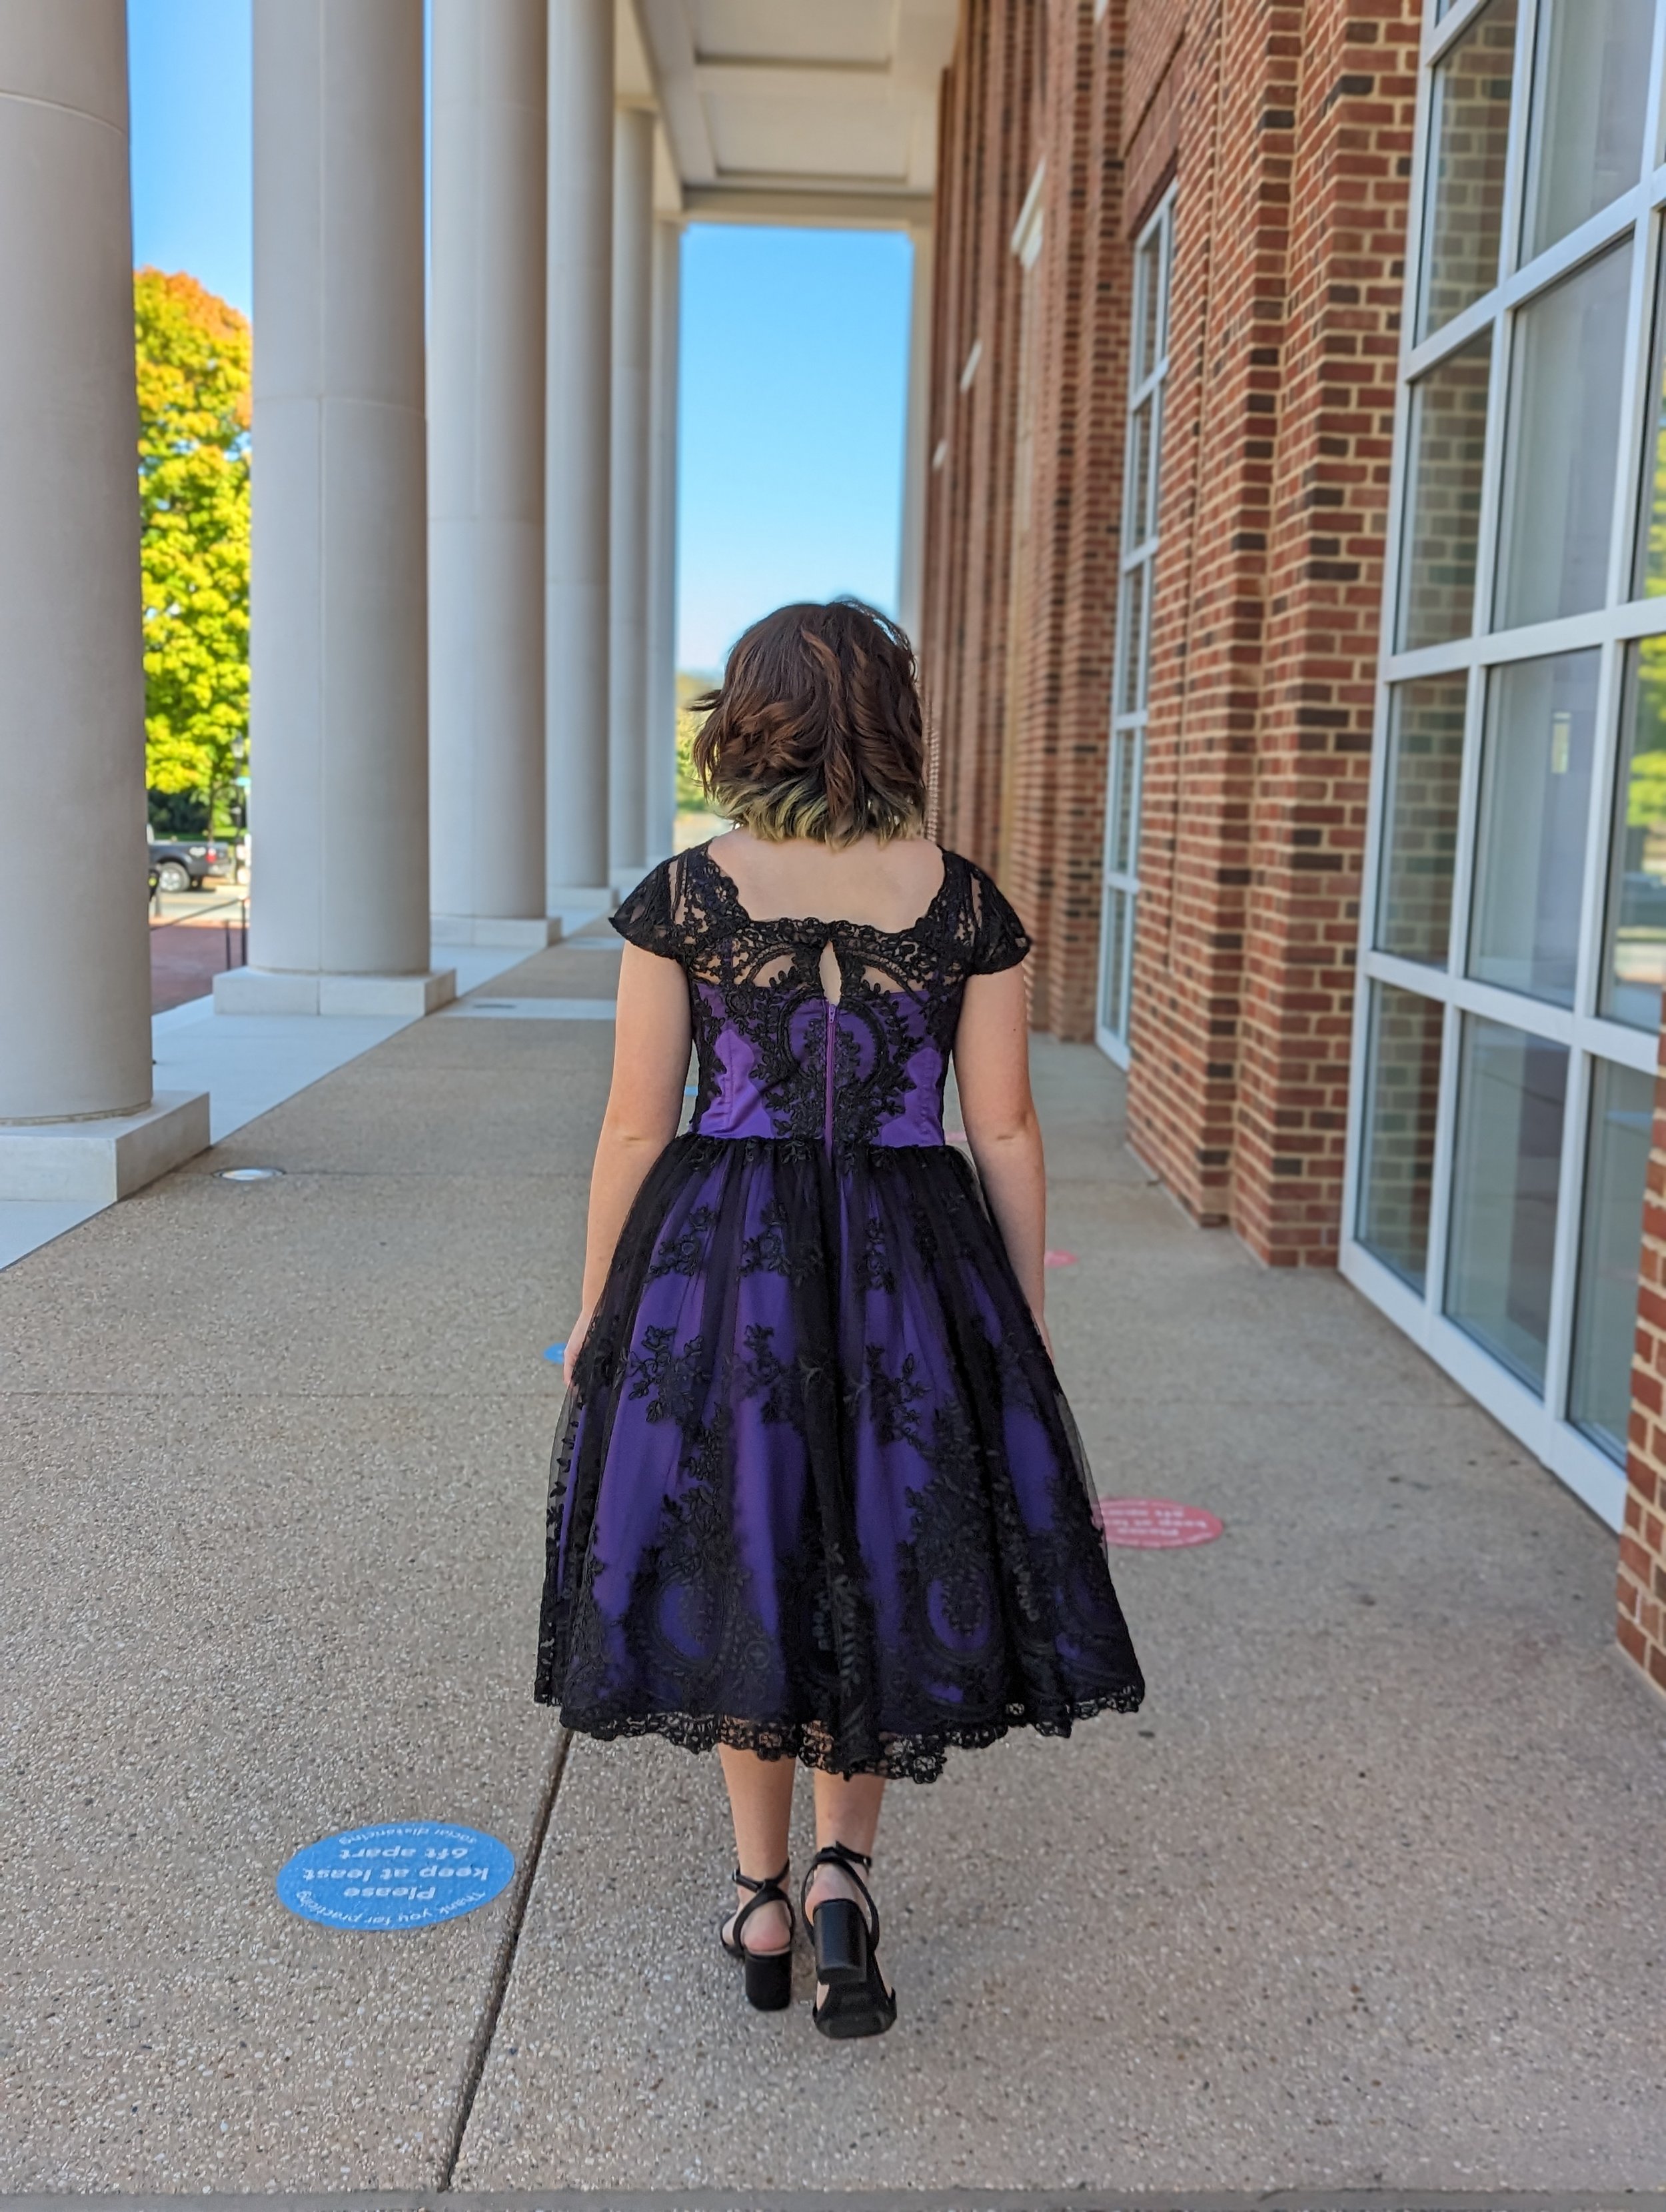
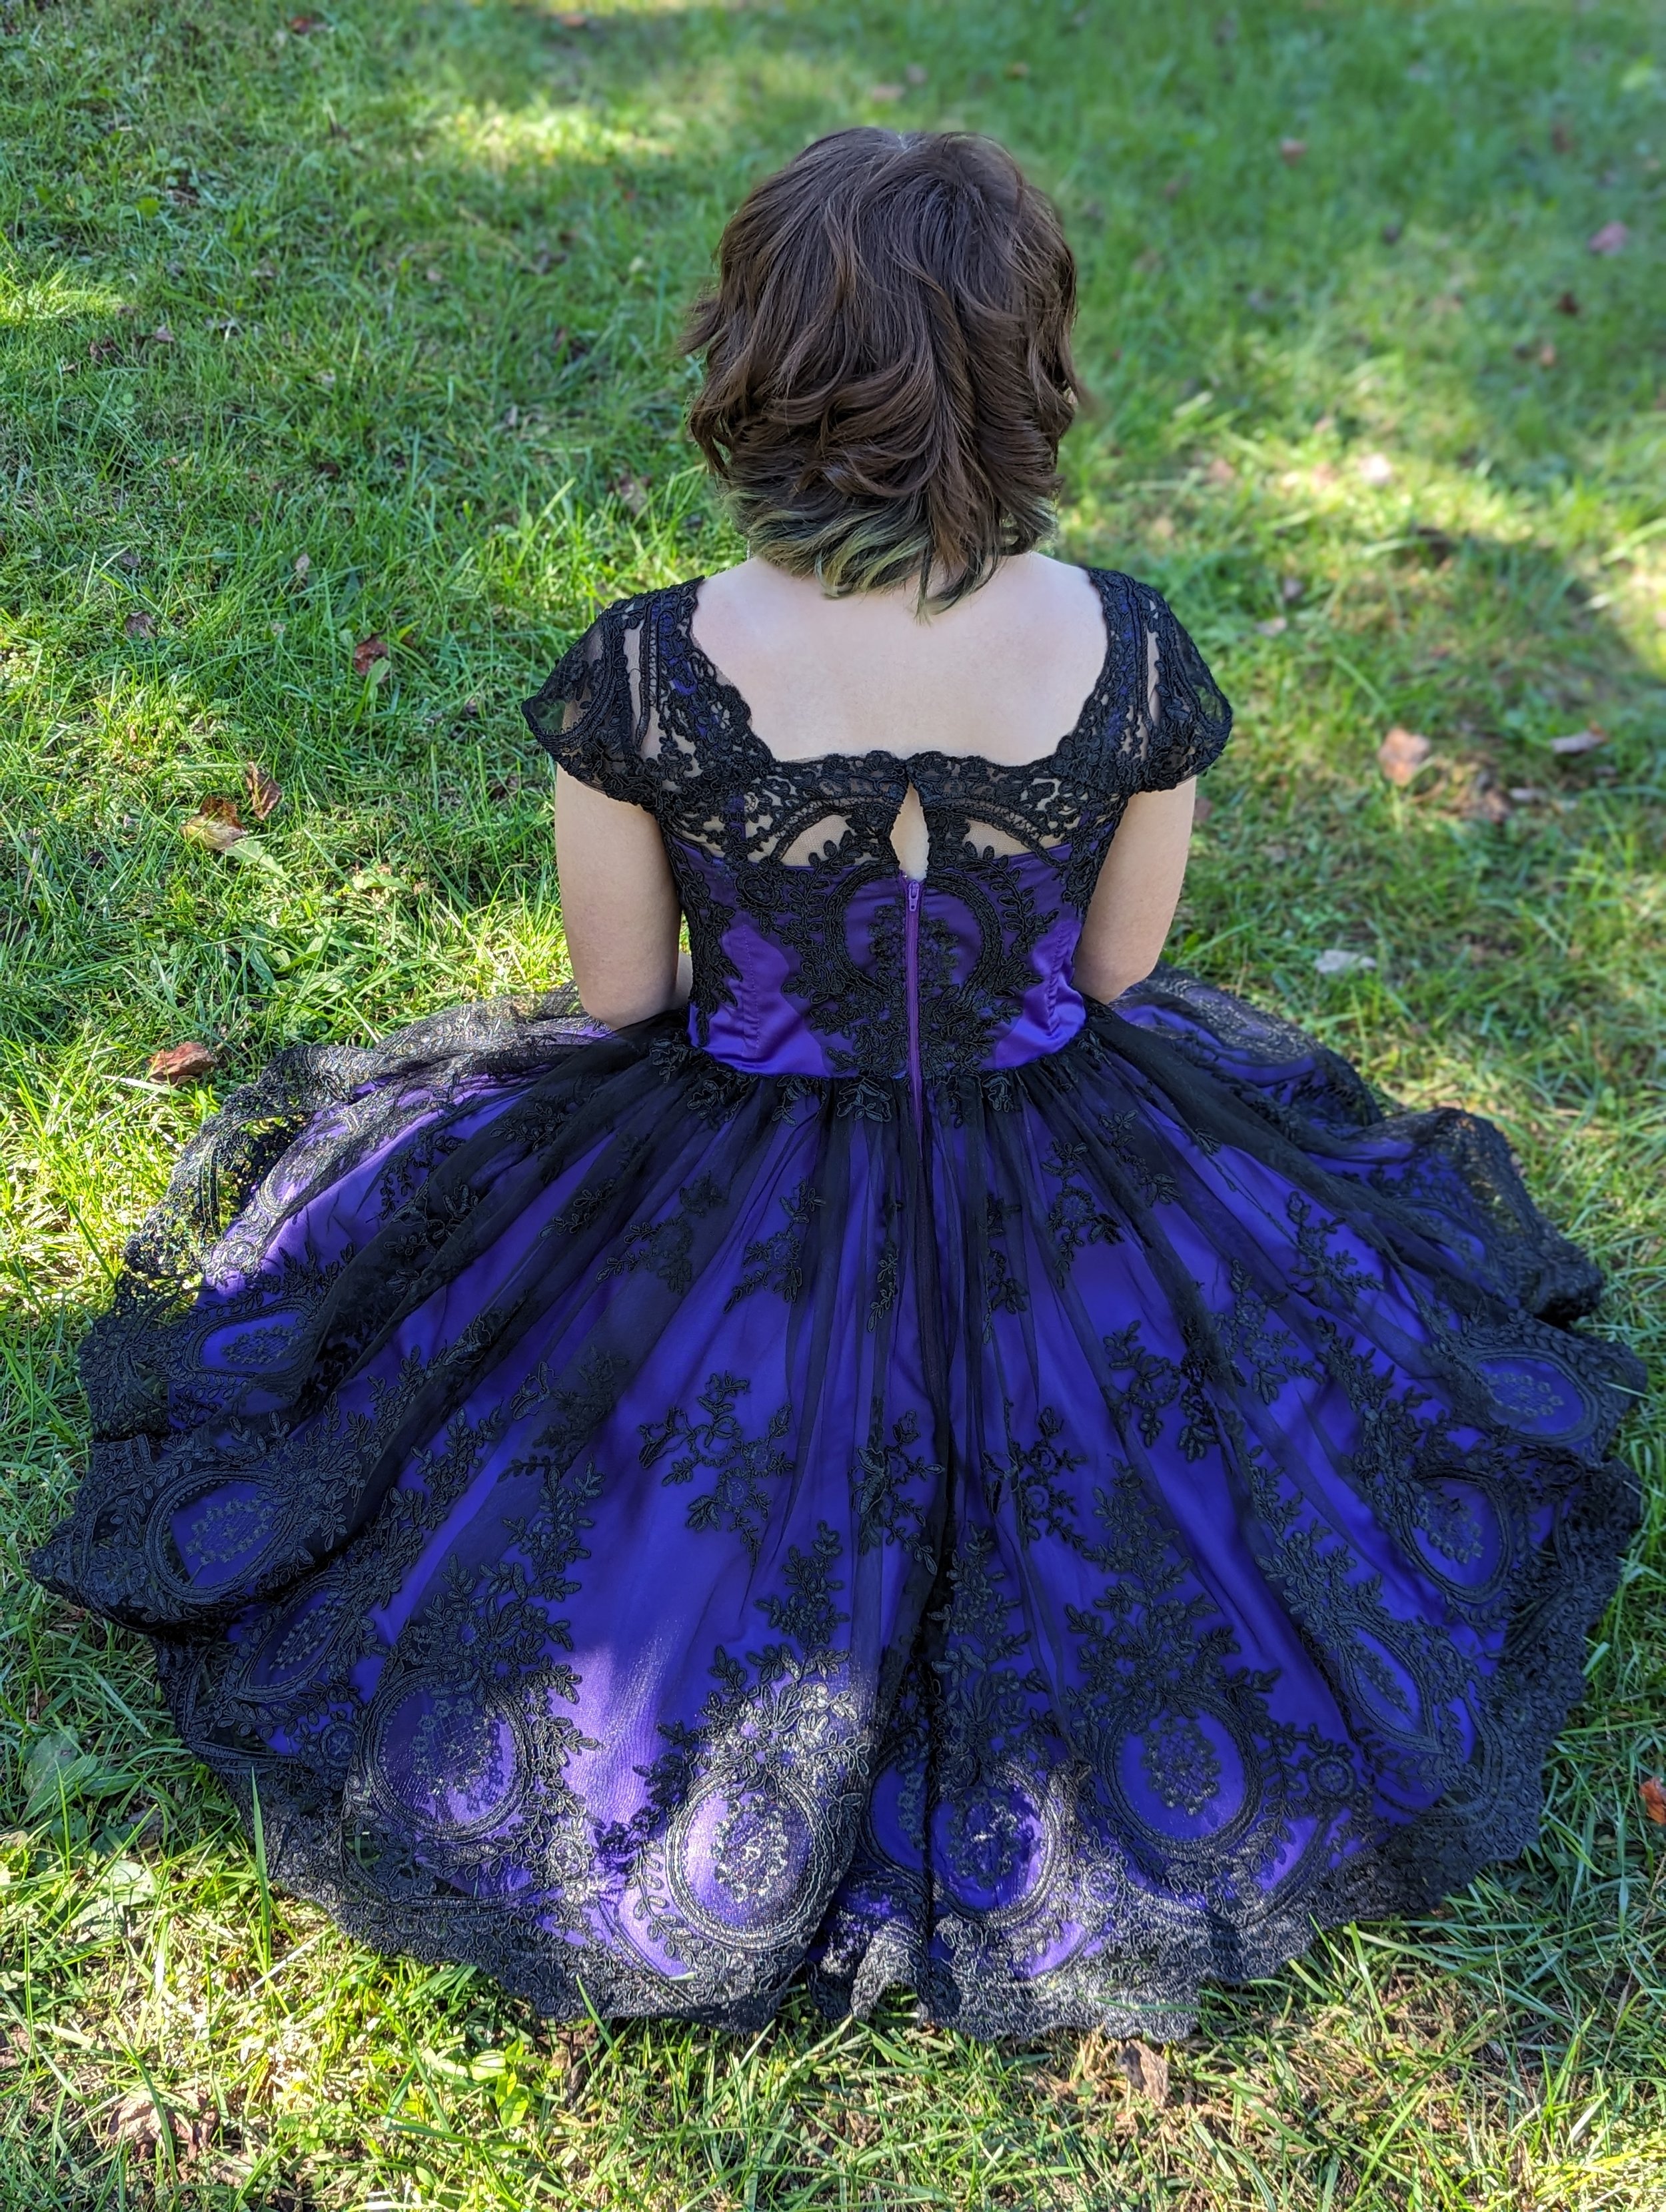
Bodice 2 was much better. The underlining with cotton/poly broadcloth made a huge improvement. It had a couple areas where I noticed needed small alterations for better fitting. I decided to add the straps (trying to be able to use a normal bra) but on her they looked weird. I also got the idea while researching to use a waist stay to help keep up the weight of the dress. This worked great. I used grosgrain ribbon but bought petersham ribbon for the next, on the recommendation of the internet. I also put the boning on all the seams but it made it look and fit like armor over her bust, so I decided to eliminate it in the front seams for the next one.
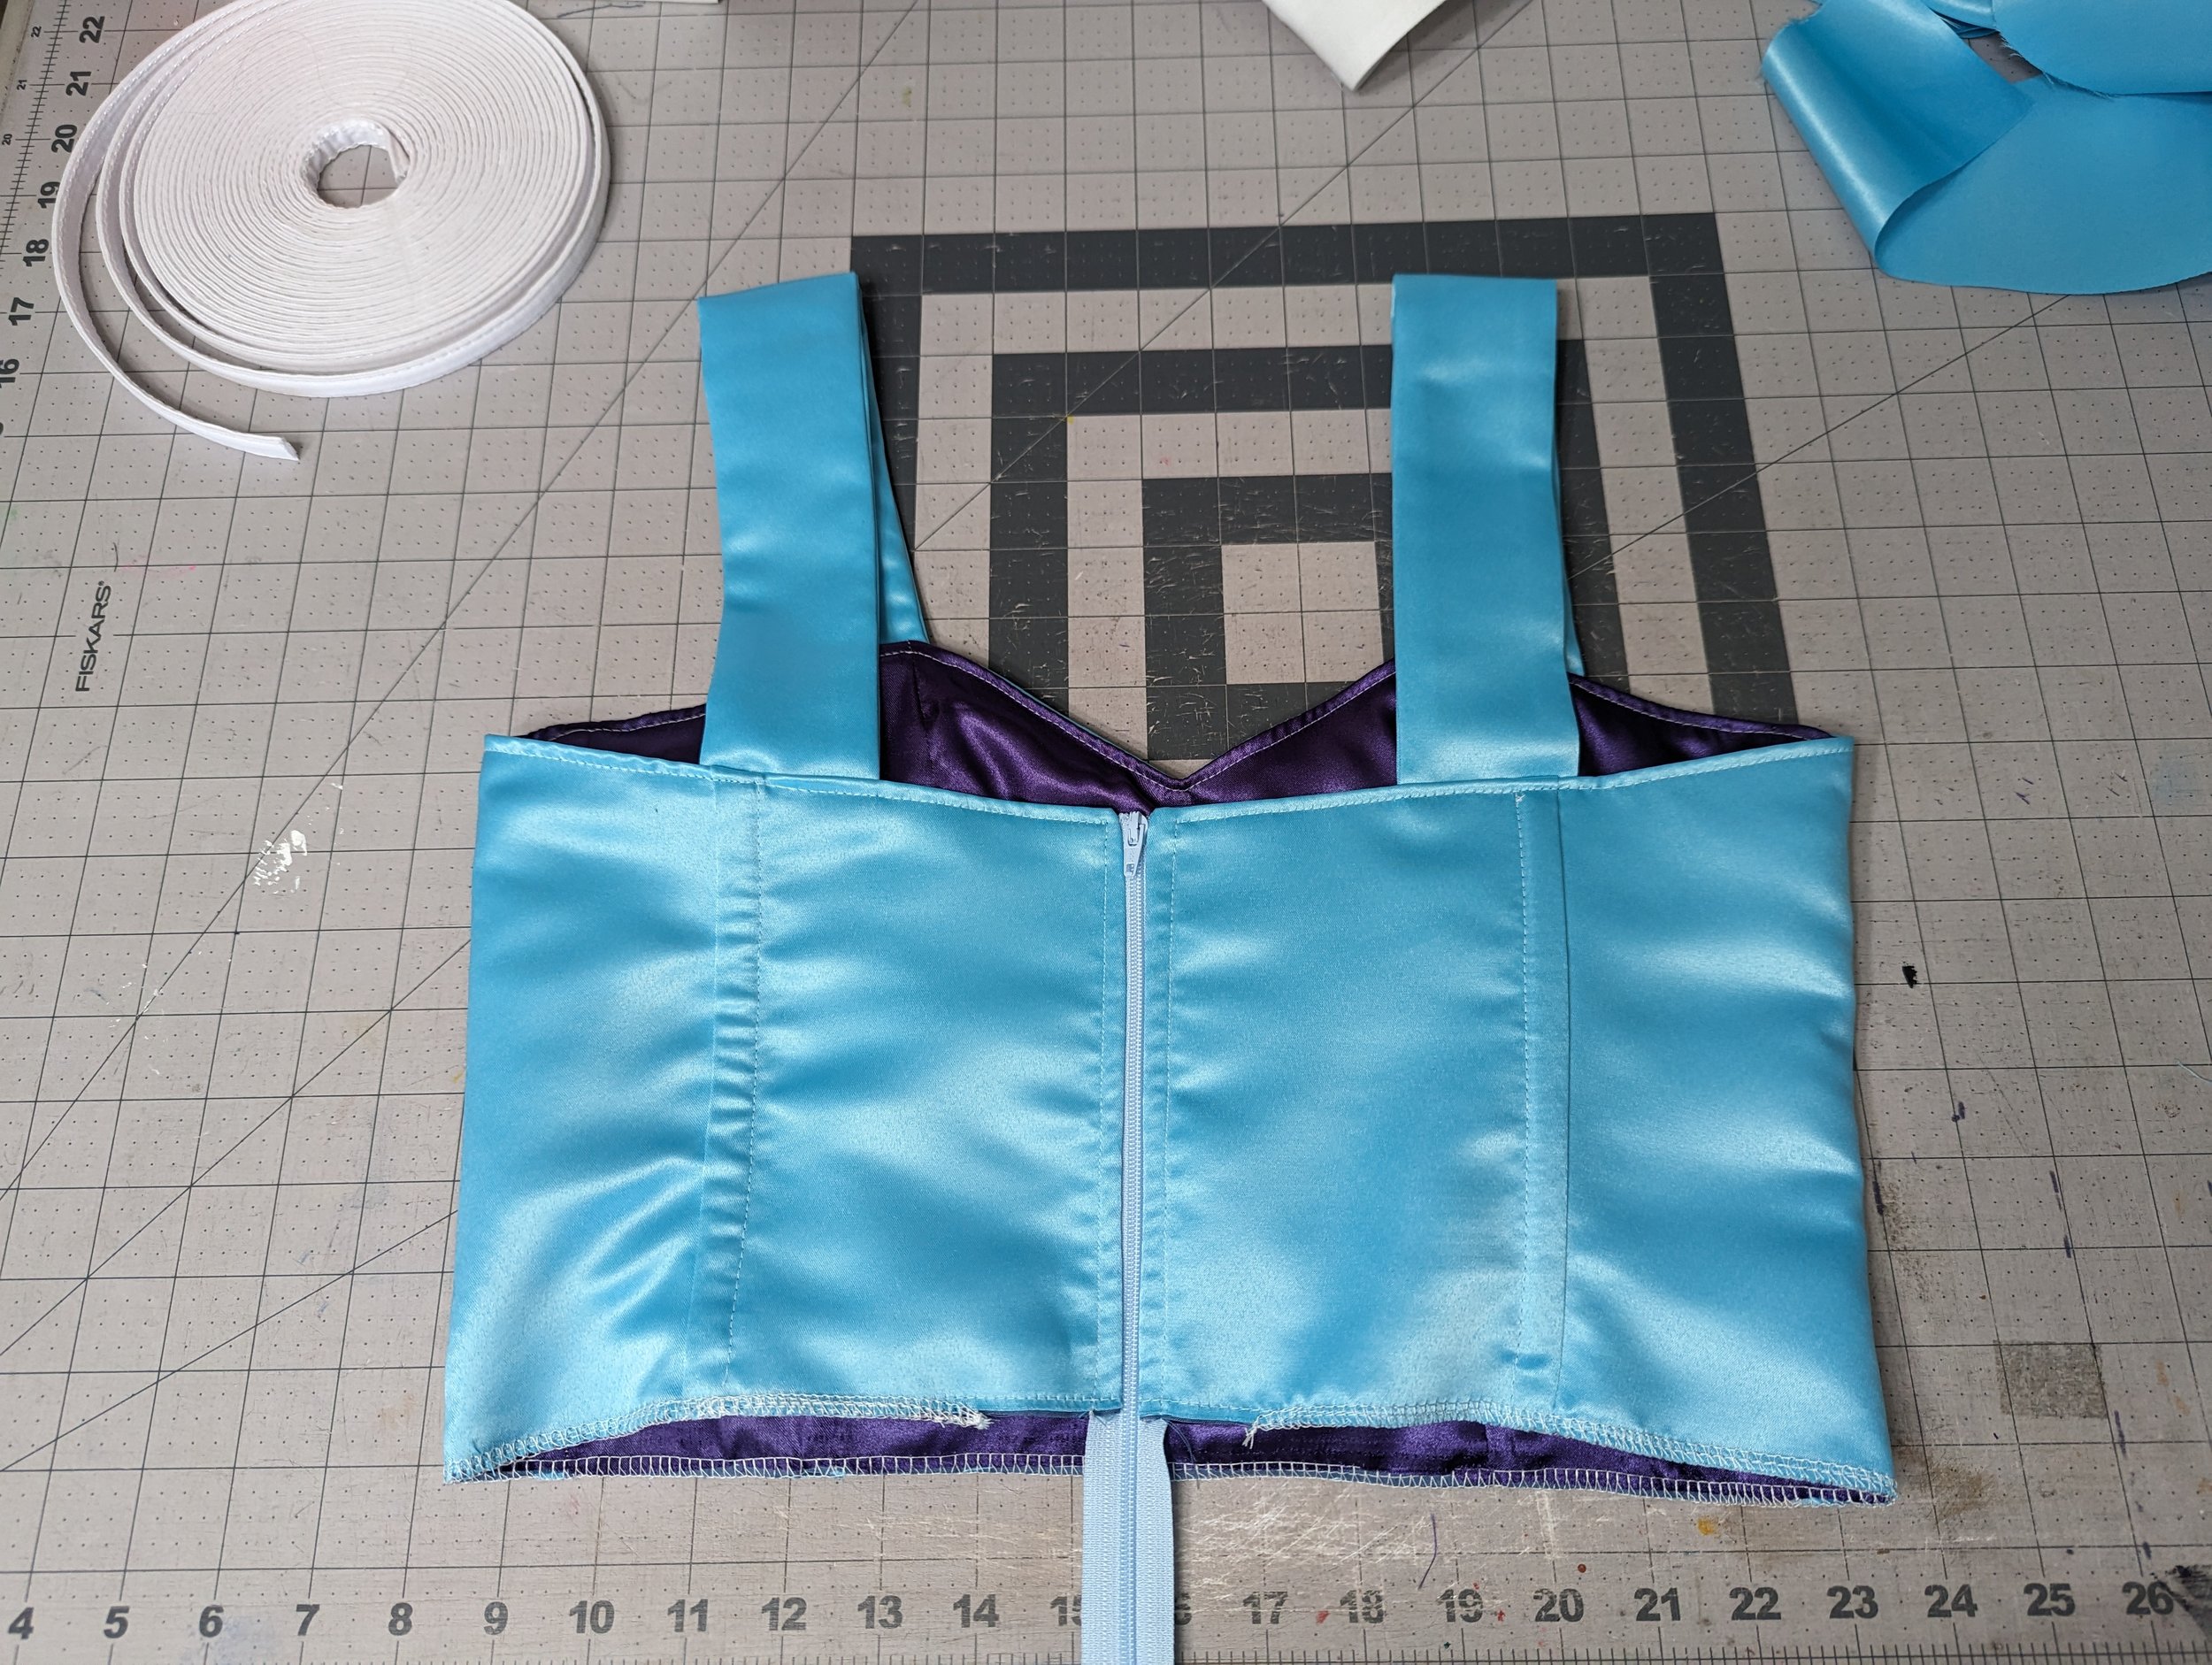
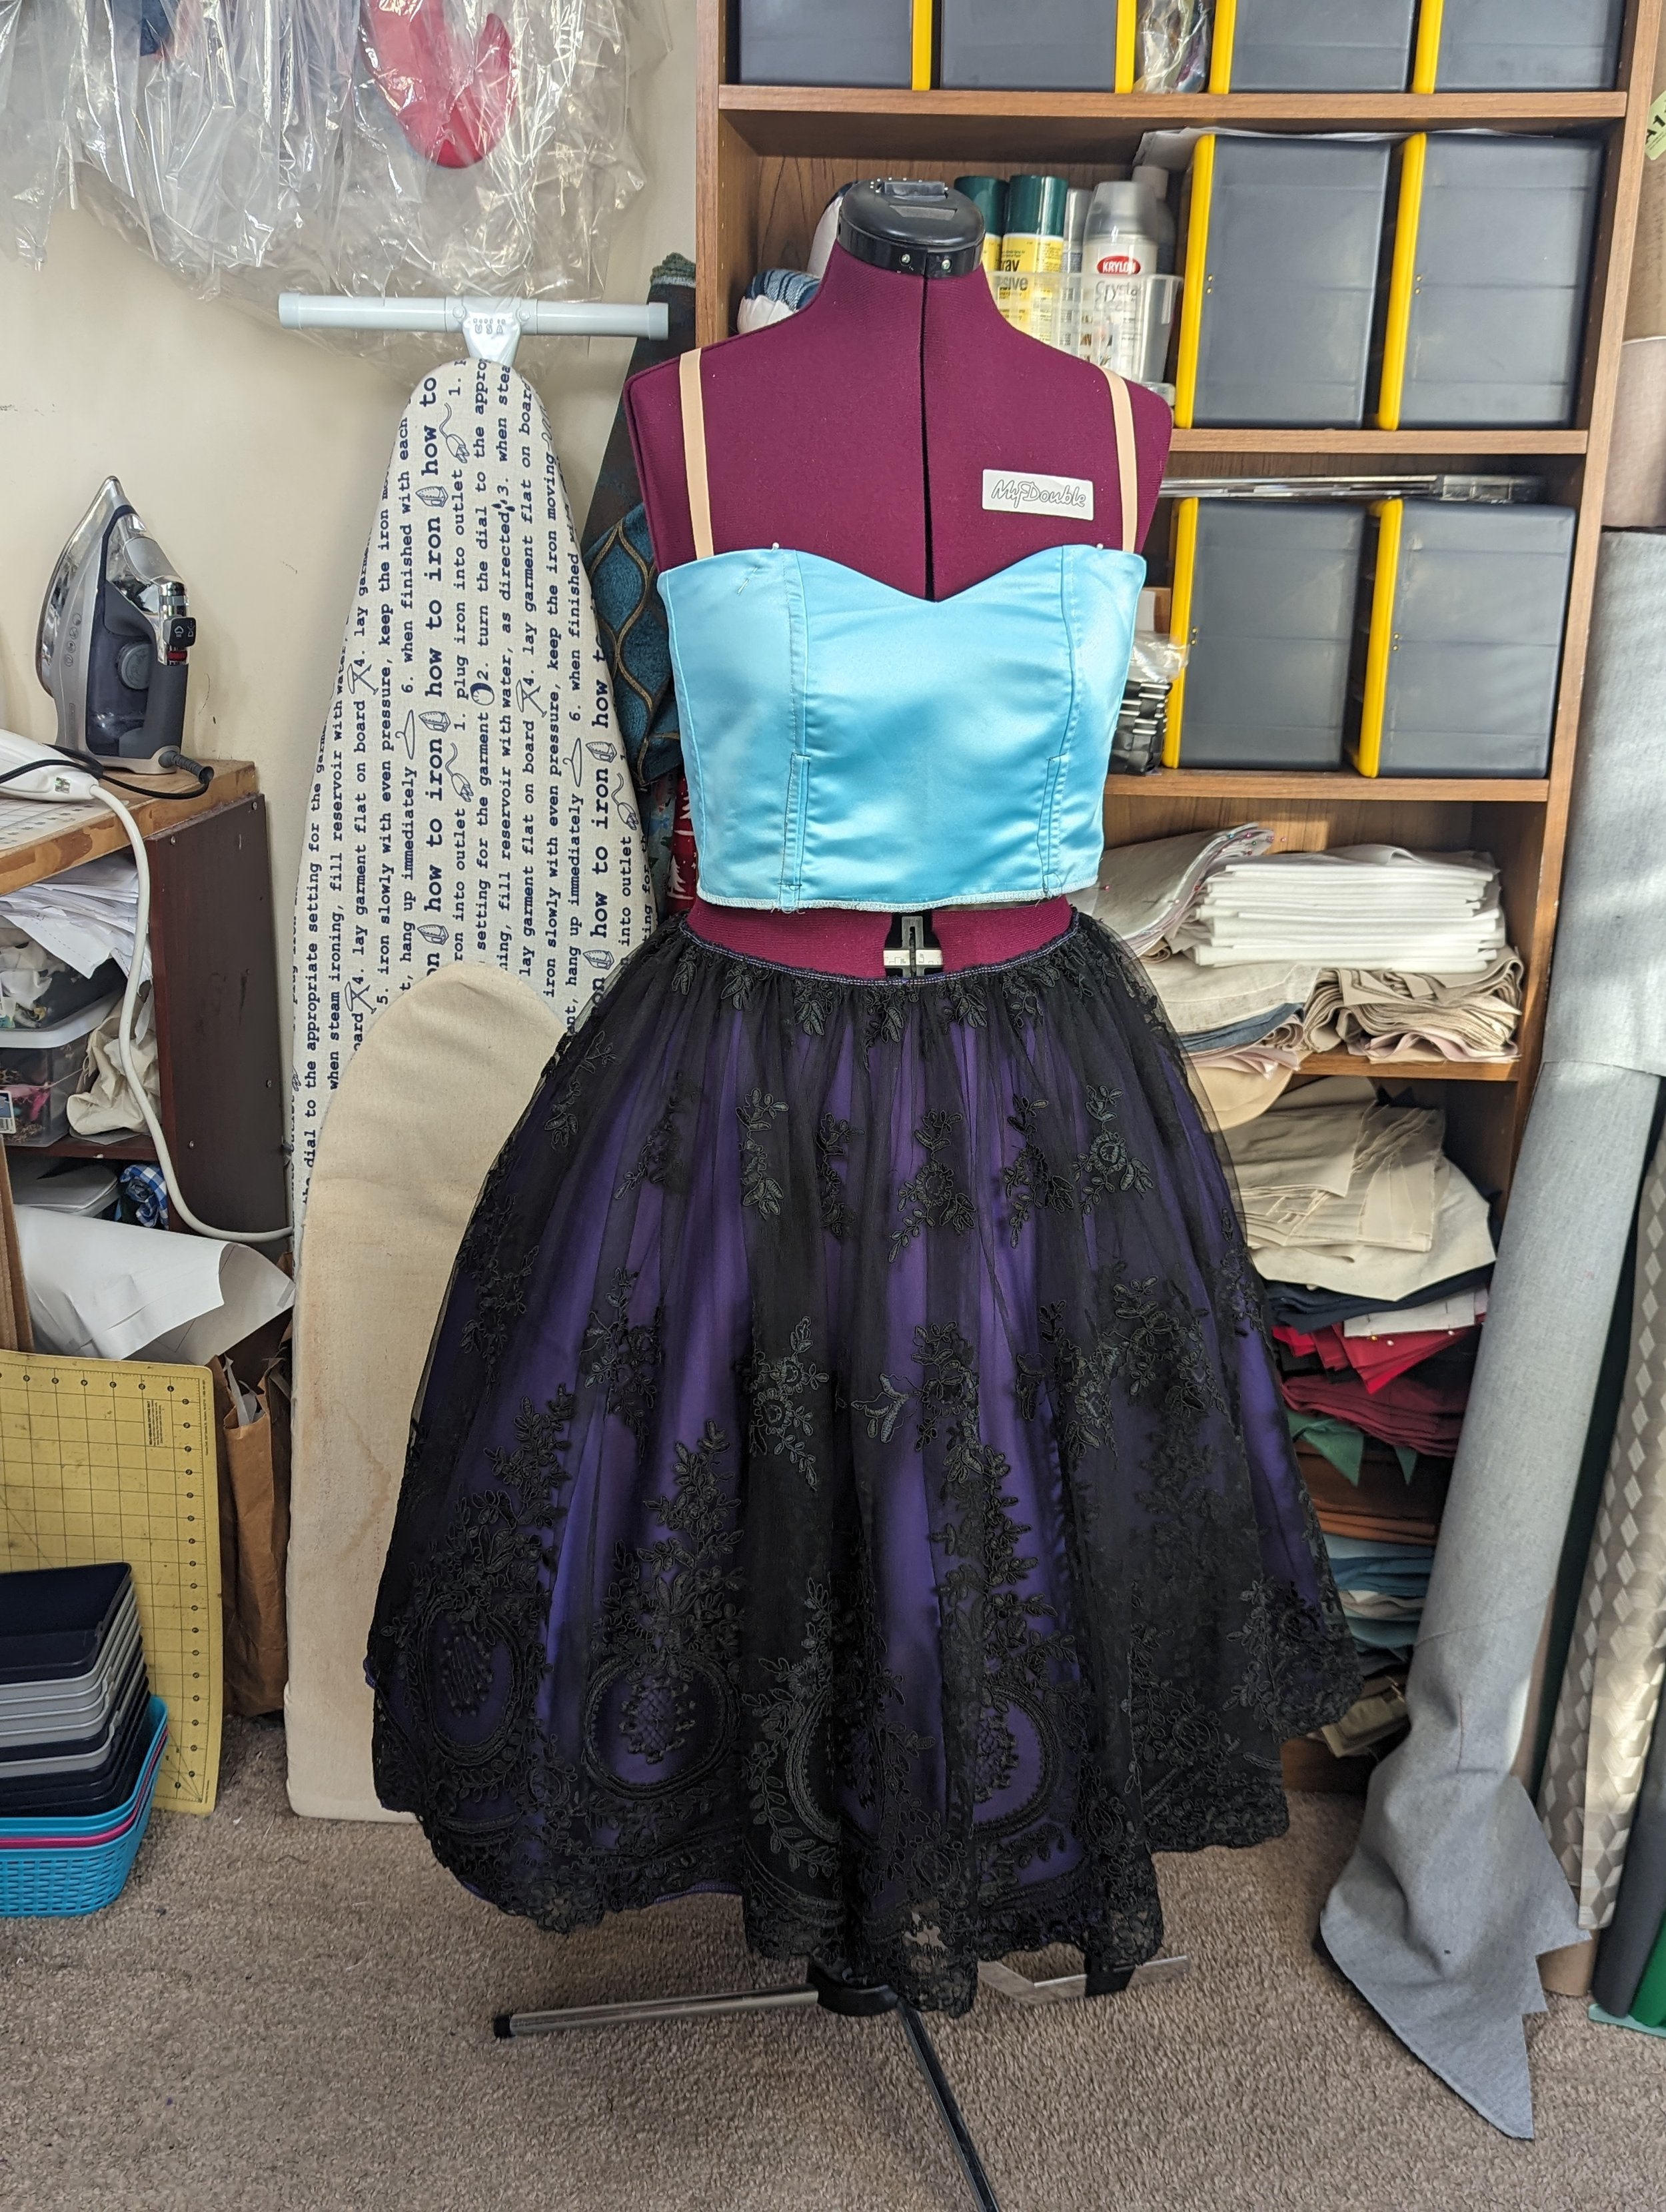
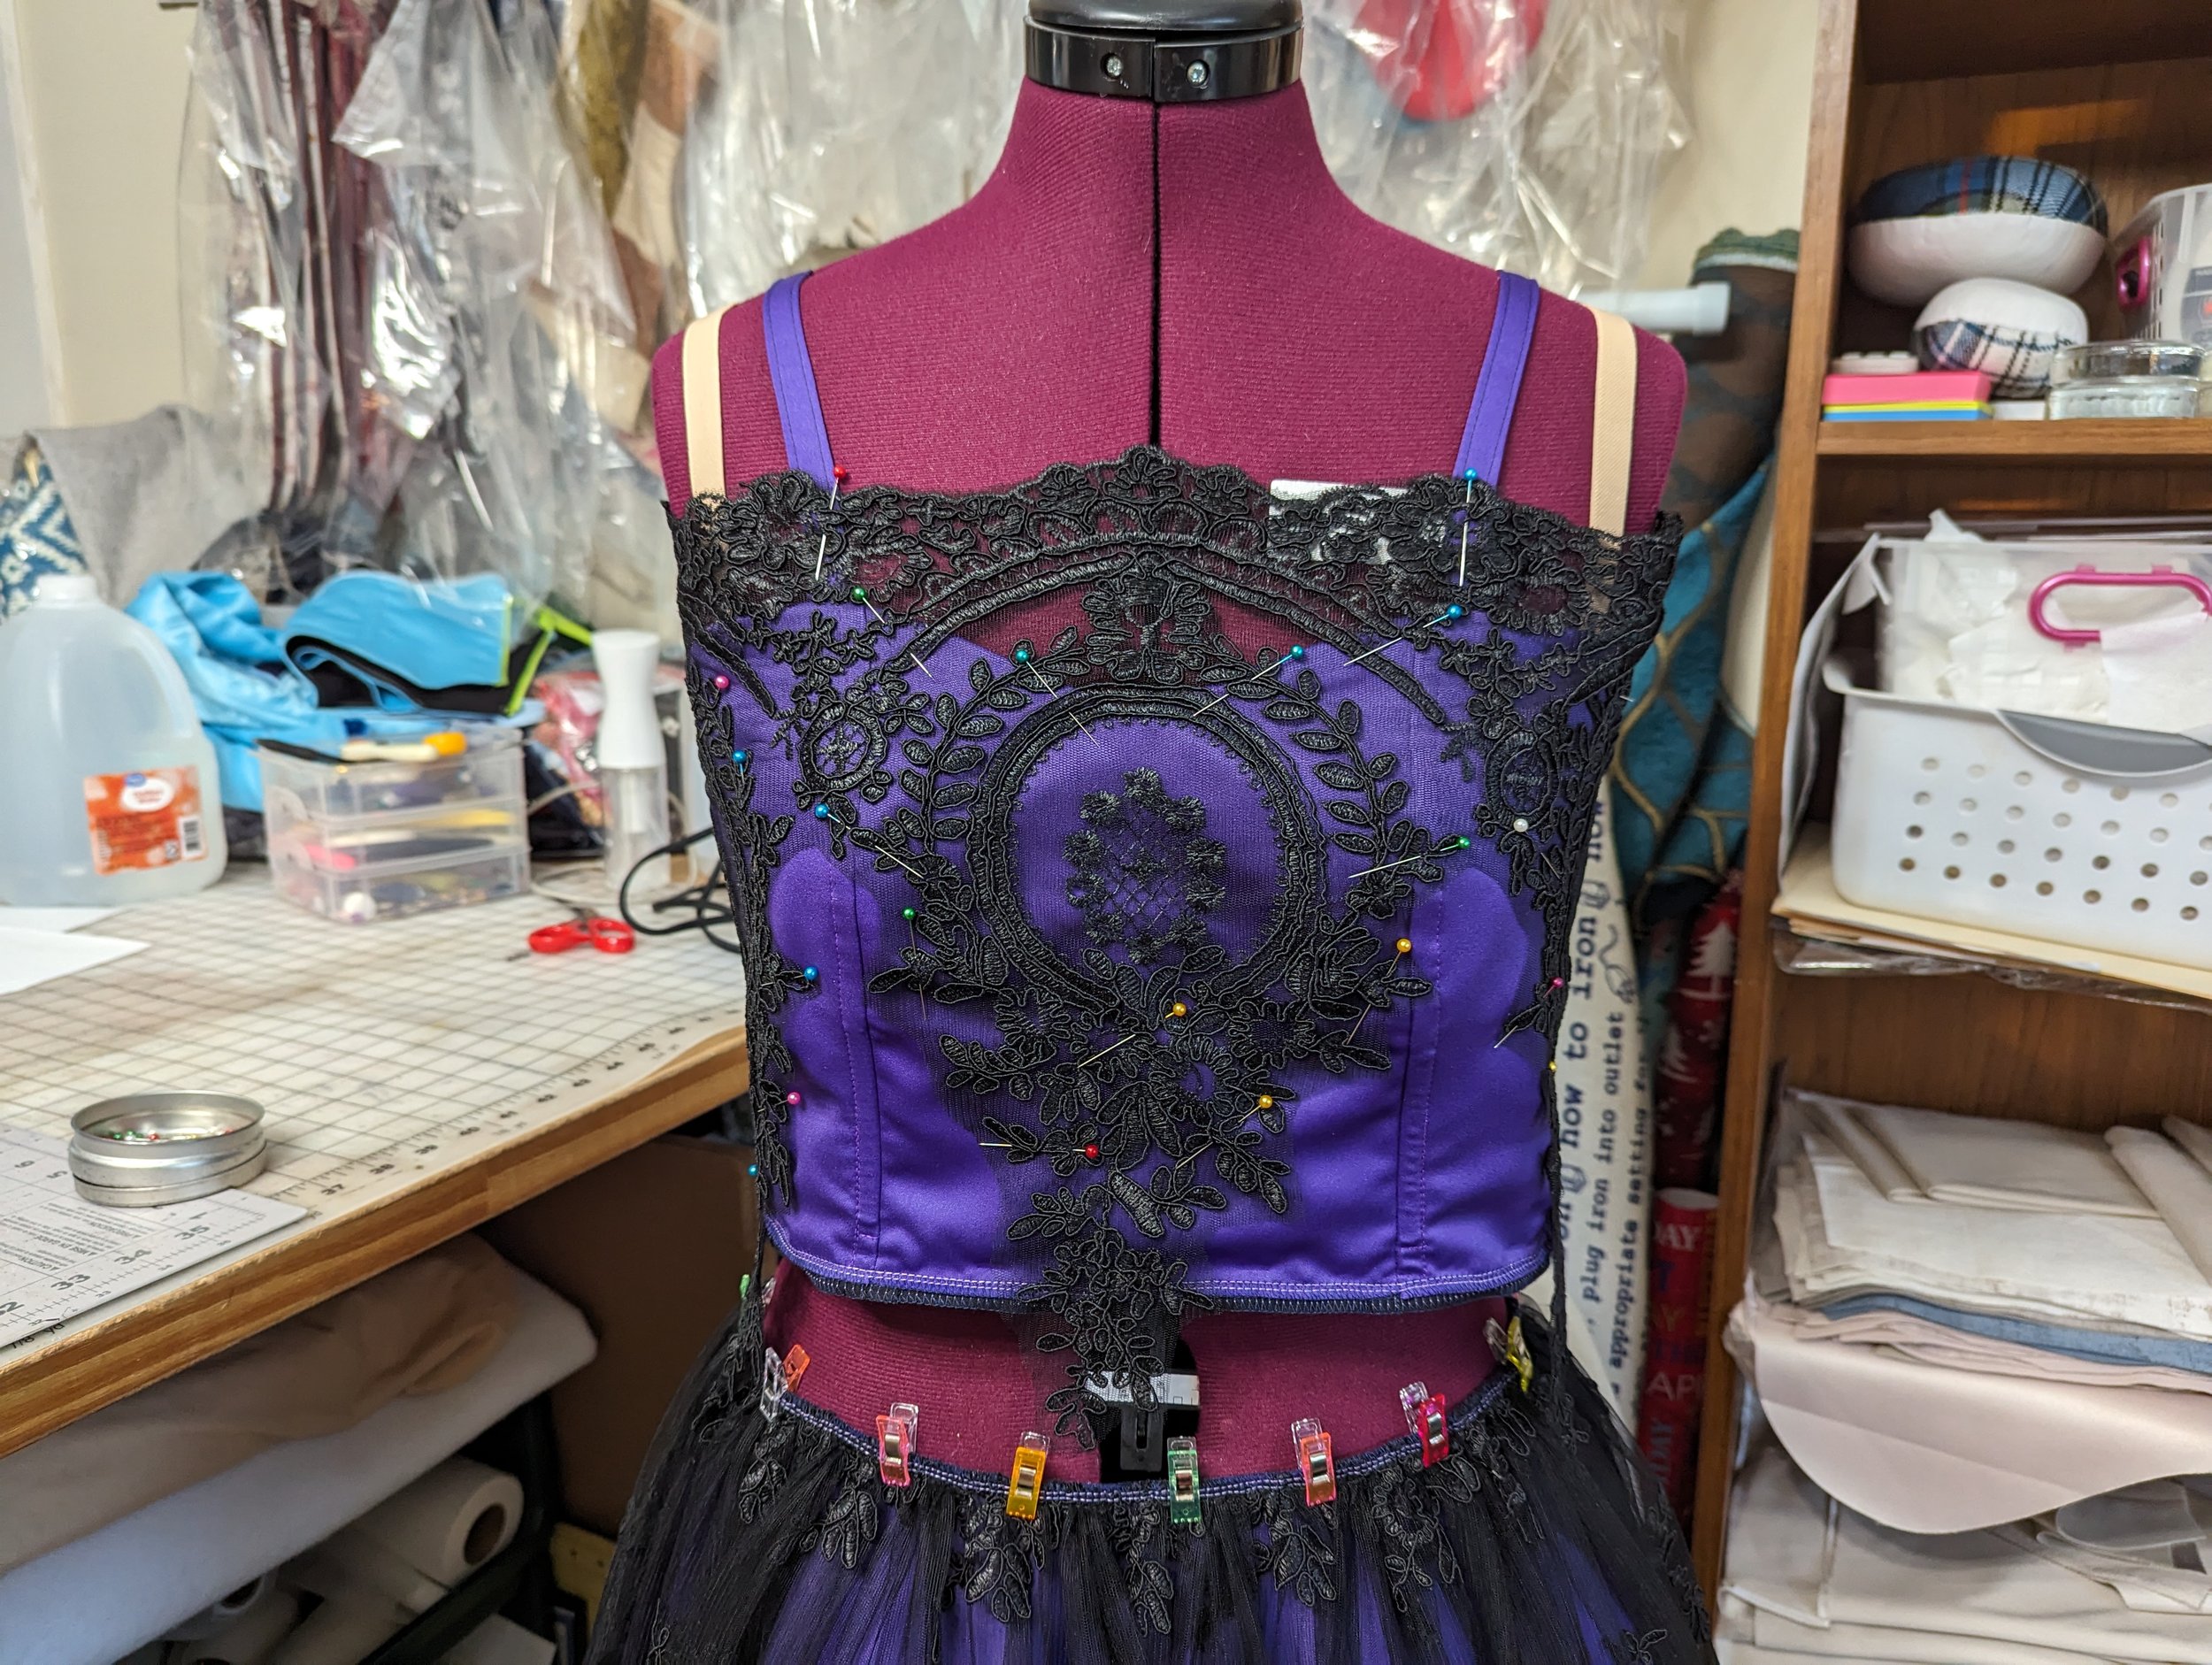
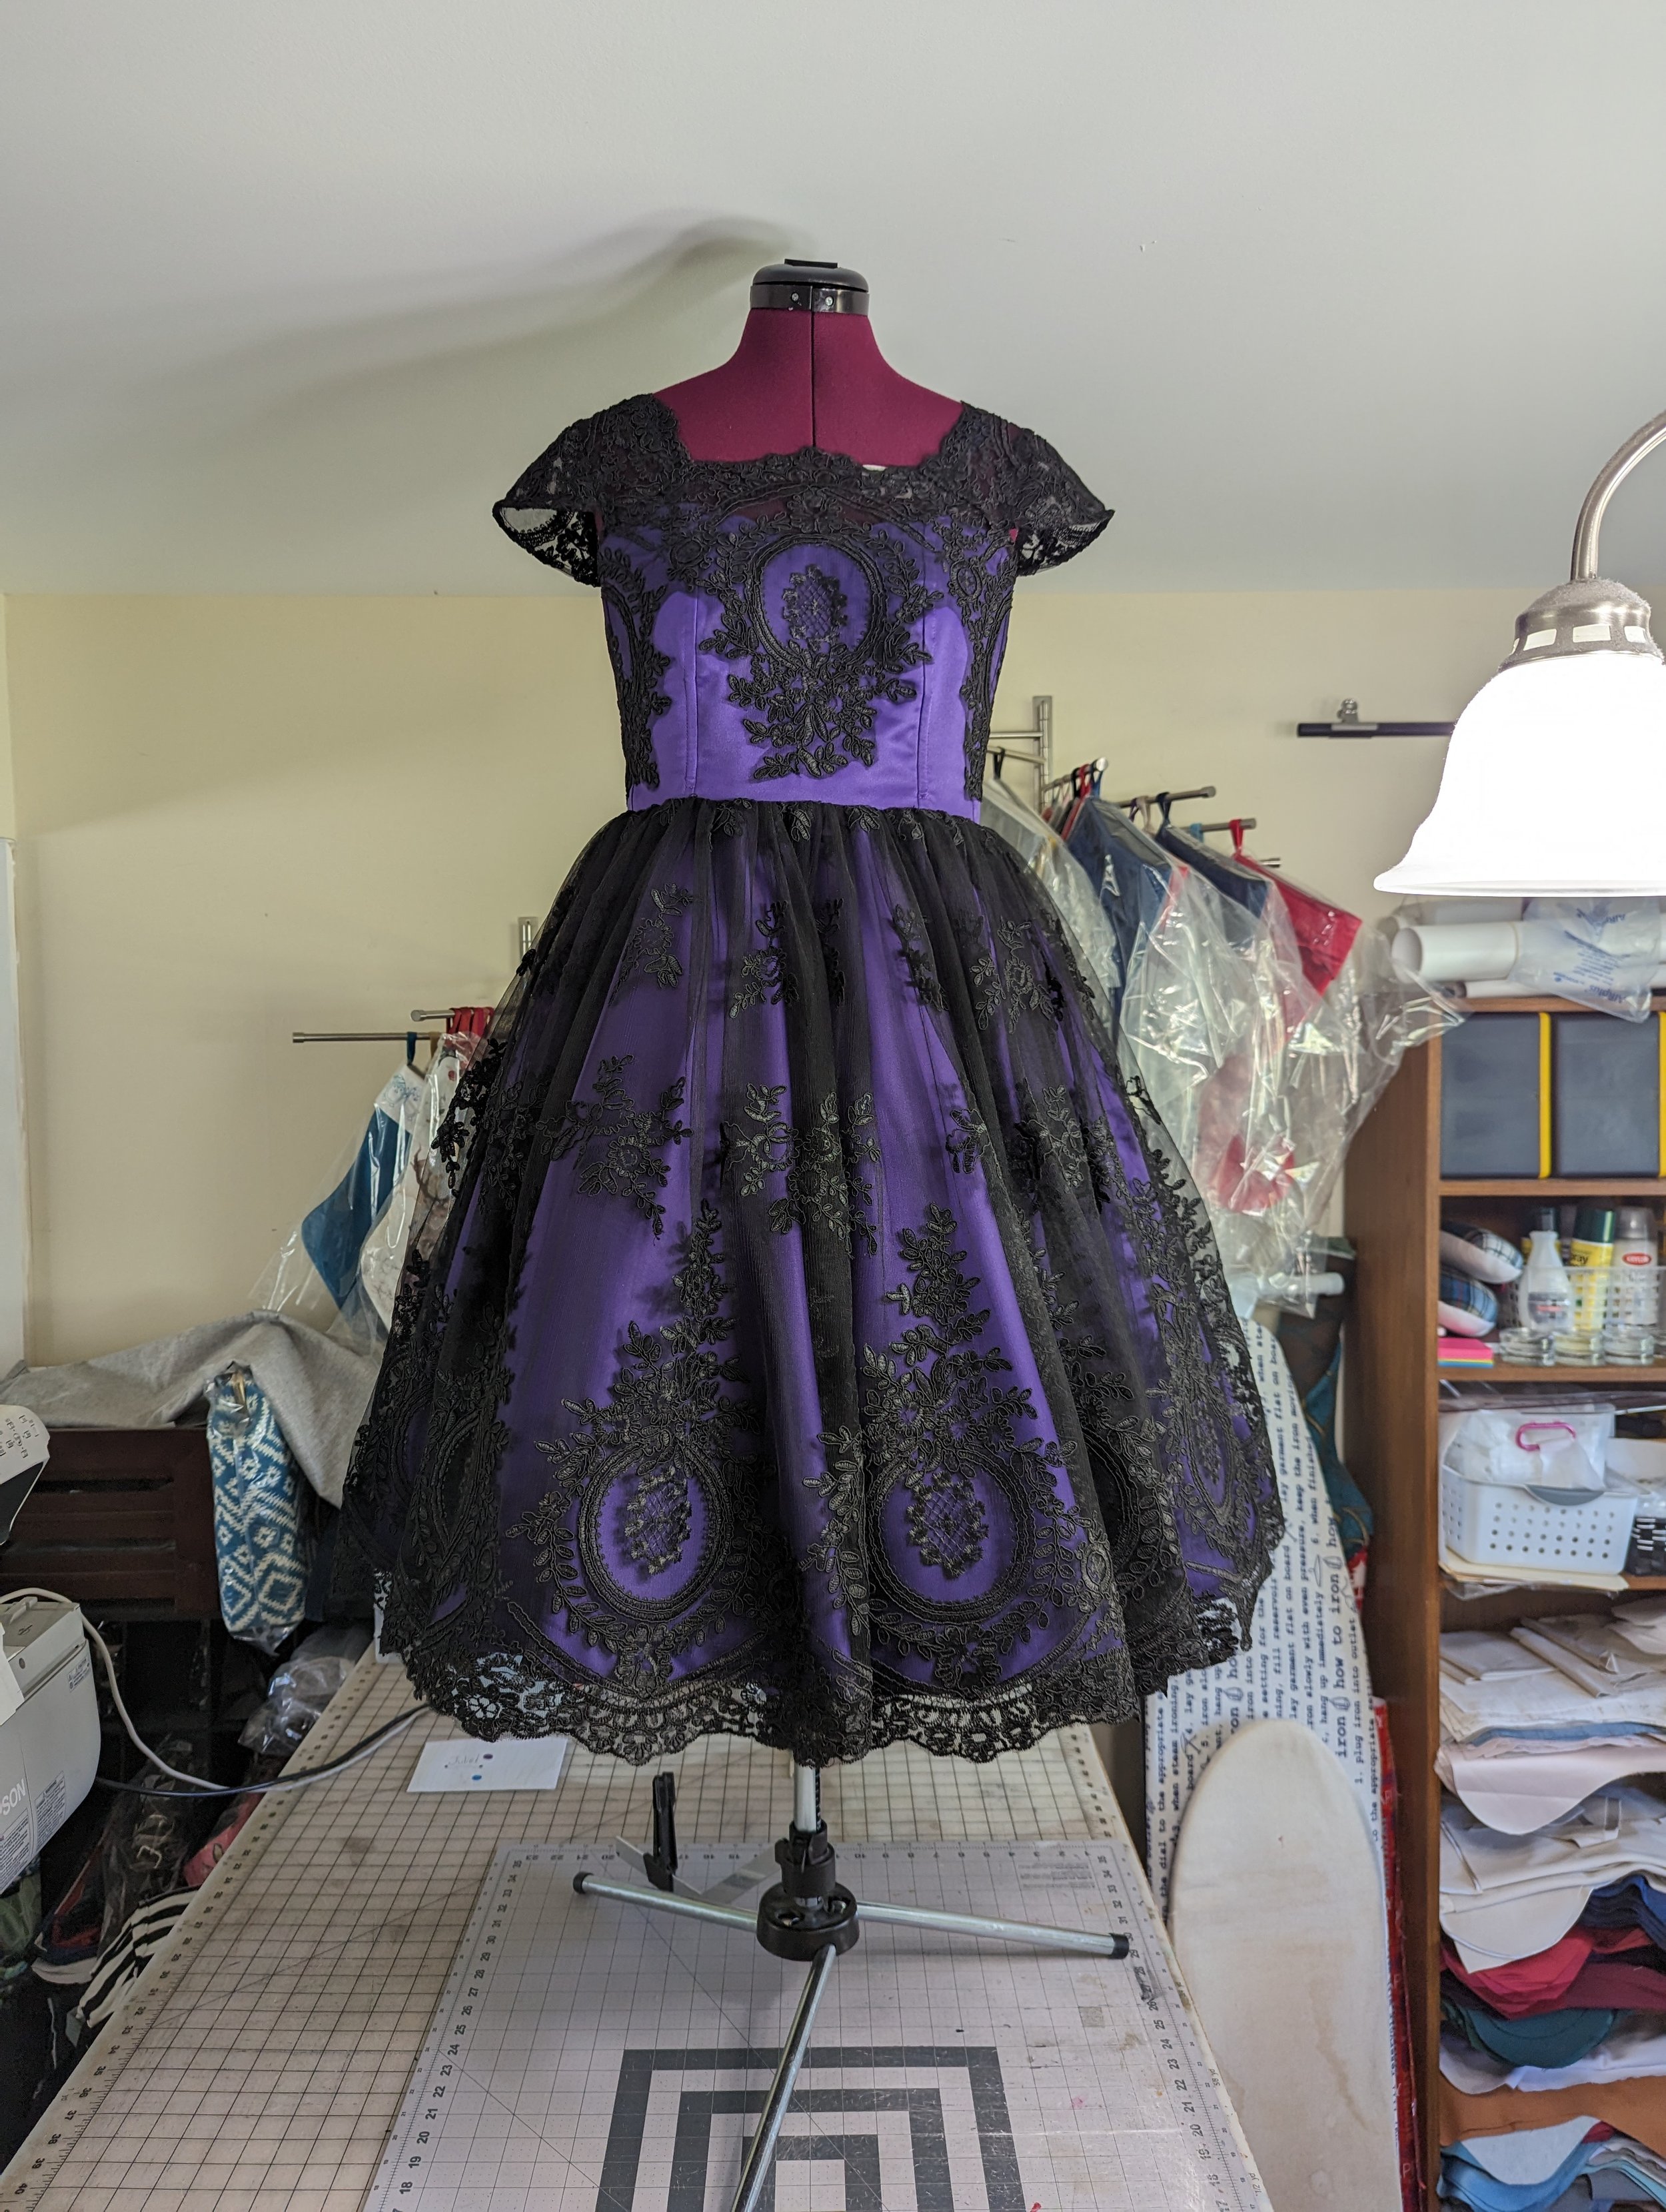
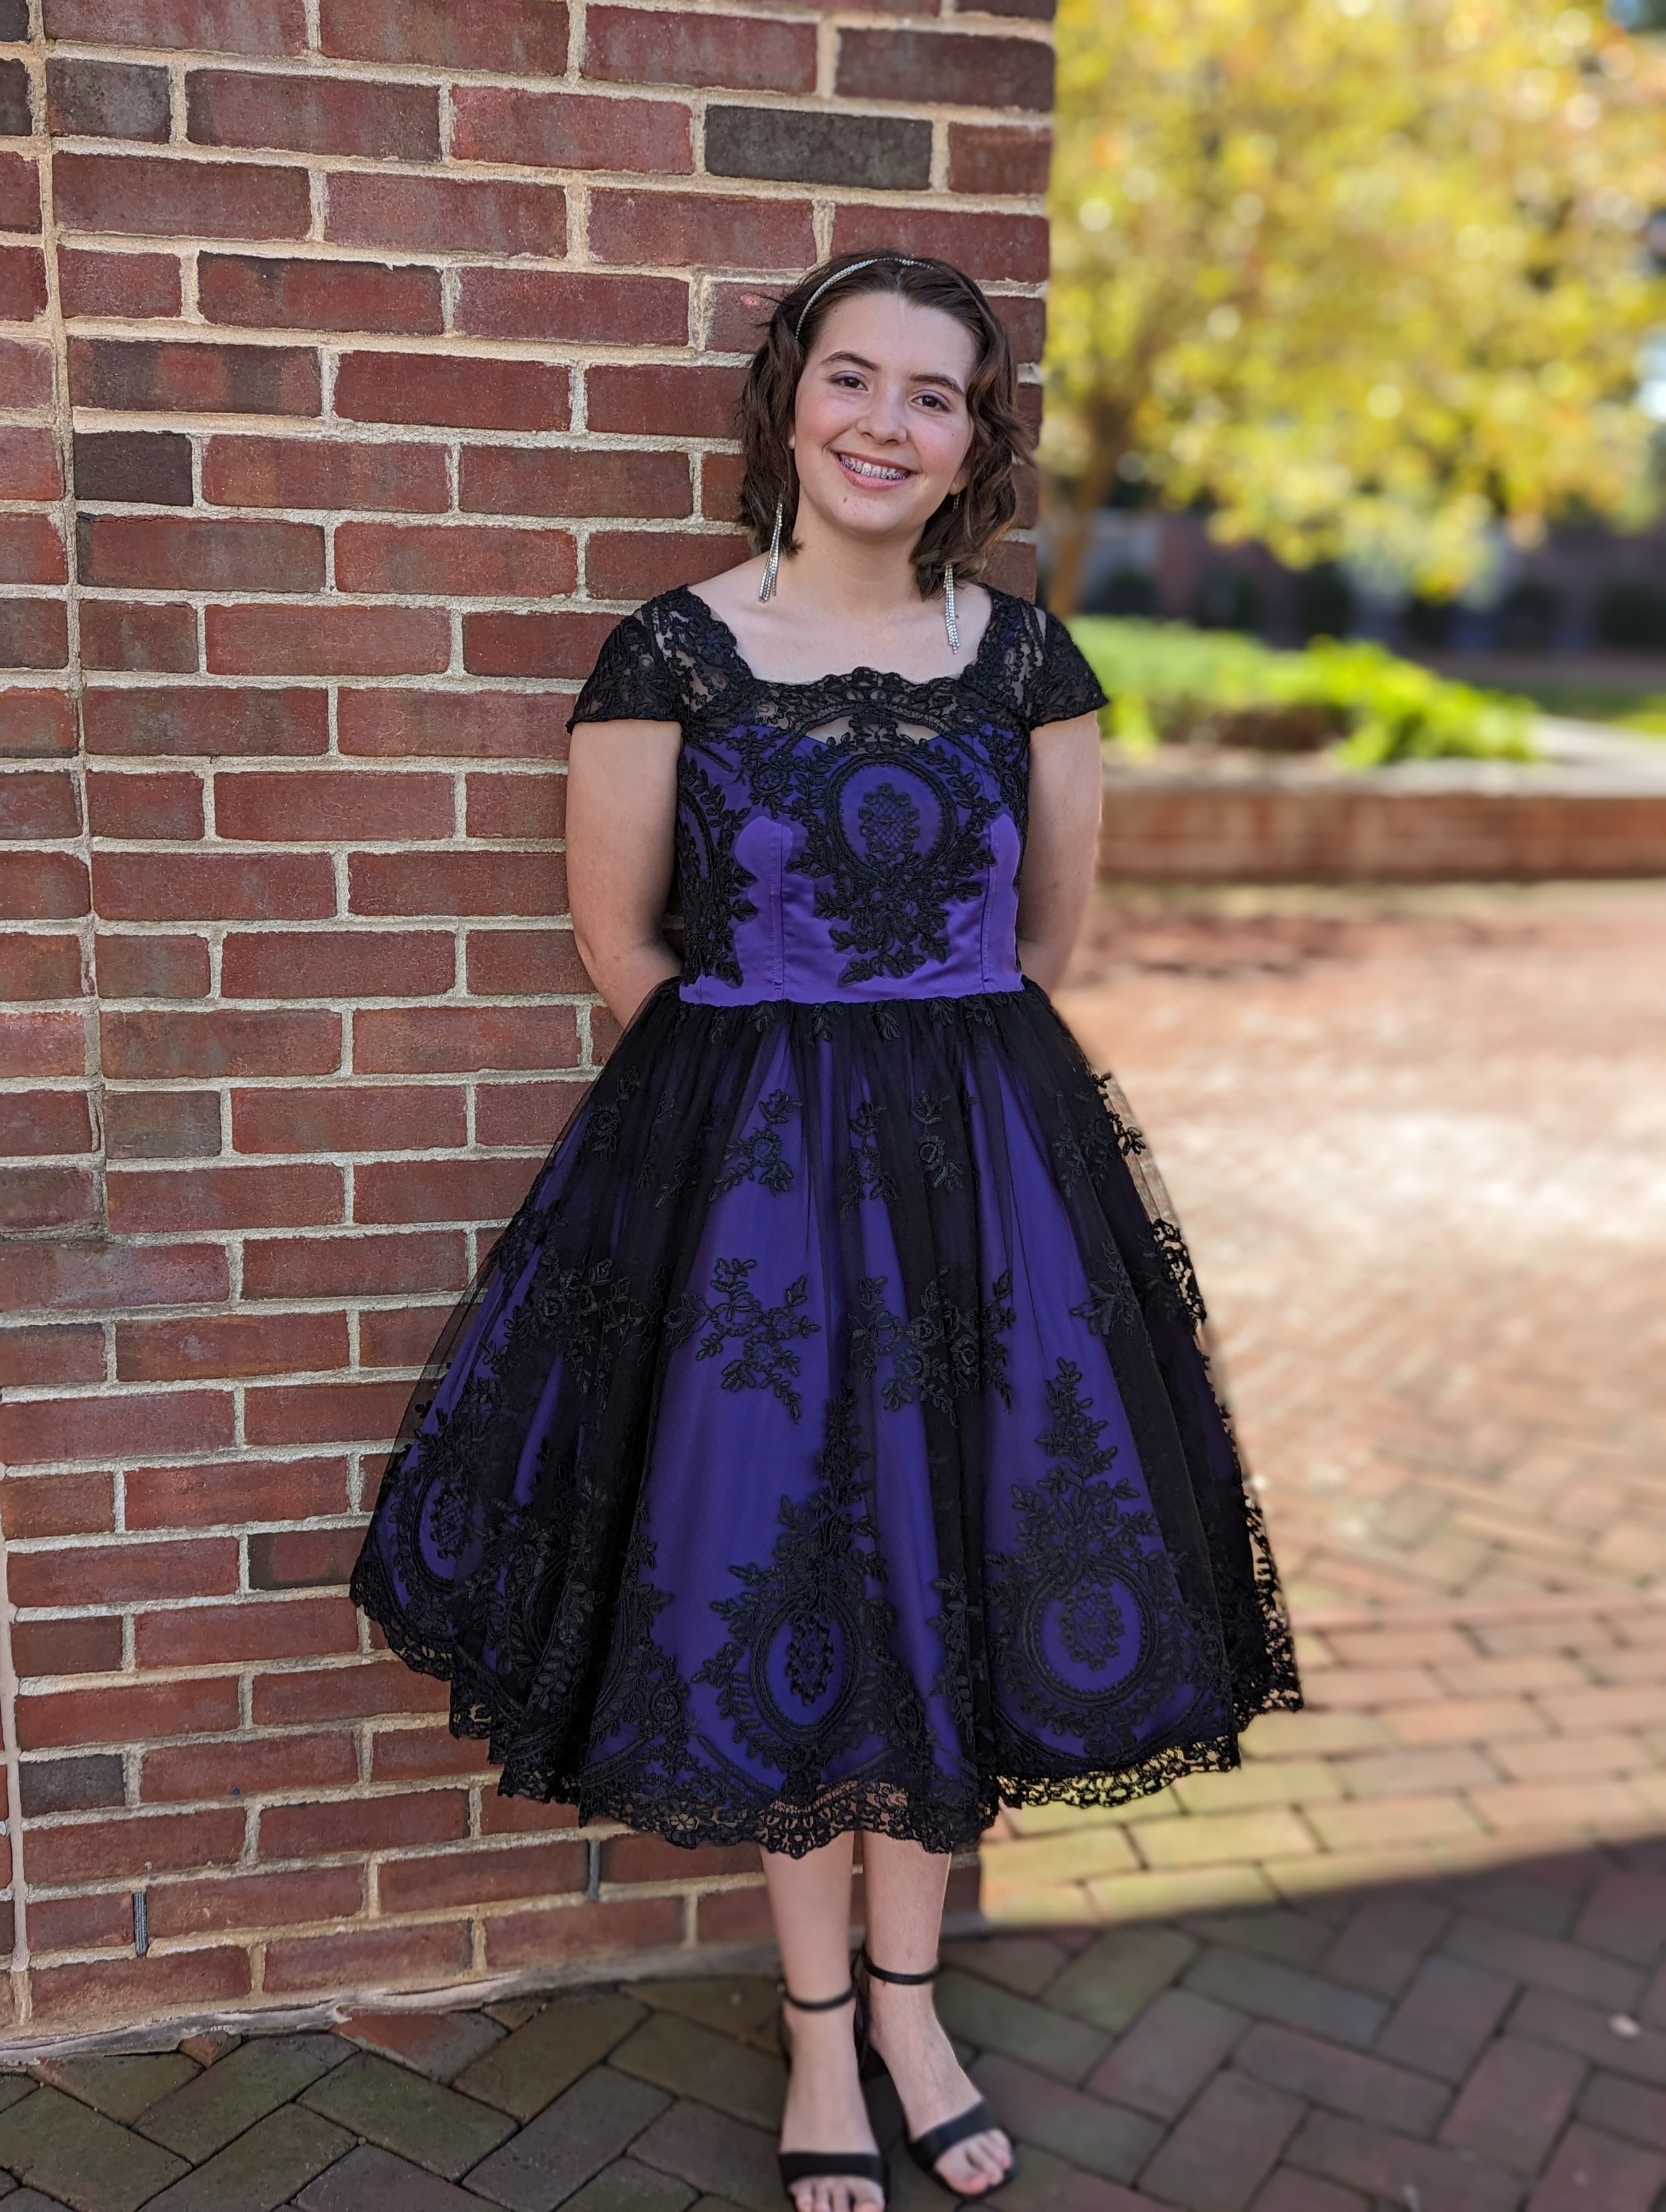
Bodice 3 was the best of all! For this one I switched to a cotton poly sateen for the lining rather than the satin I used for the others. I put the boning in the side seams only and not in the bust (though I later on added 3” of boning under the bust). This fit the best. Later on it started to stretch a little at the top, so I ended up adding some fusible interfacing on the top of the lining pieces for the final. Other than that, this one was good enough to be used except it was blue.
I set the bodice aside and began to work on the skirt. I decided on a 3/4 circle skirt for the skirt and lining rather than a gathered rectangle like the tulle so I wouldn’t have bulk at the waist. The length came from dividing the width of the lace I bought by 2 because it had a border on each side, and the 3/4 circle pattern I made after using various circle skirt calculators online. I subtracted how much shorter I wanted each layer (.5” for the purple satin, then another 1” for the lining, which took into account 1” hem for both). I actually made a mini version of this to make sure it looked okay to have a gathered rectangle on top of a 3/4 circle skirt.
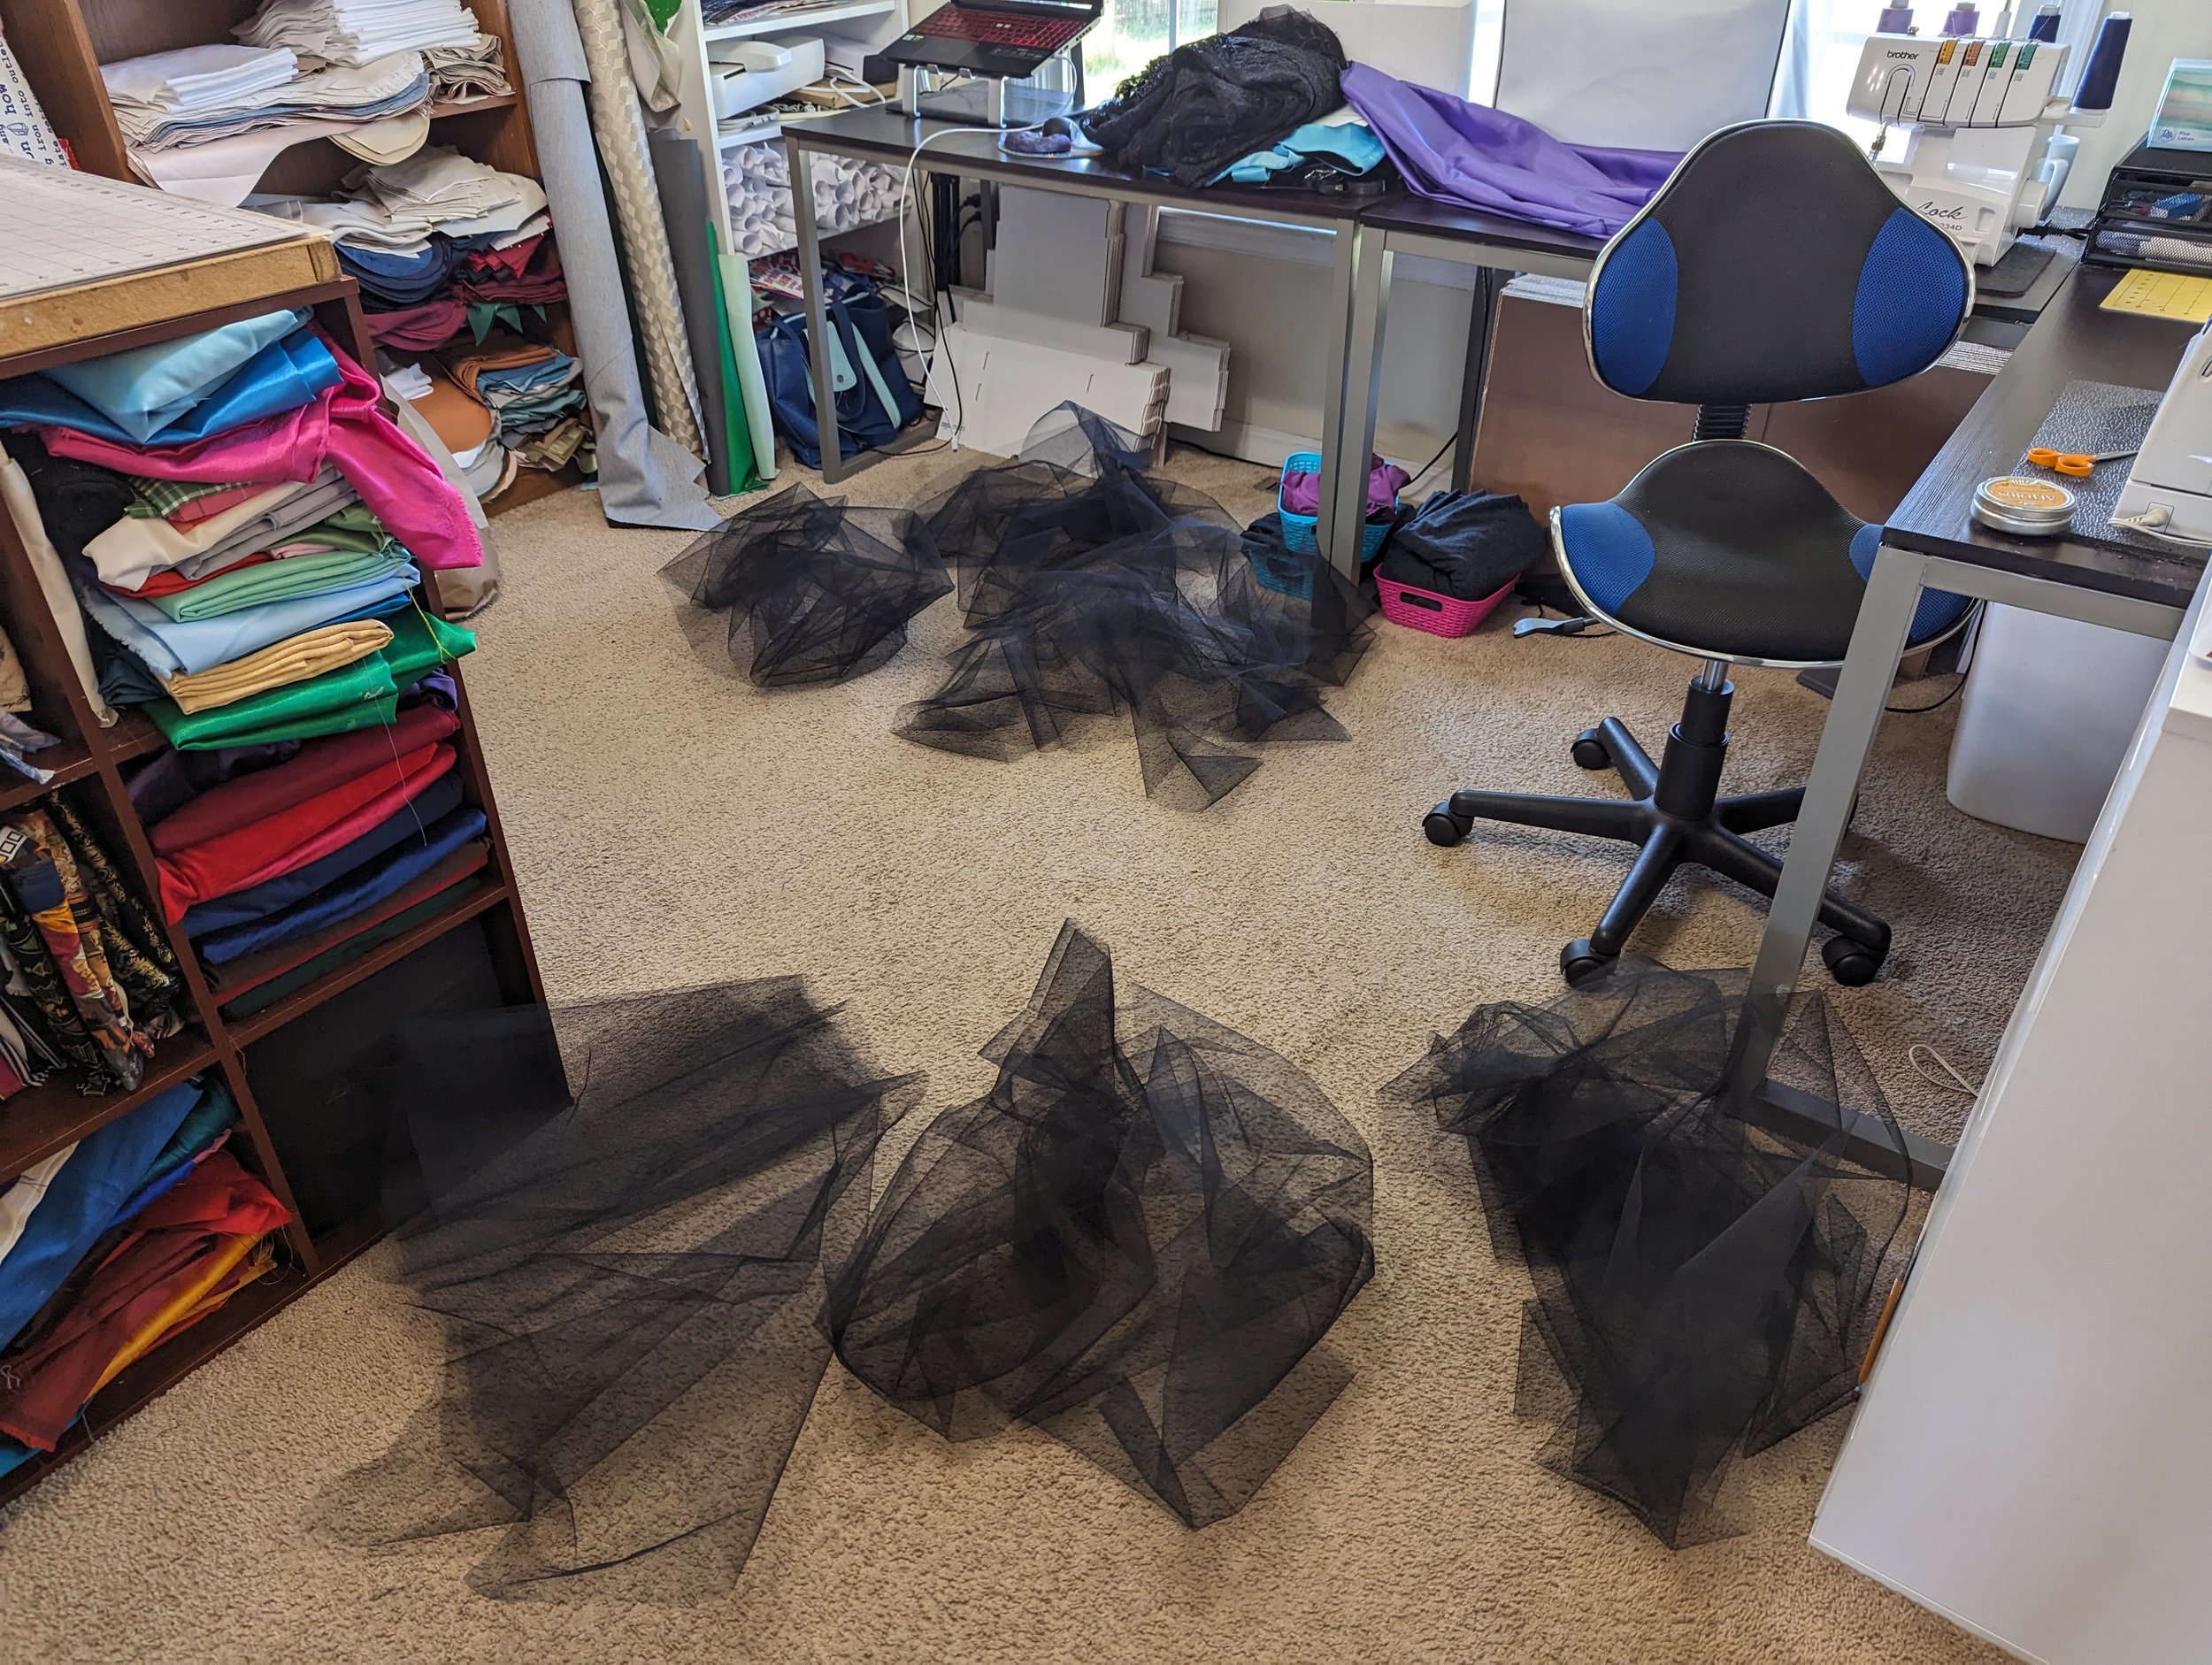
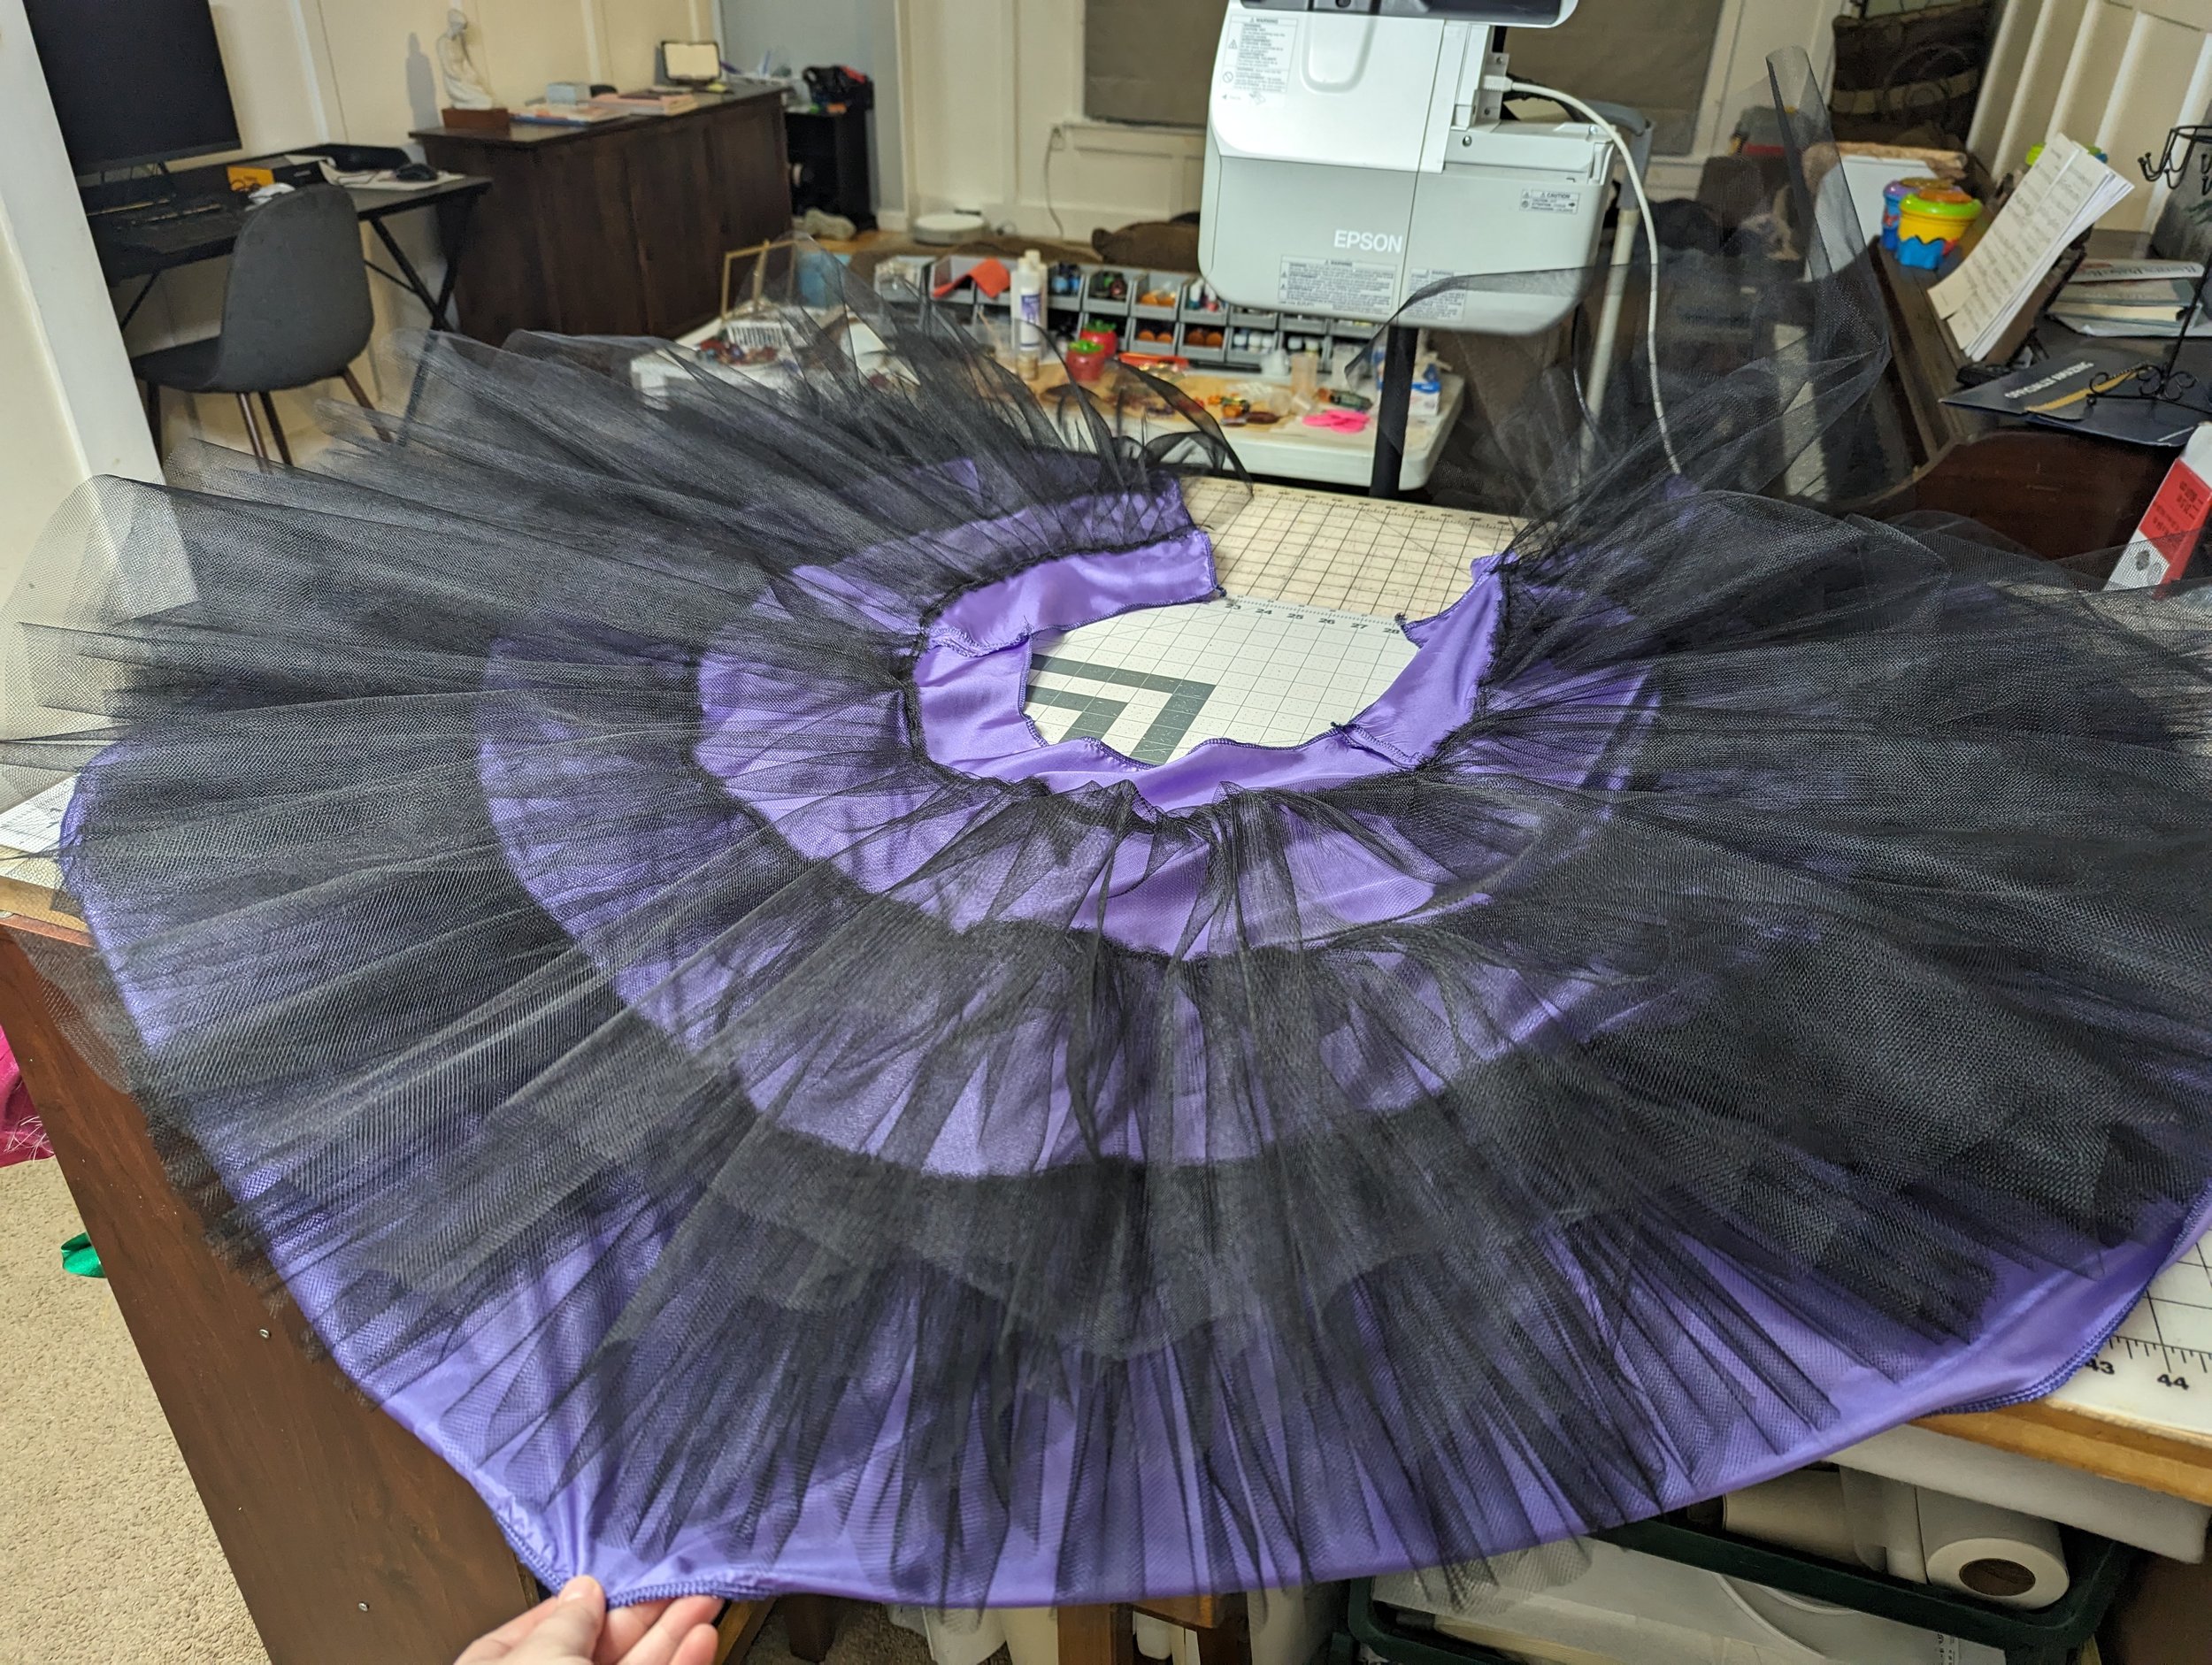
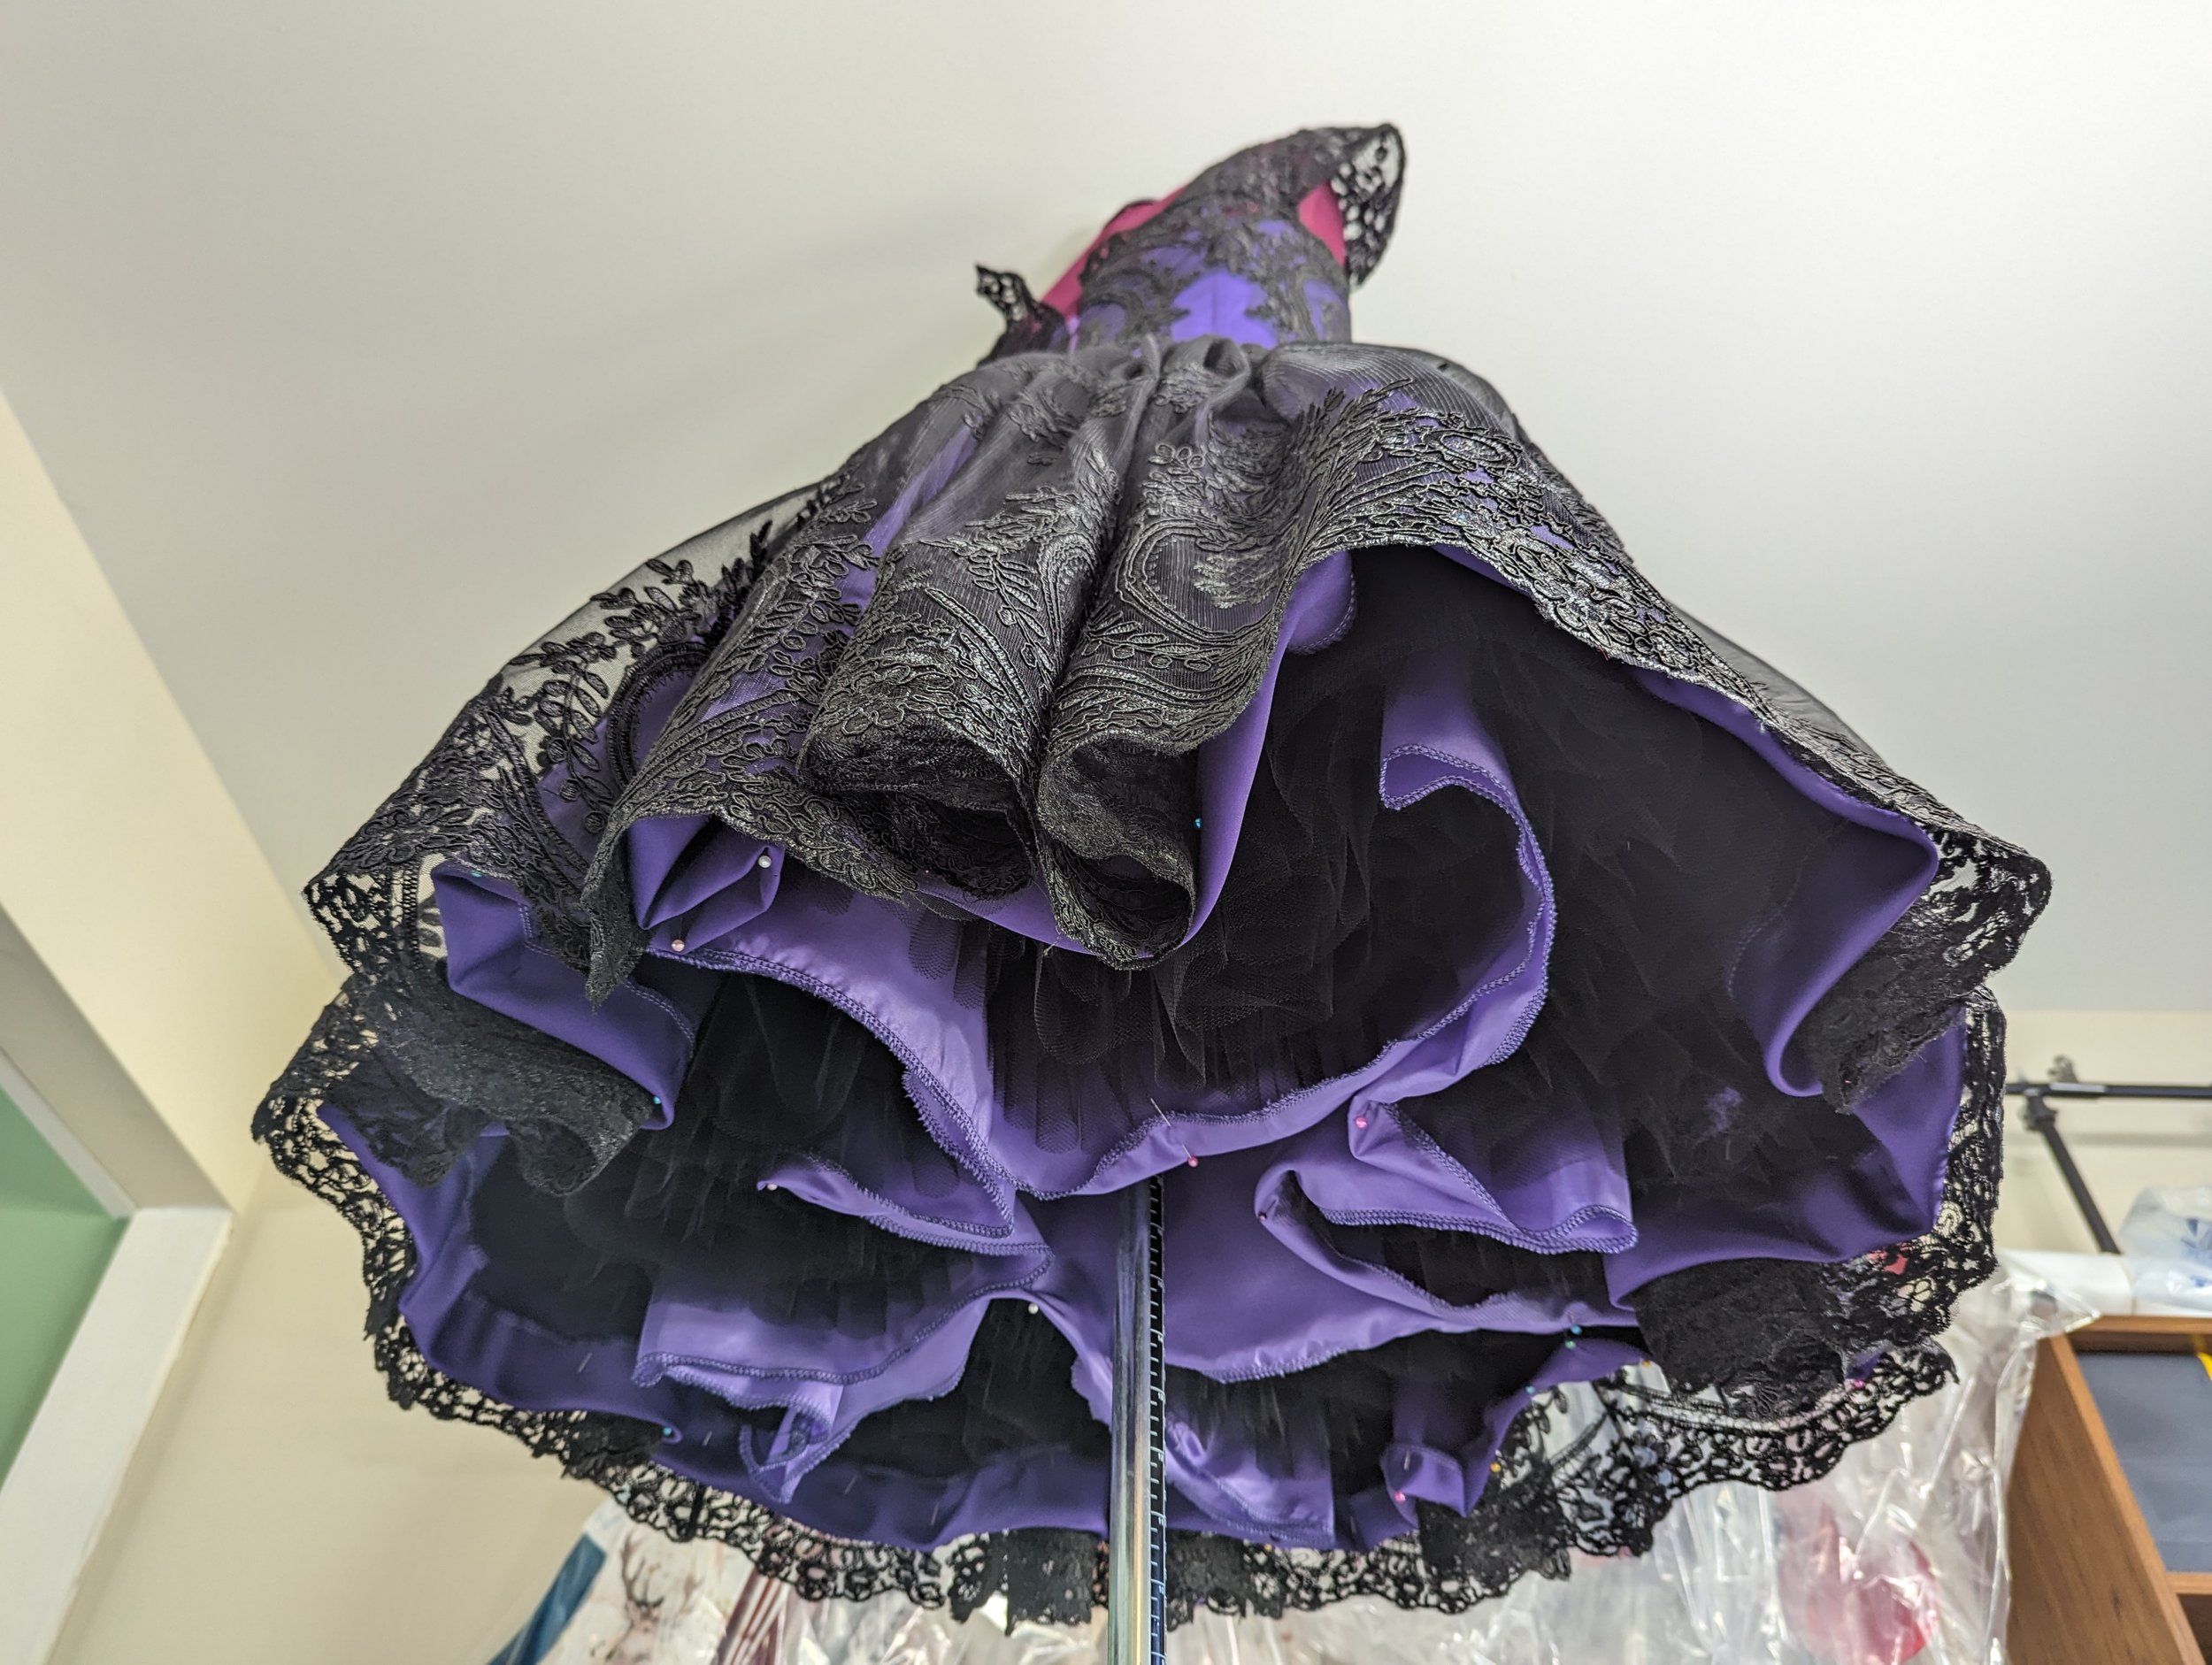
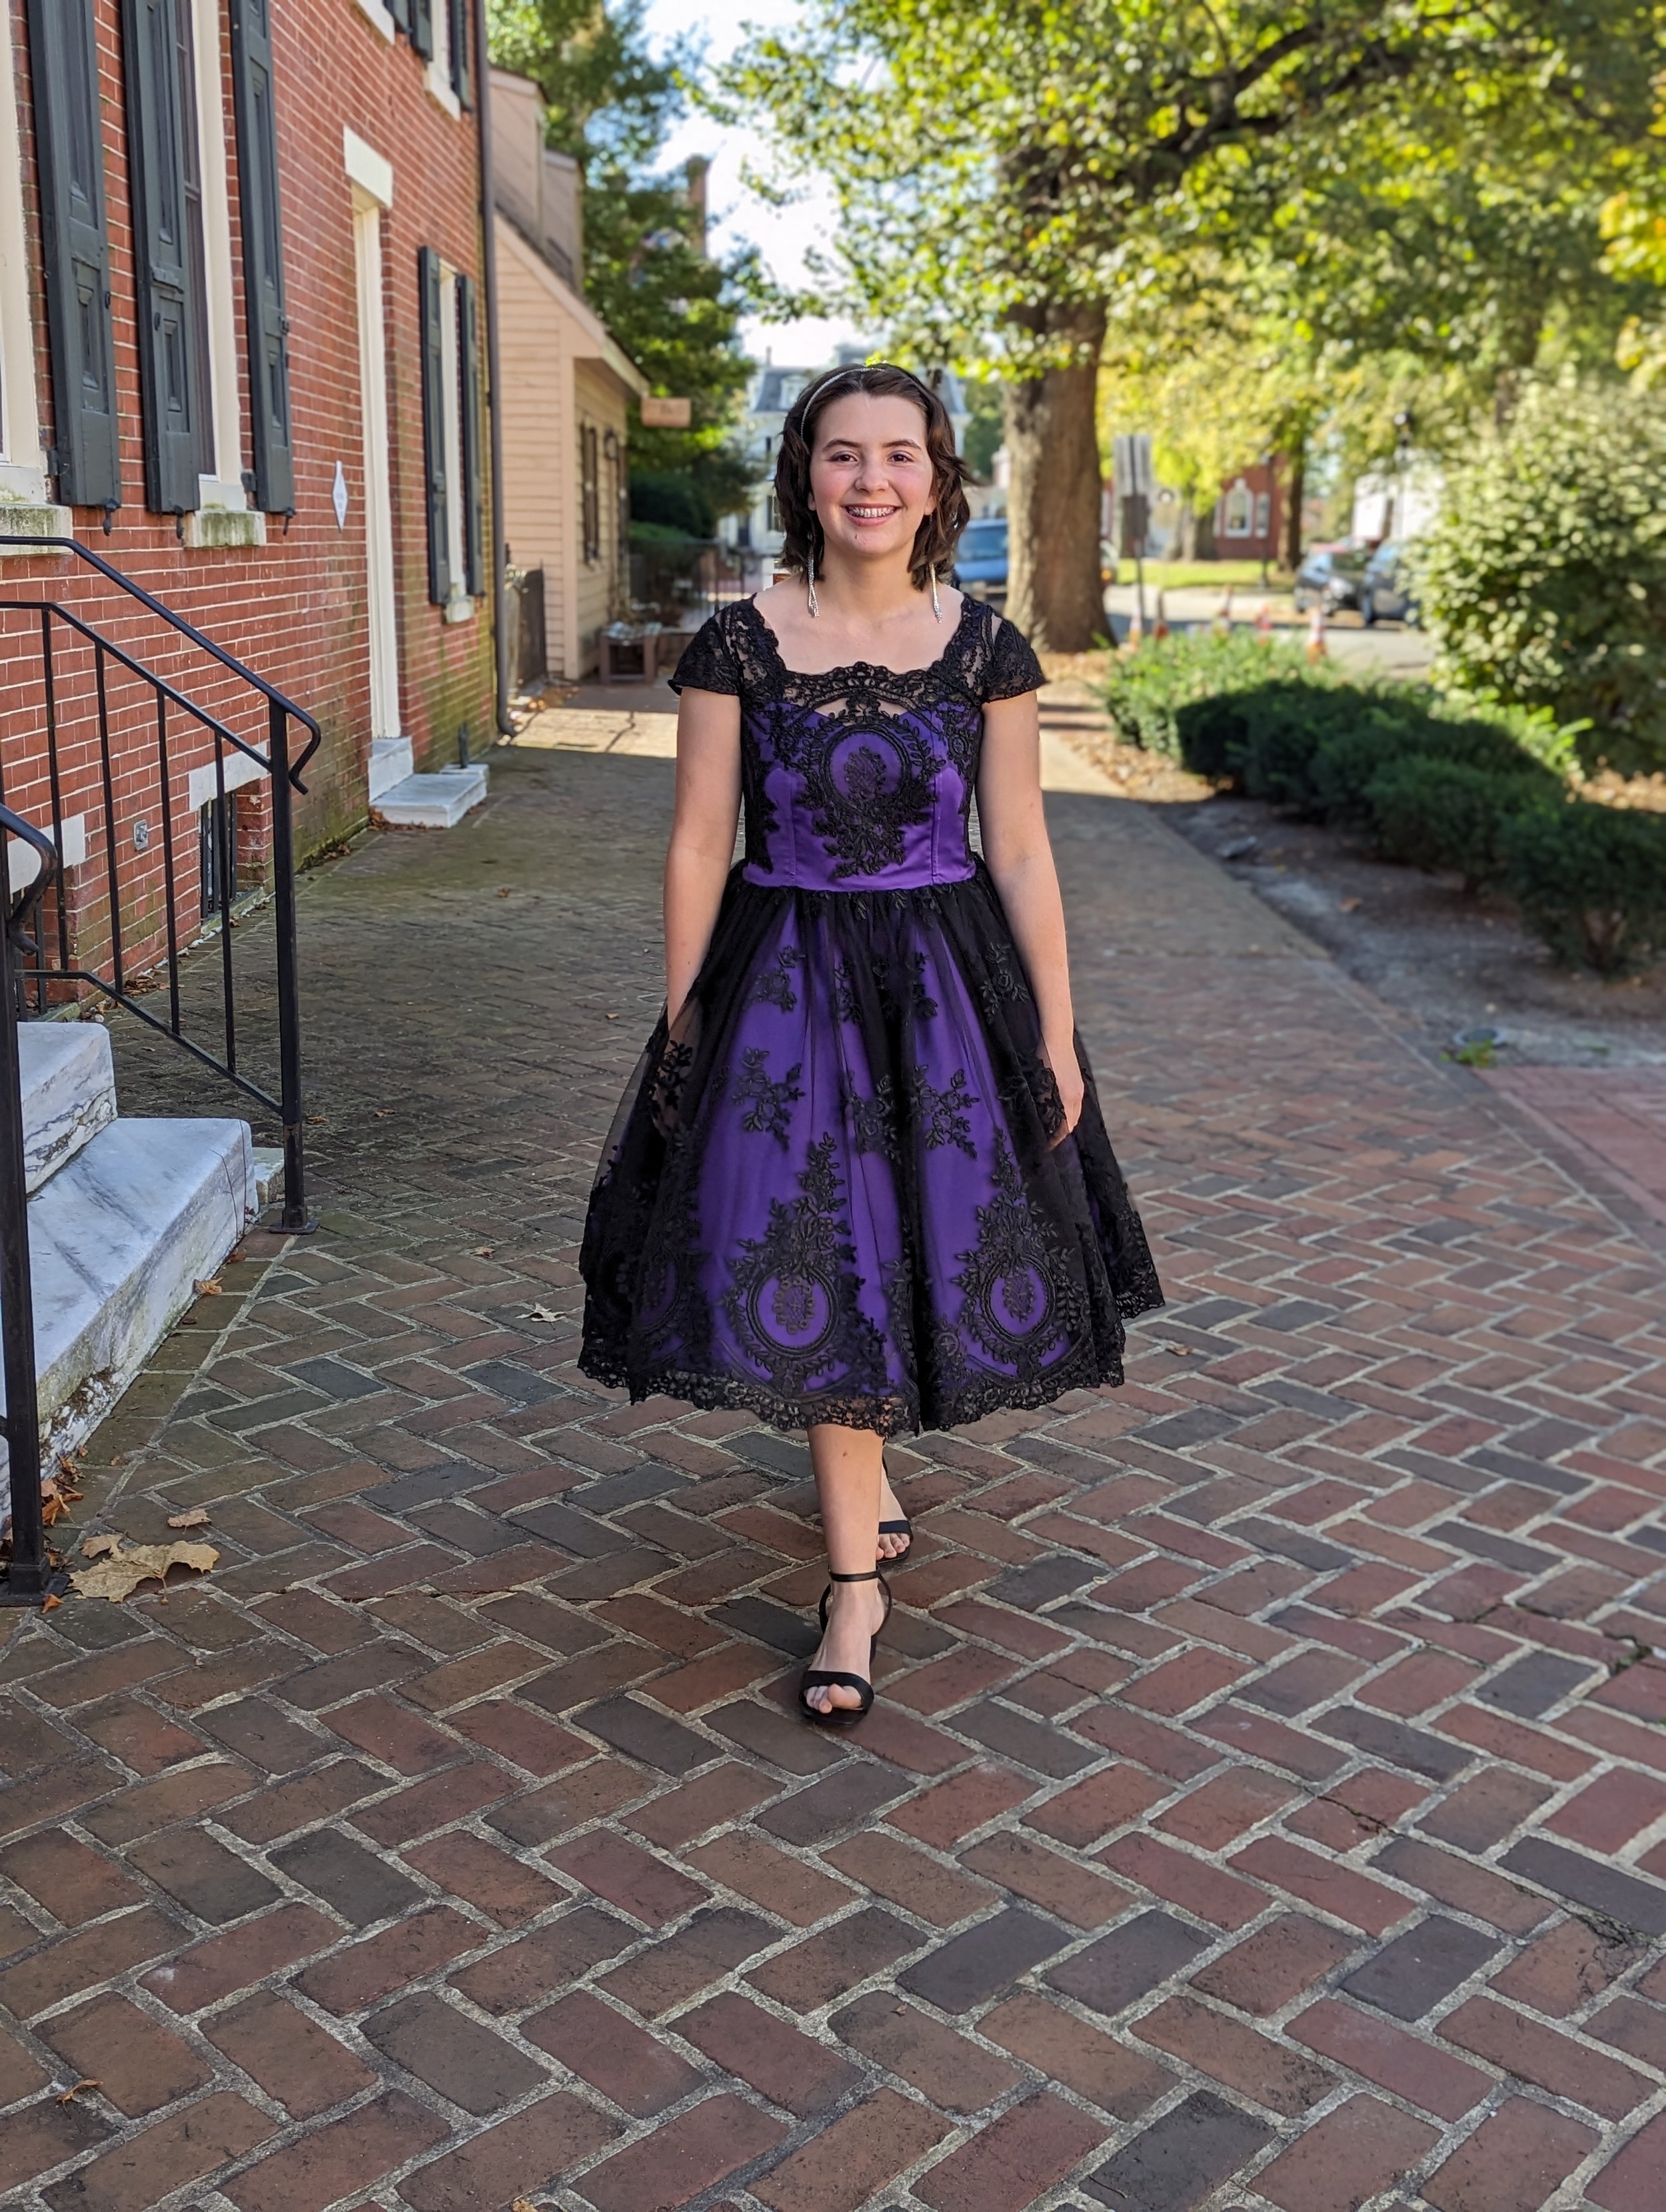
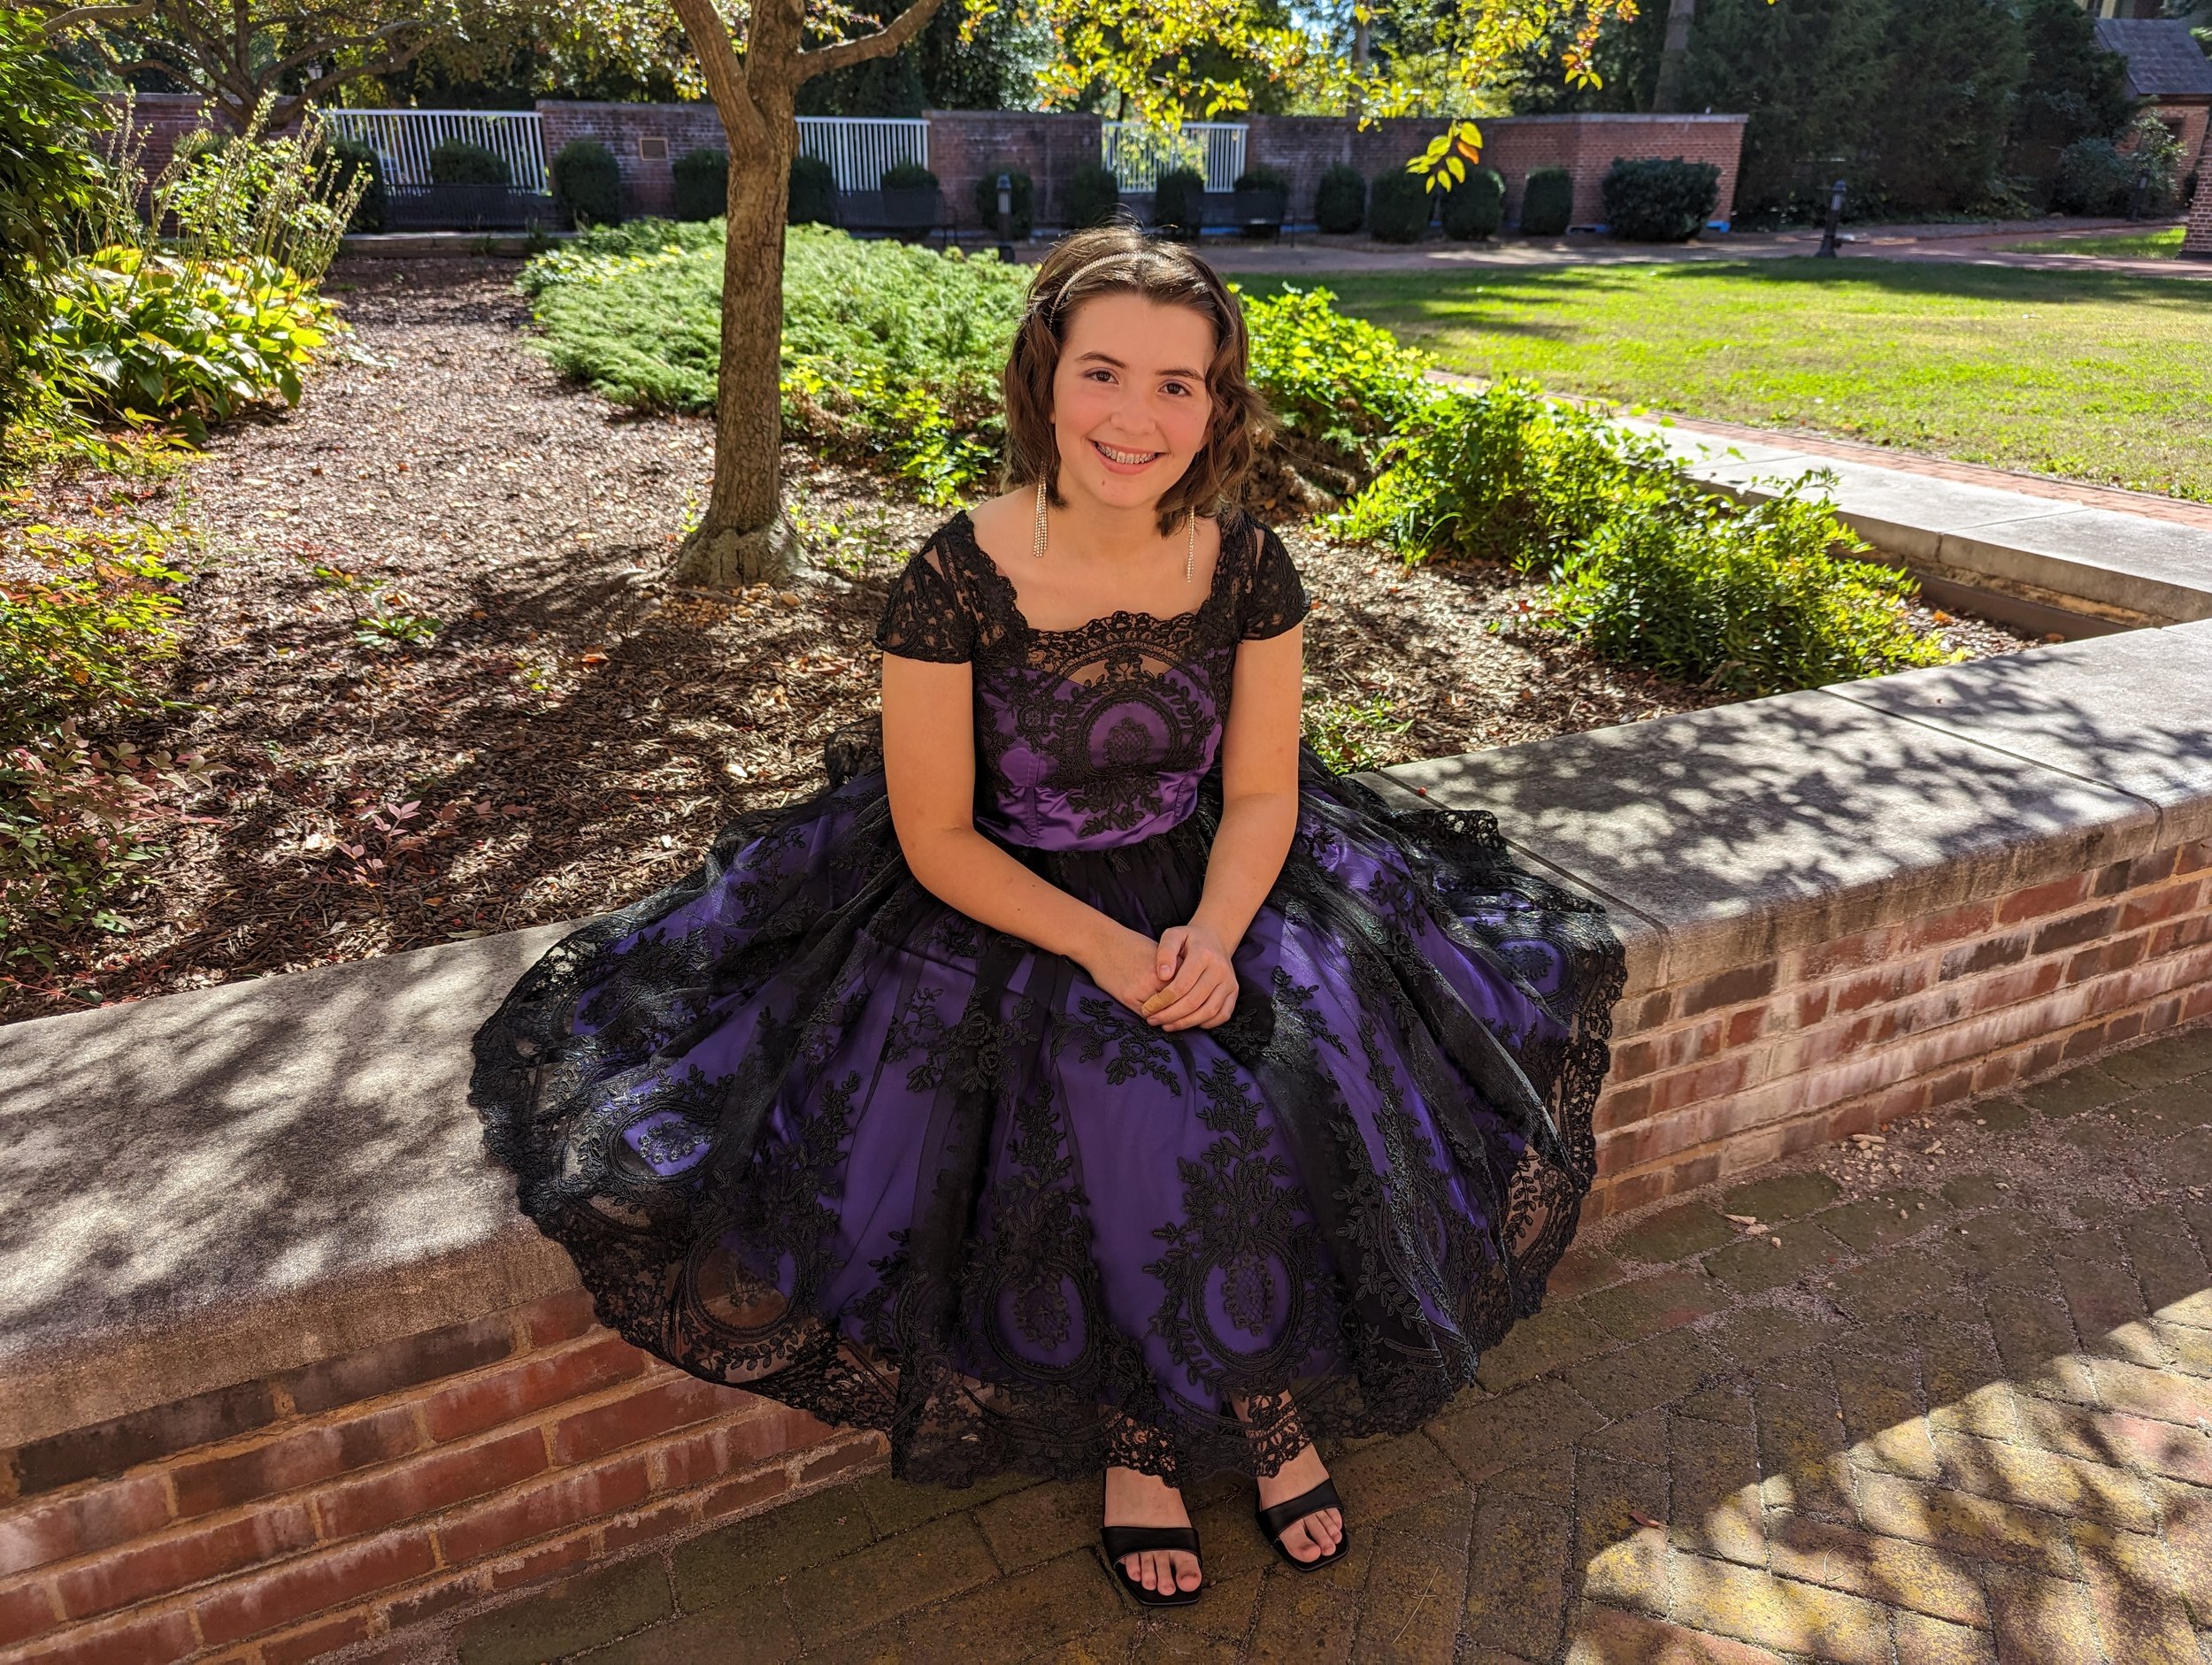
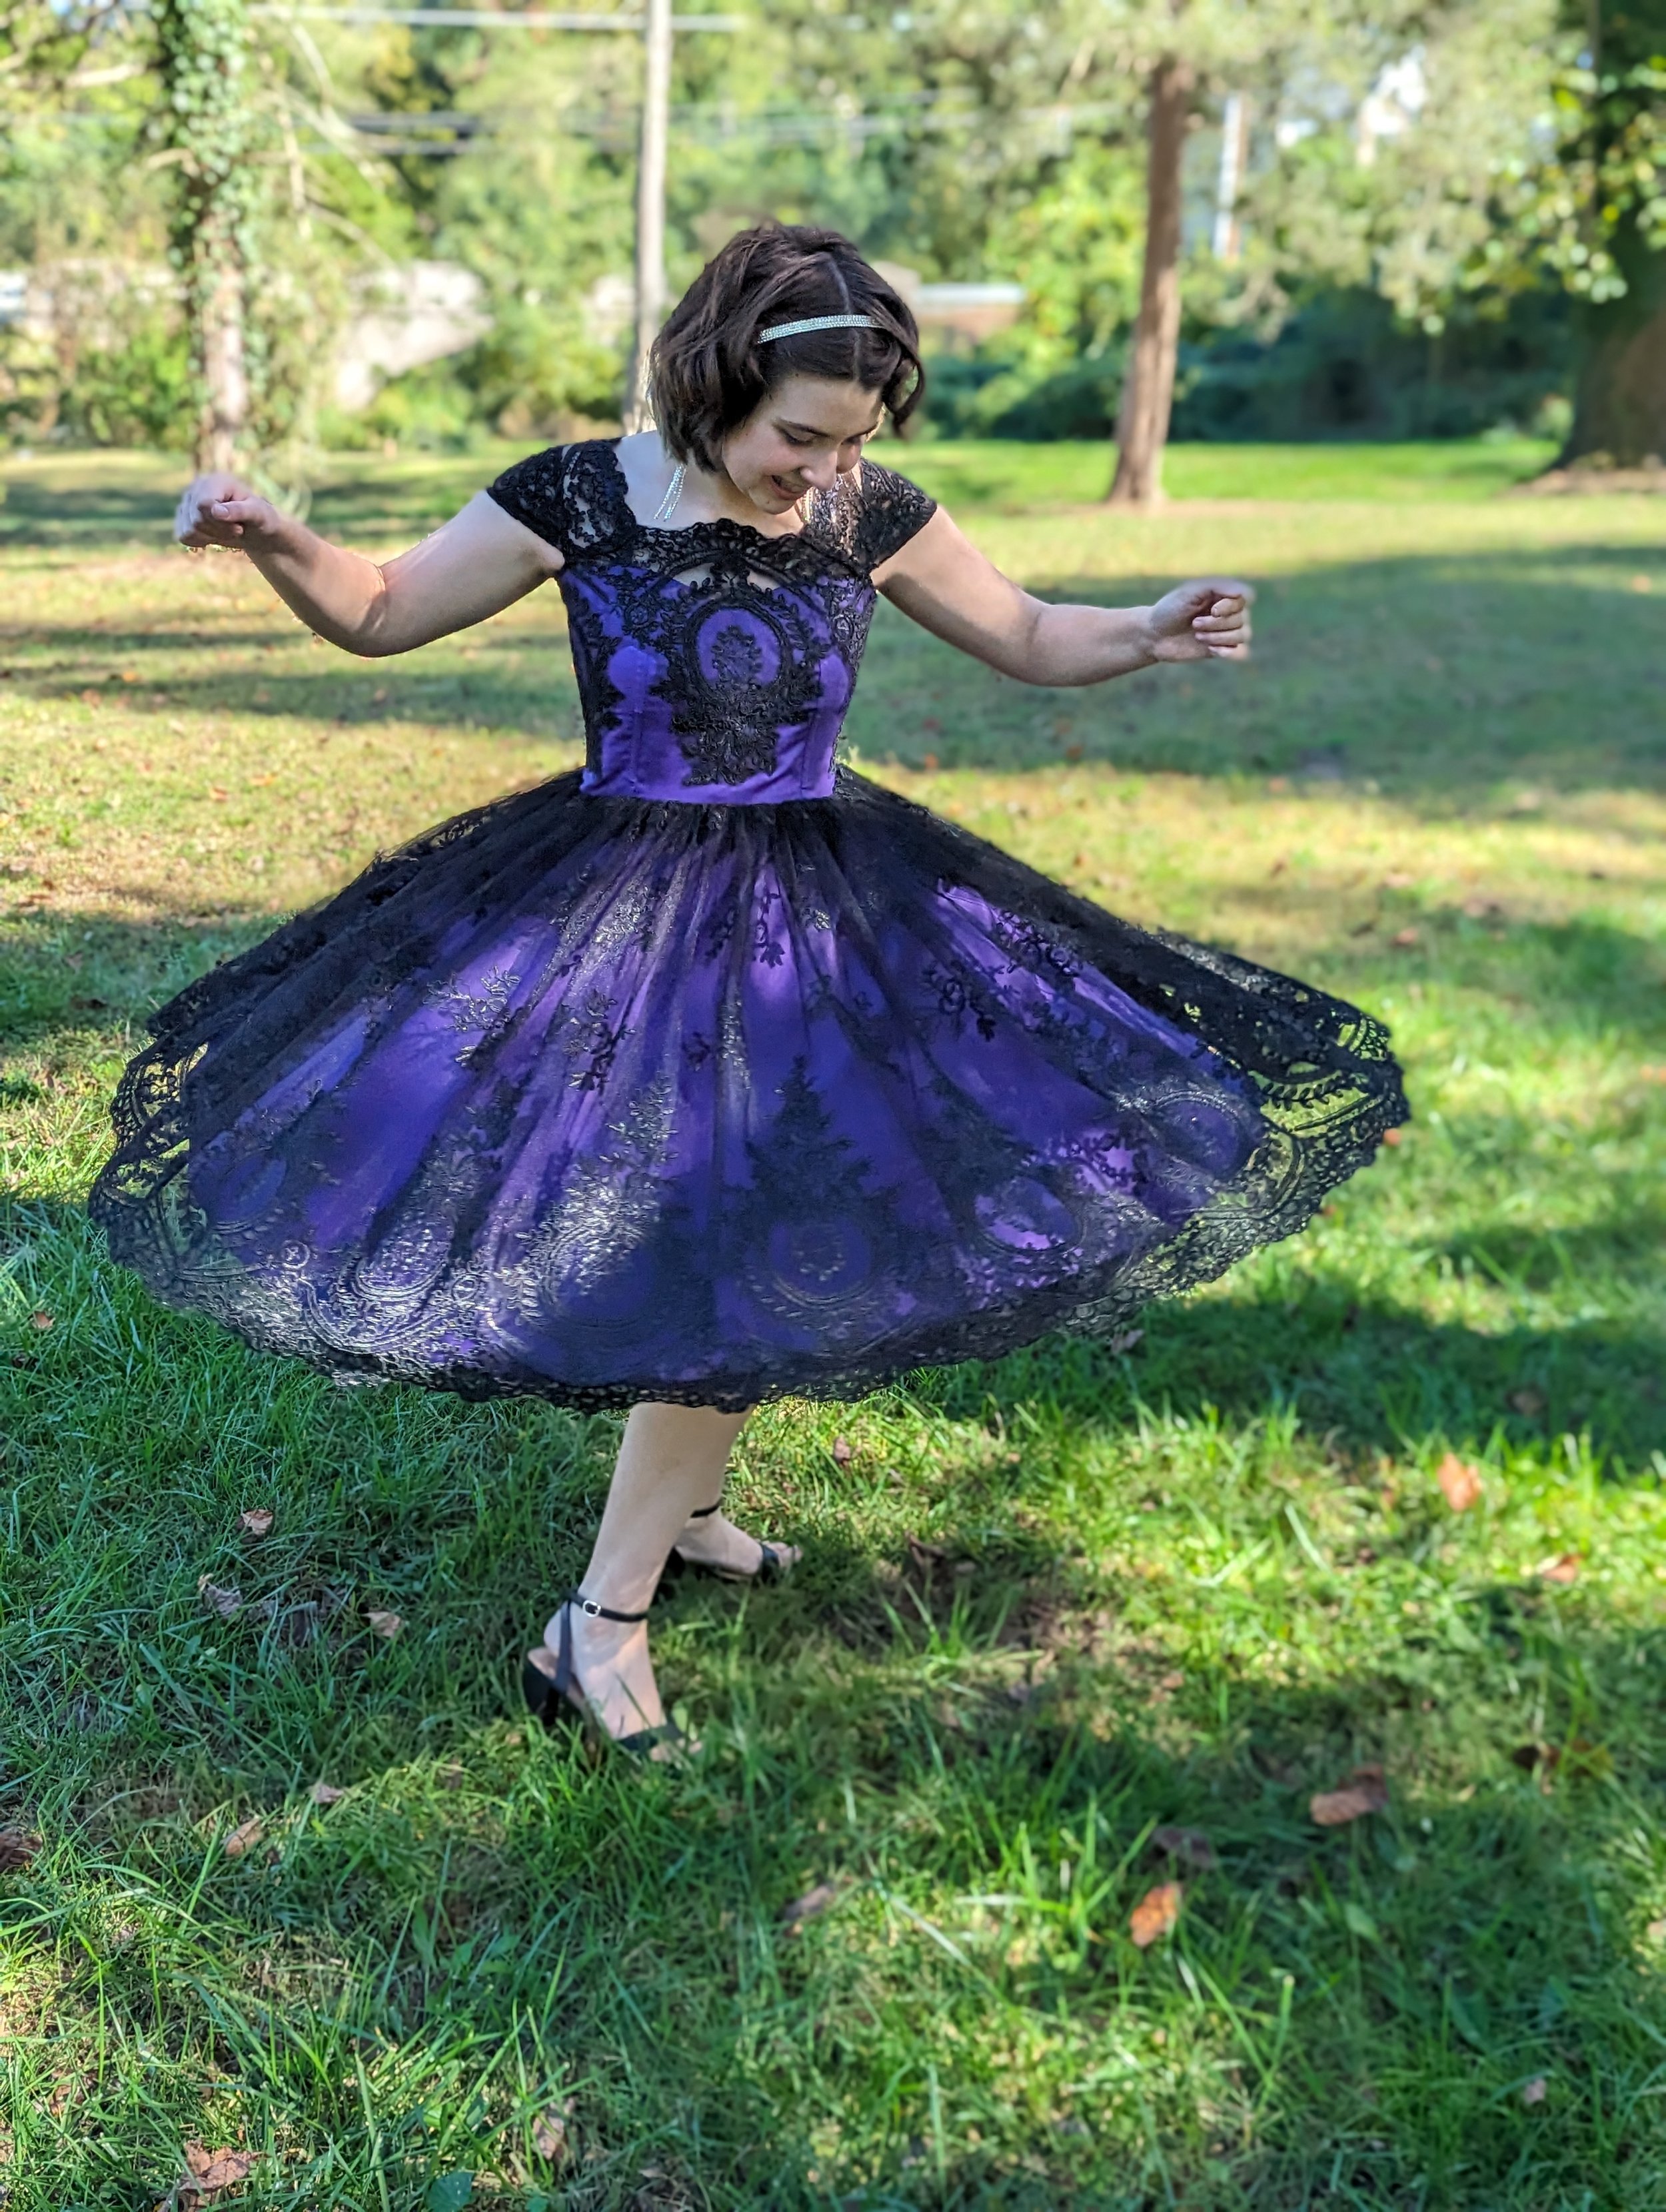
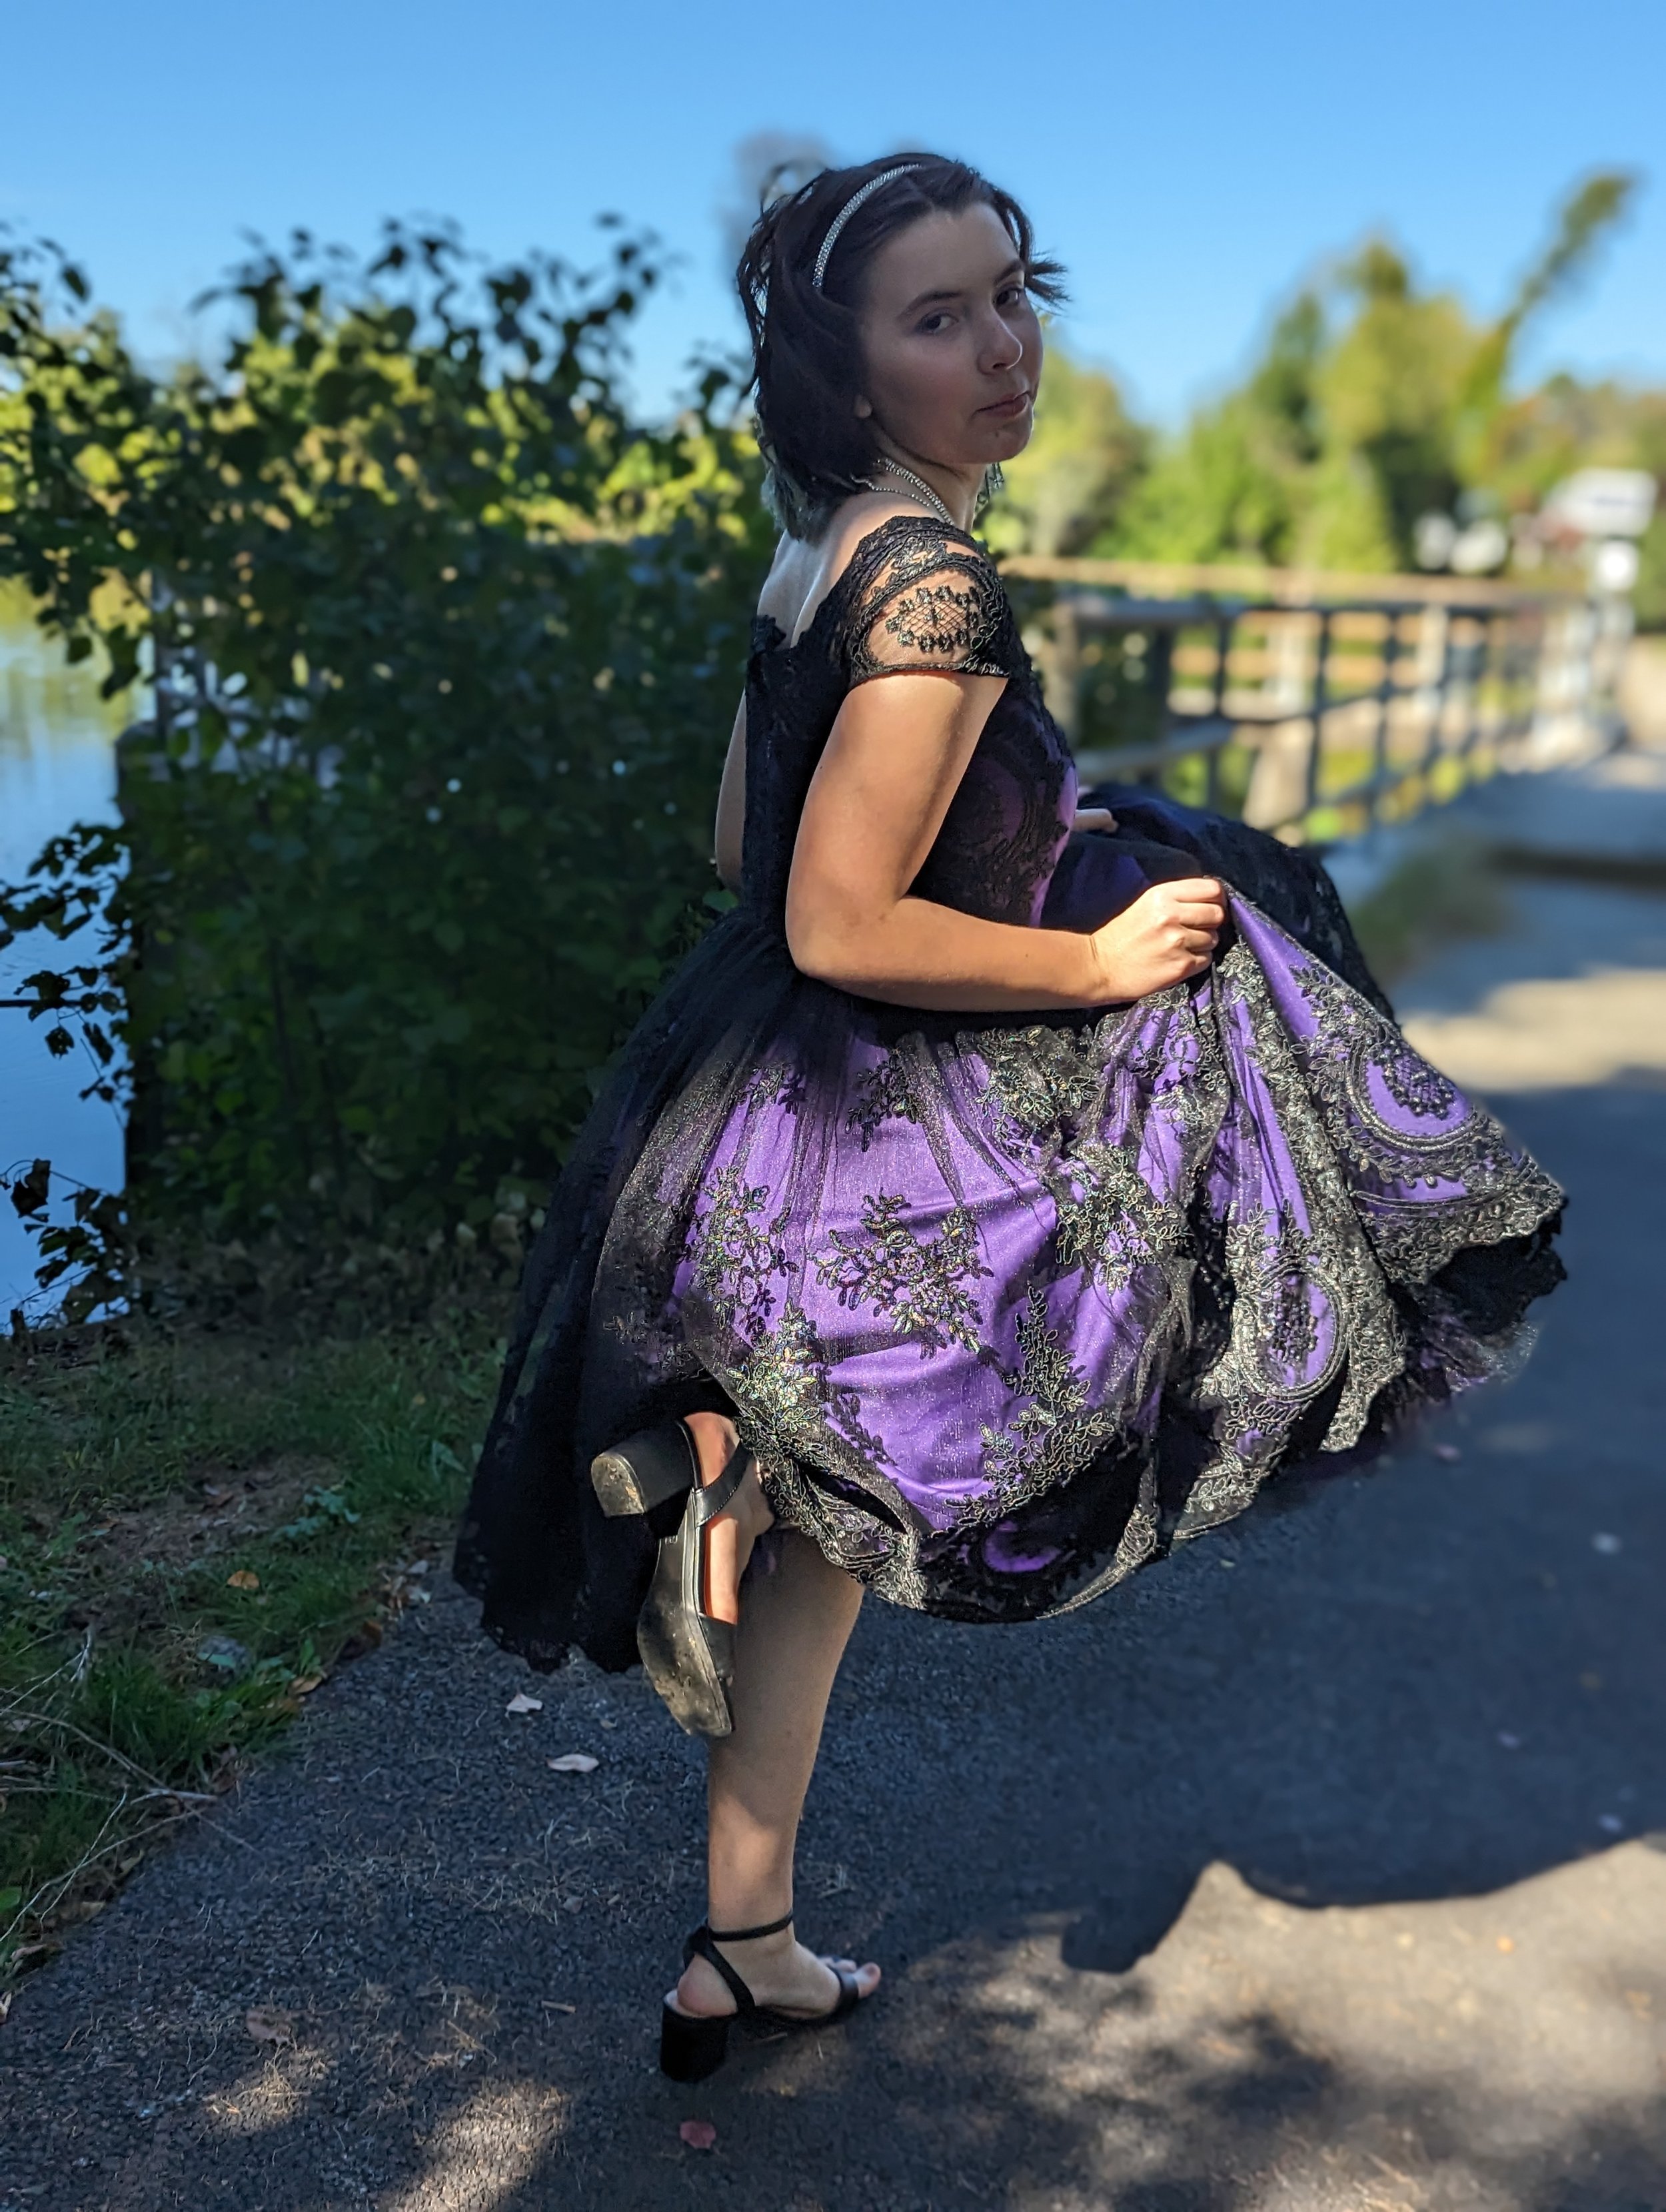
I determined that I wanted to add netting to it. A couple years ago I hemmed a prom dress for a young lady at church and noticed the tiered tulle to give it extra volume. My mother-in-law has done a lot of formal dress alterations and told me how it is done on A-line skirts: a bottom tier of 8x the width, middle of 4x, and top of 2x. I found some petticoat netting at Joann Fabrics and decided to use that rather than tulle for better volume. I also decided that for my sanity, I couldn’t do 8x. I actually did 4x the bottom circumference, which ended up being more than 4x where I was attaching it, then 2x for the middle, and the same as bottom circumference for the top tier. I quickly determined that gathering it would be a huge pain, so I ended up pleating each layer. It was a lot of work, but it added a lot of body without having to use a petticoat. We actually own a petticoat, so all this work was mostly because I had an idea and wanted to see if it would work! But it really did end up cool.
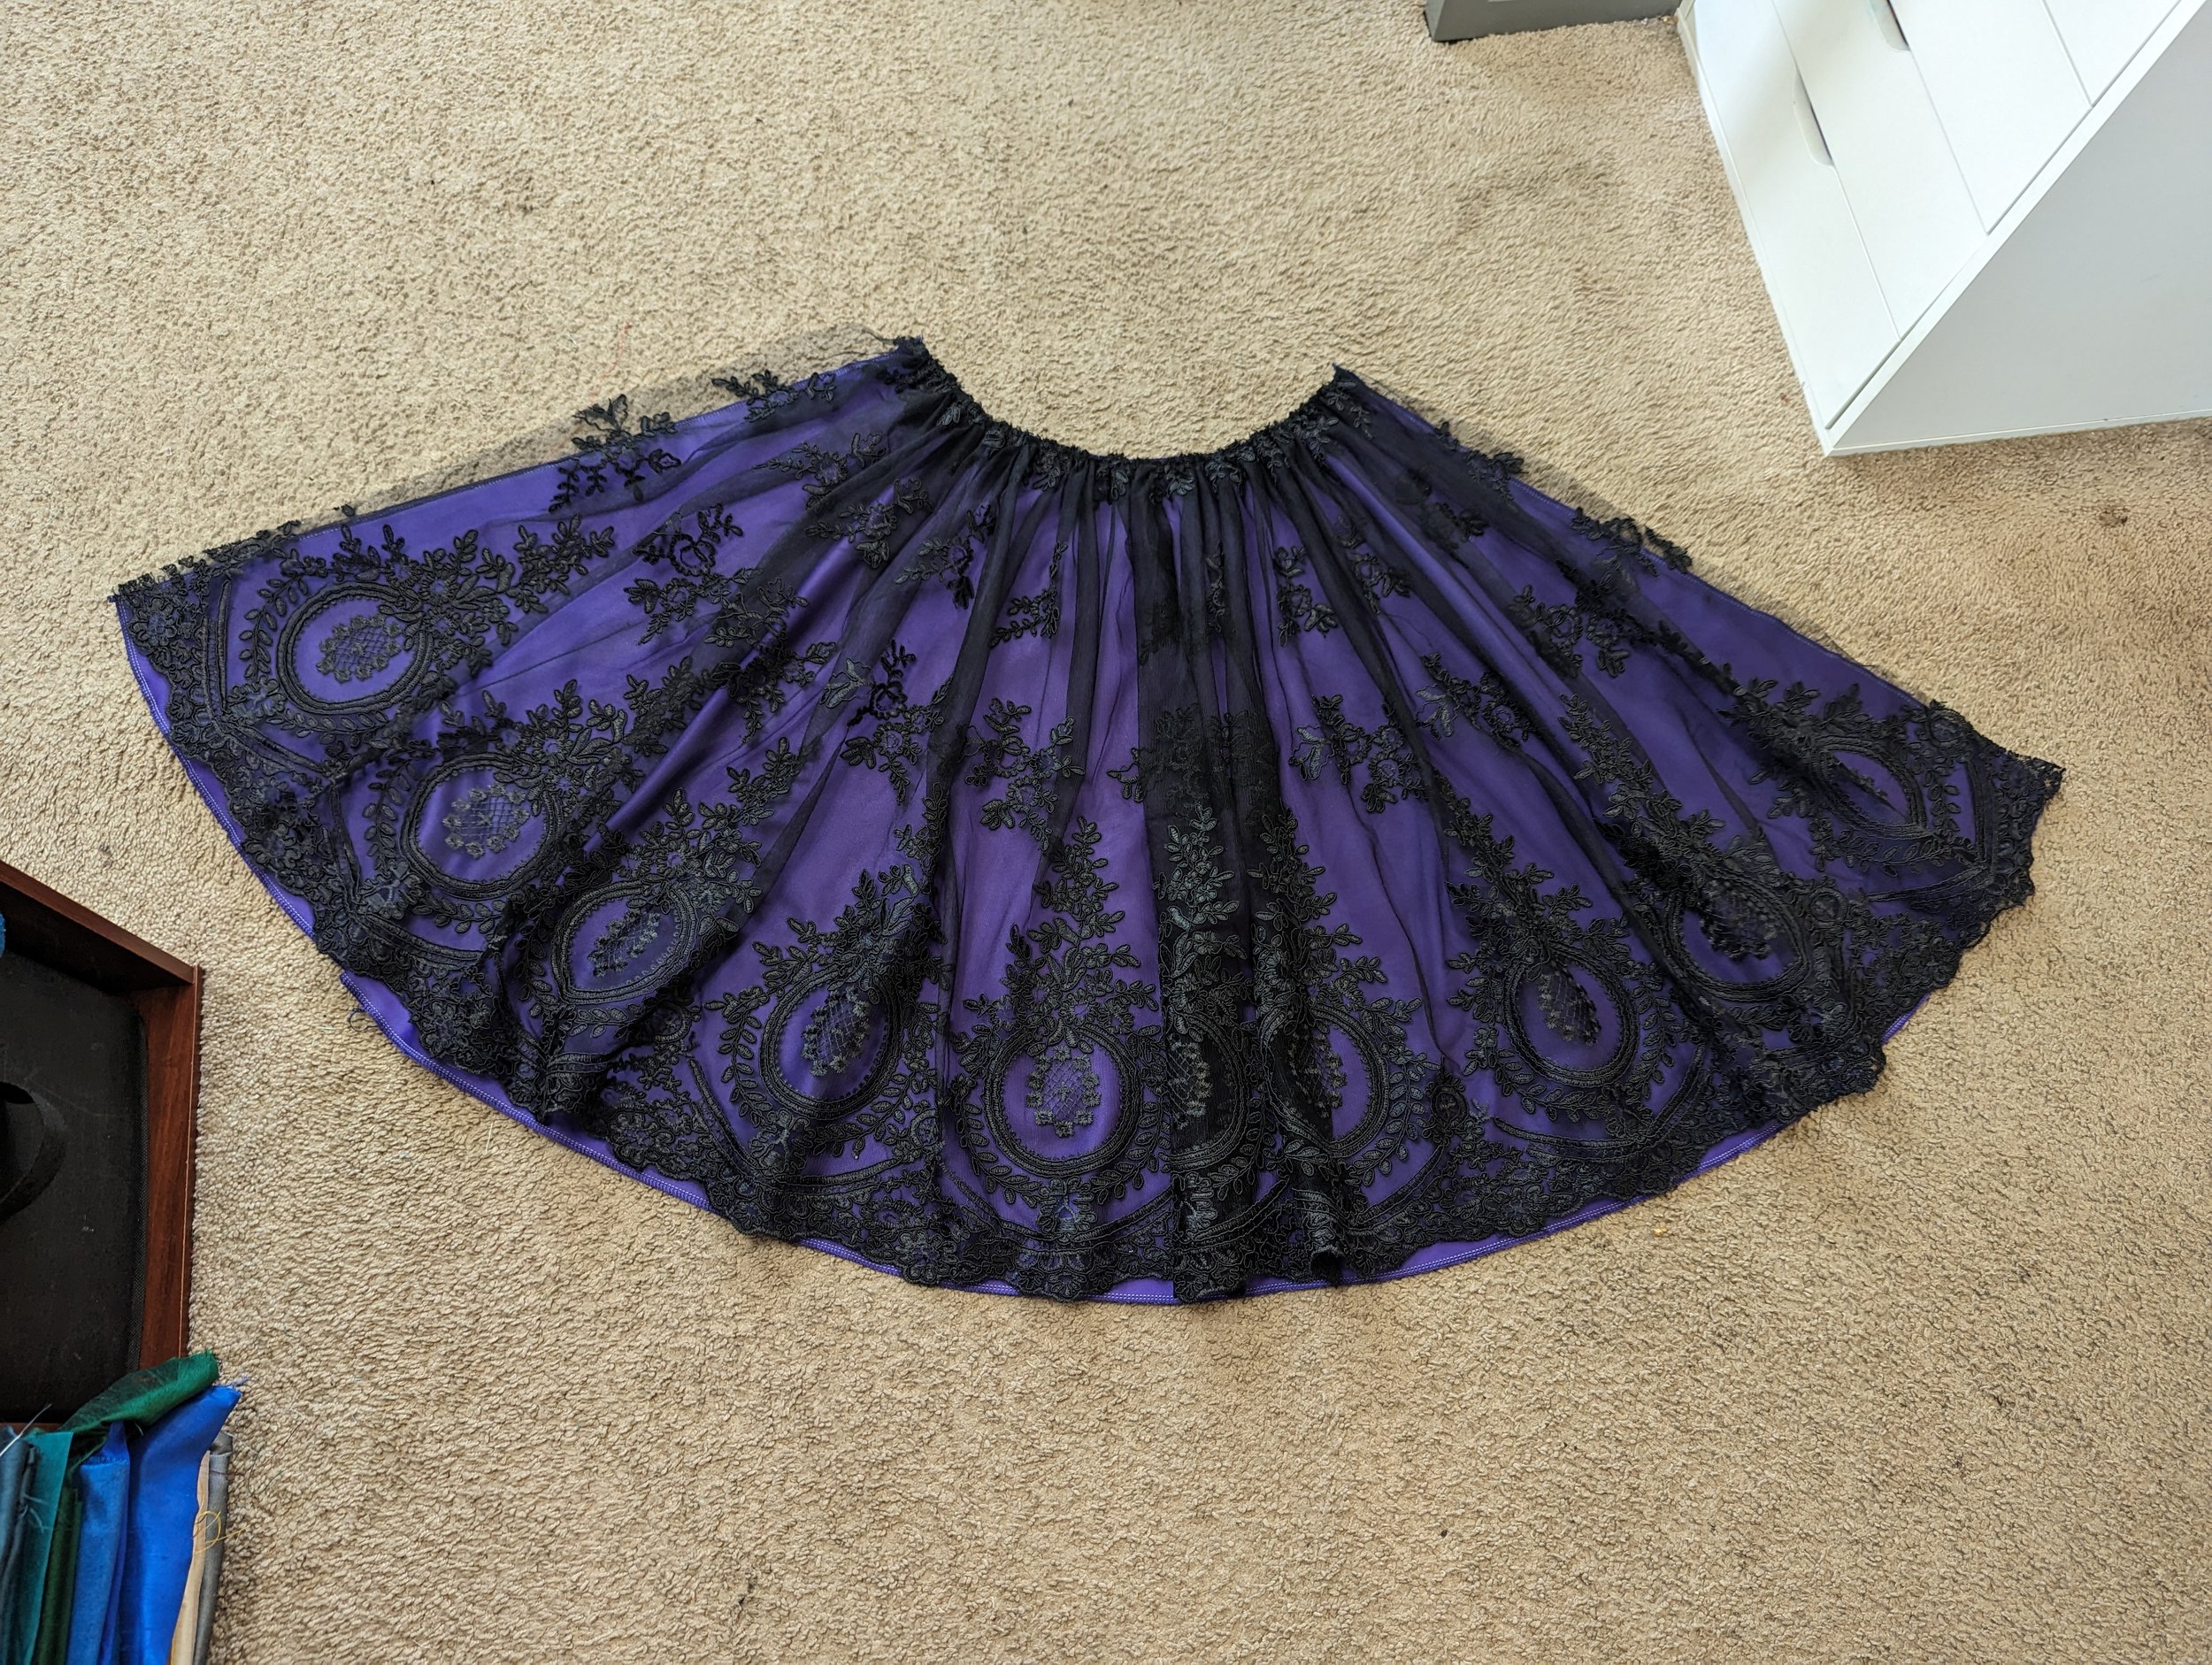
Next up was the overskirt. I used three pieces. The 3/4 skirt pattern piece was cut in half for the front piece, and then for the back I cut it into two pieces to account for the back zipper. For this I needed 4 yards of fabric (and 4 for the lining as well). I forgot to mention where I bought the fabric. I looked at the pricing at two different places I purchase from a lot: Fabric Wholesale Direct and My Textile Fabric. To my surprise, between sales and coupons, I was able to buy all I needed from my local Joann Fabrics for close to the same amount, so that’s where I bought it.
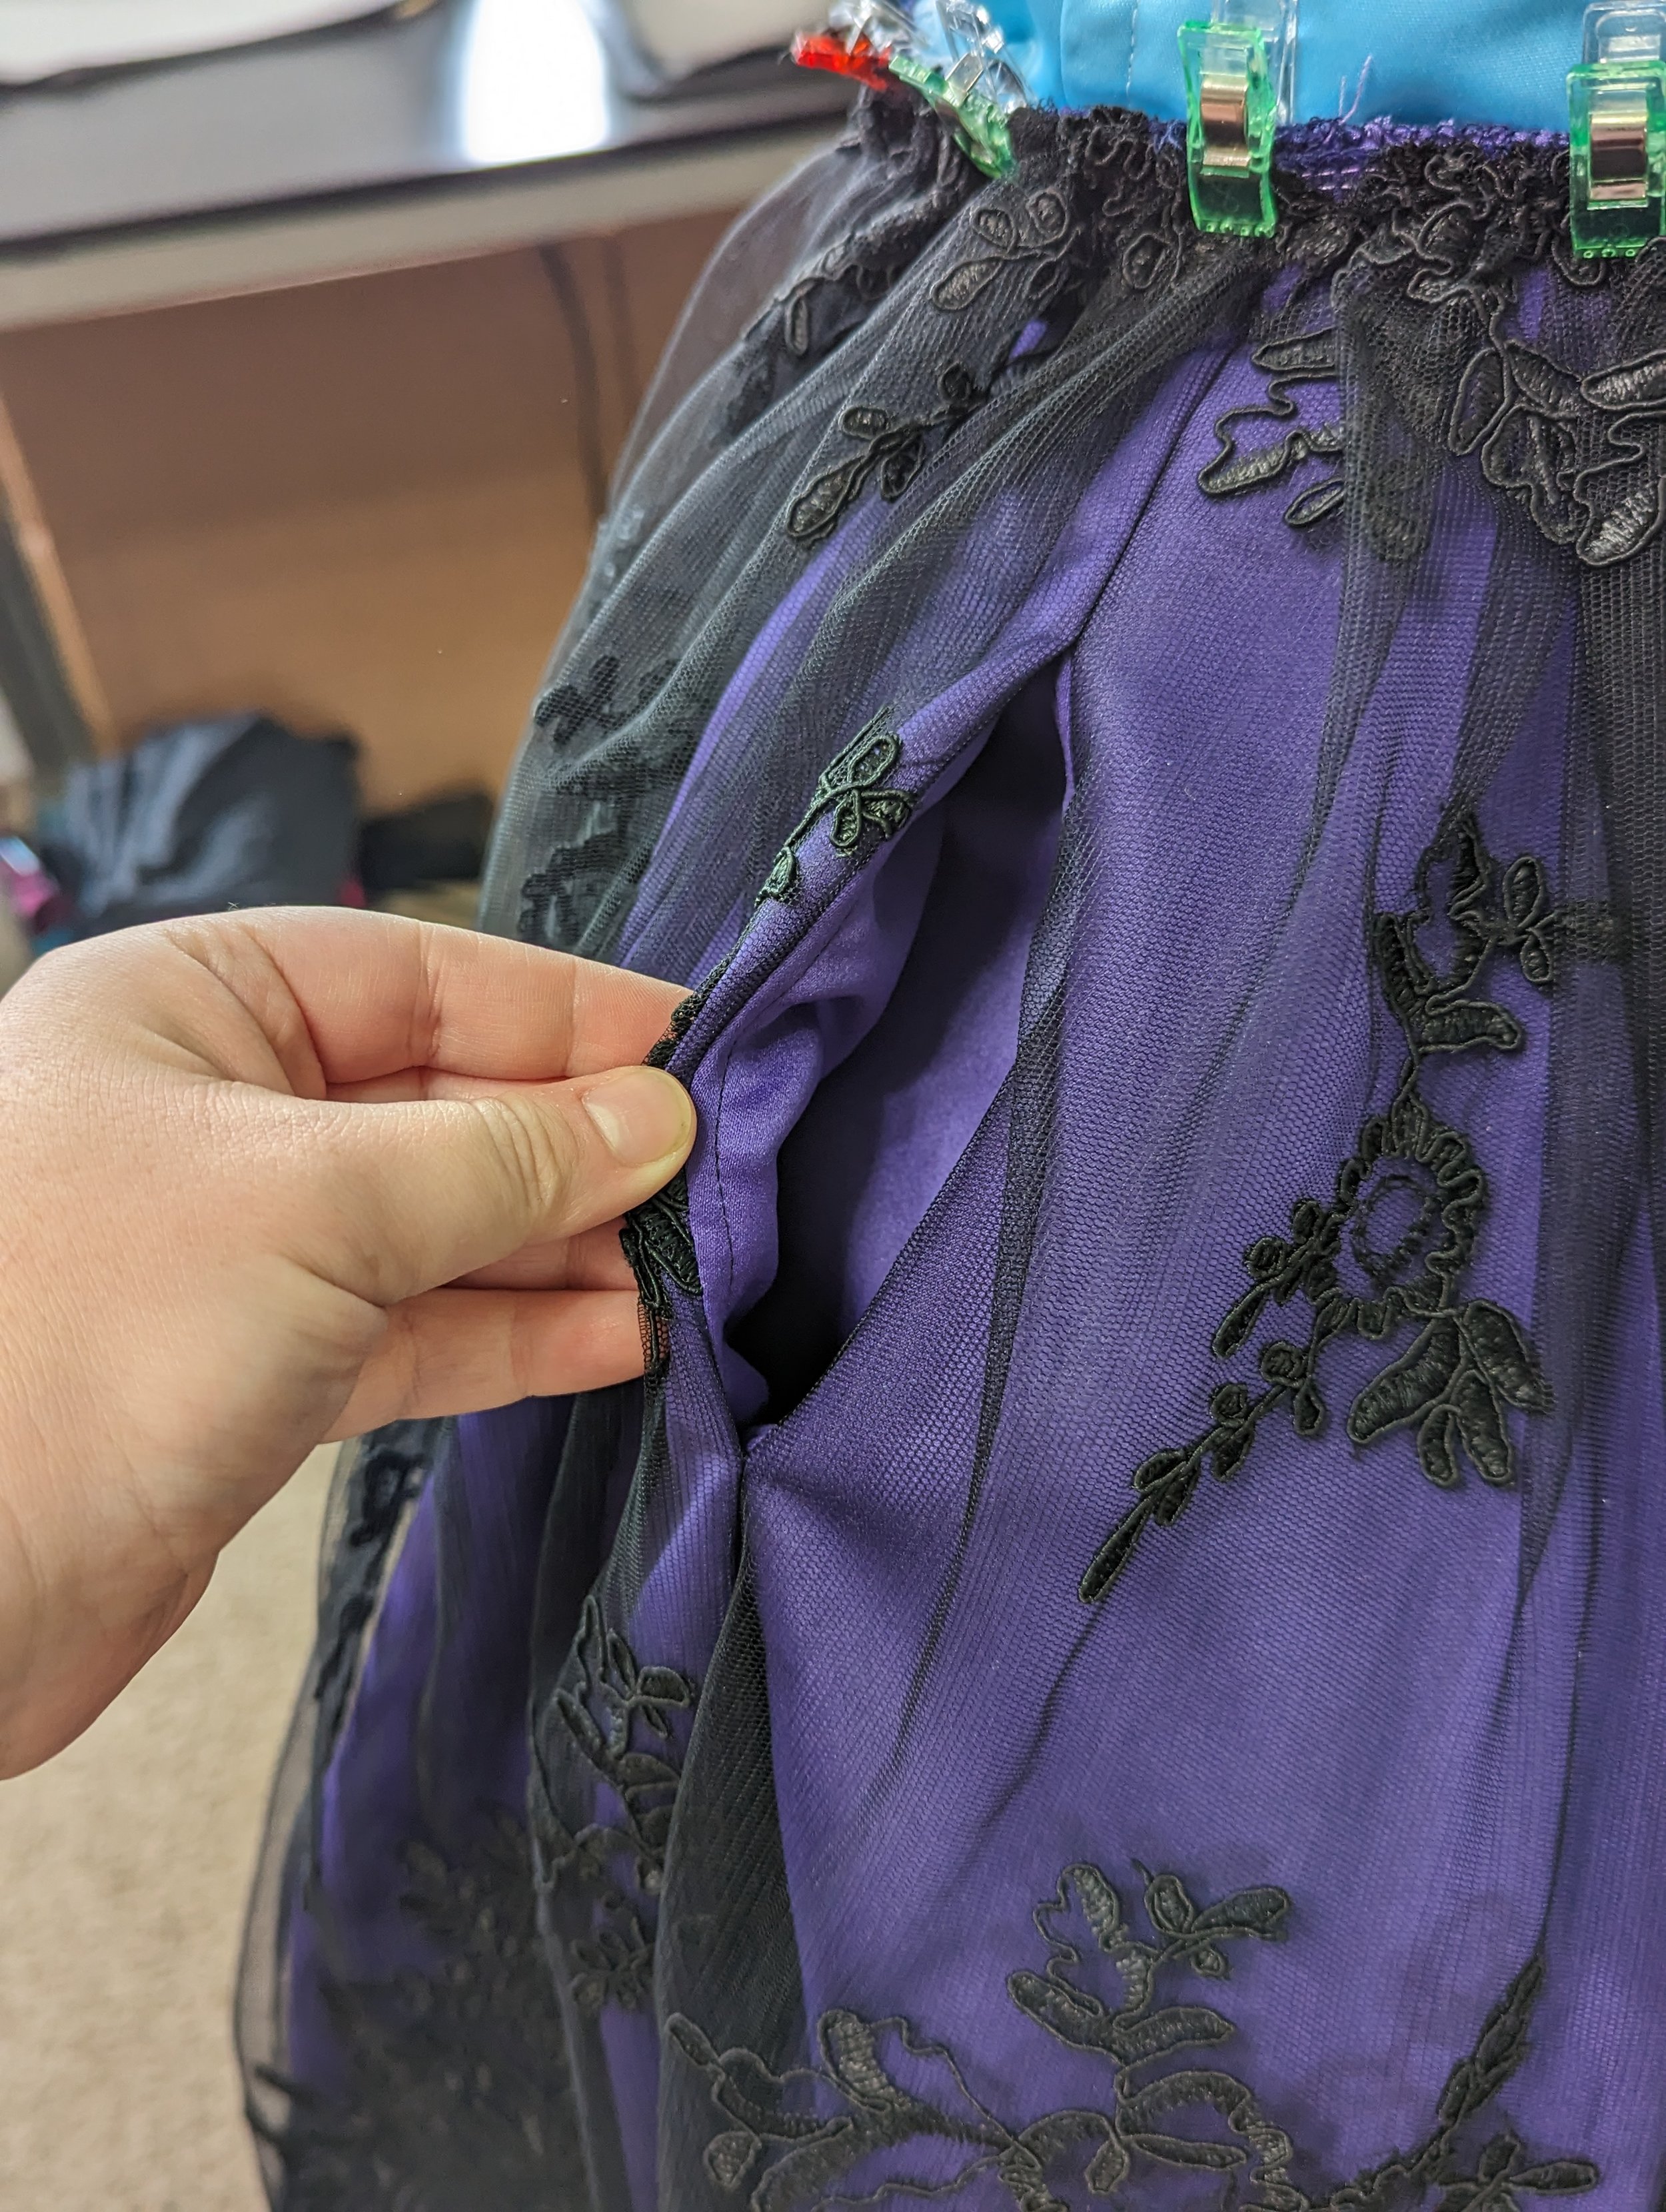
I made a little test skirt ahead of time to see if adding inseam pockets would work. To my relief, it worked great! This tutorial helped out. By comparison with the lining, the overskirt was simple to make. I borrowed a dress form from my mother-in-law and that helped me so much at this stage and going forward.
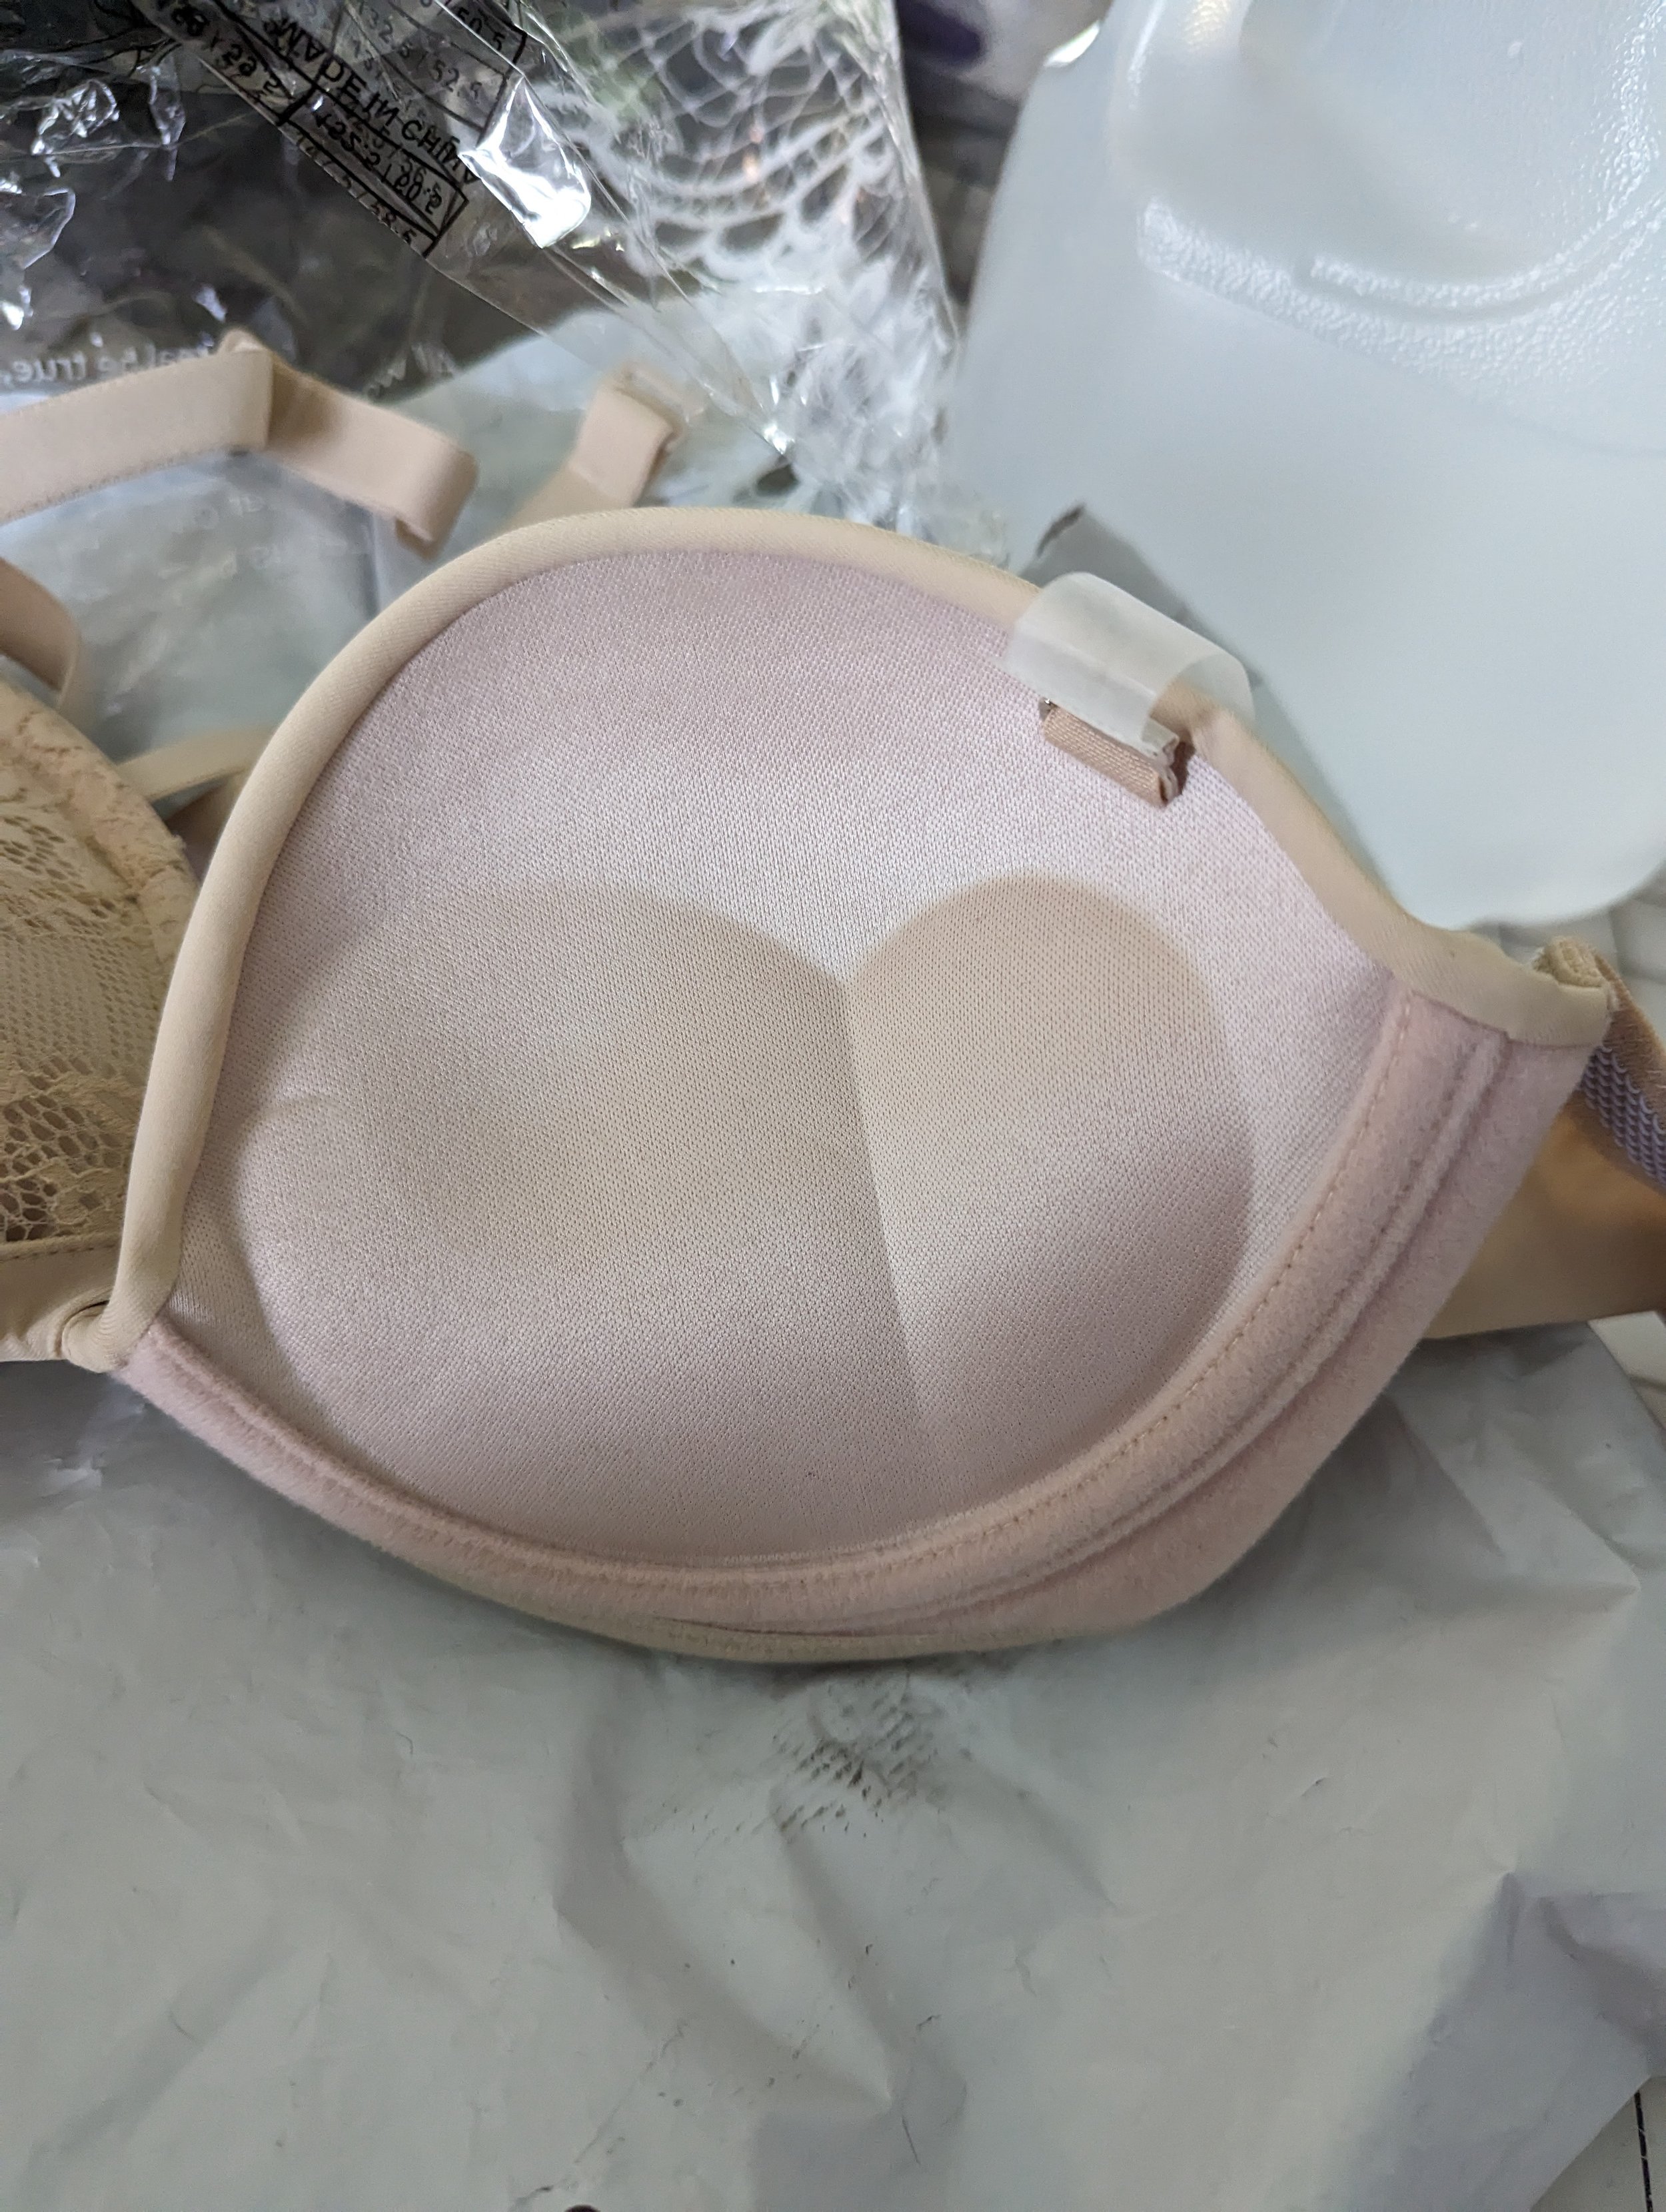
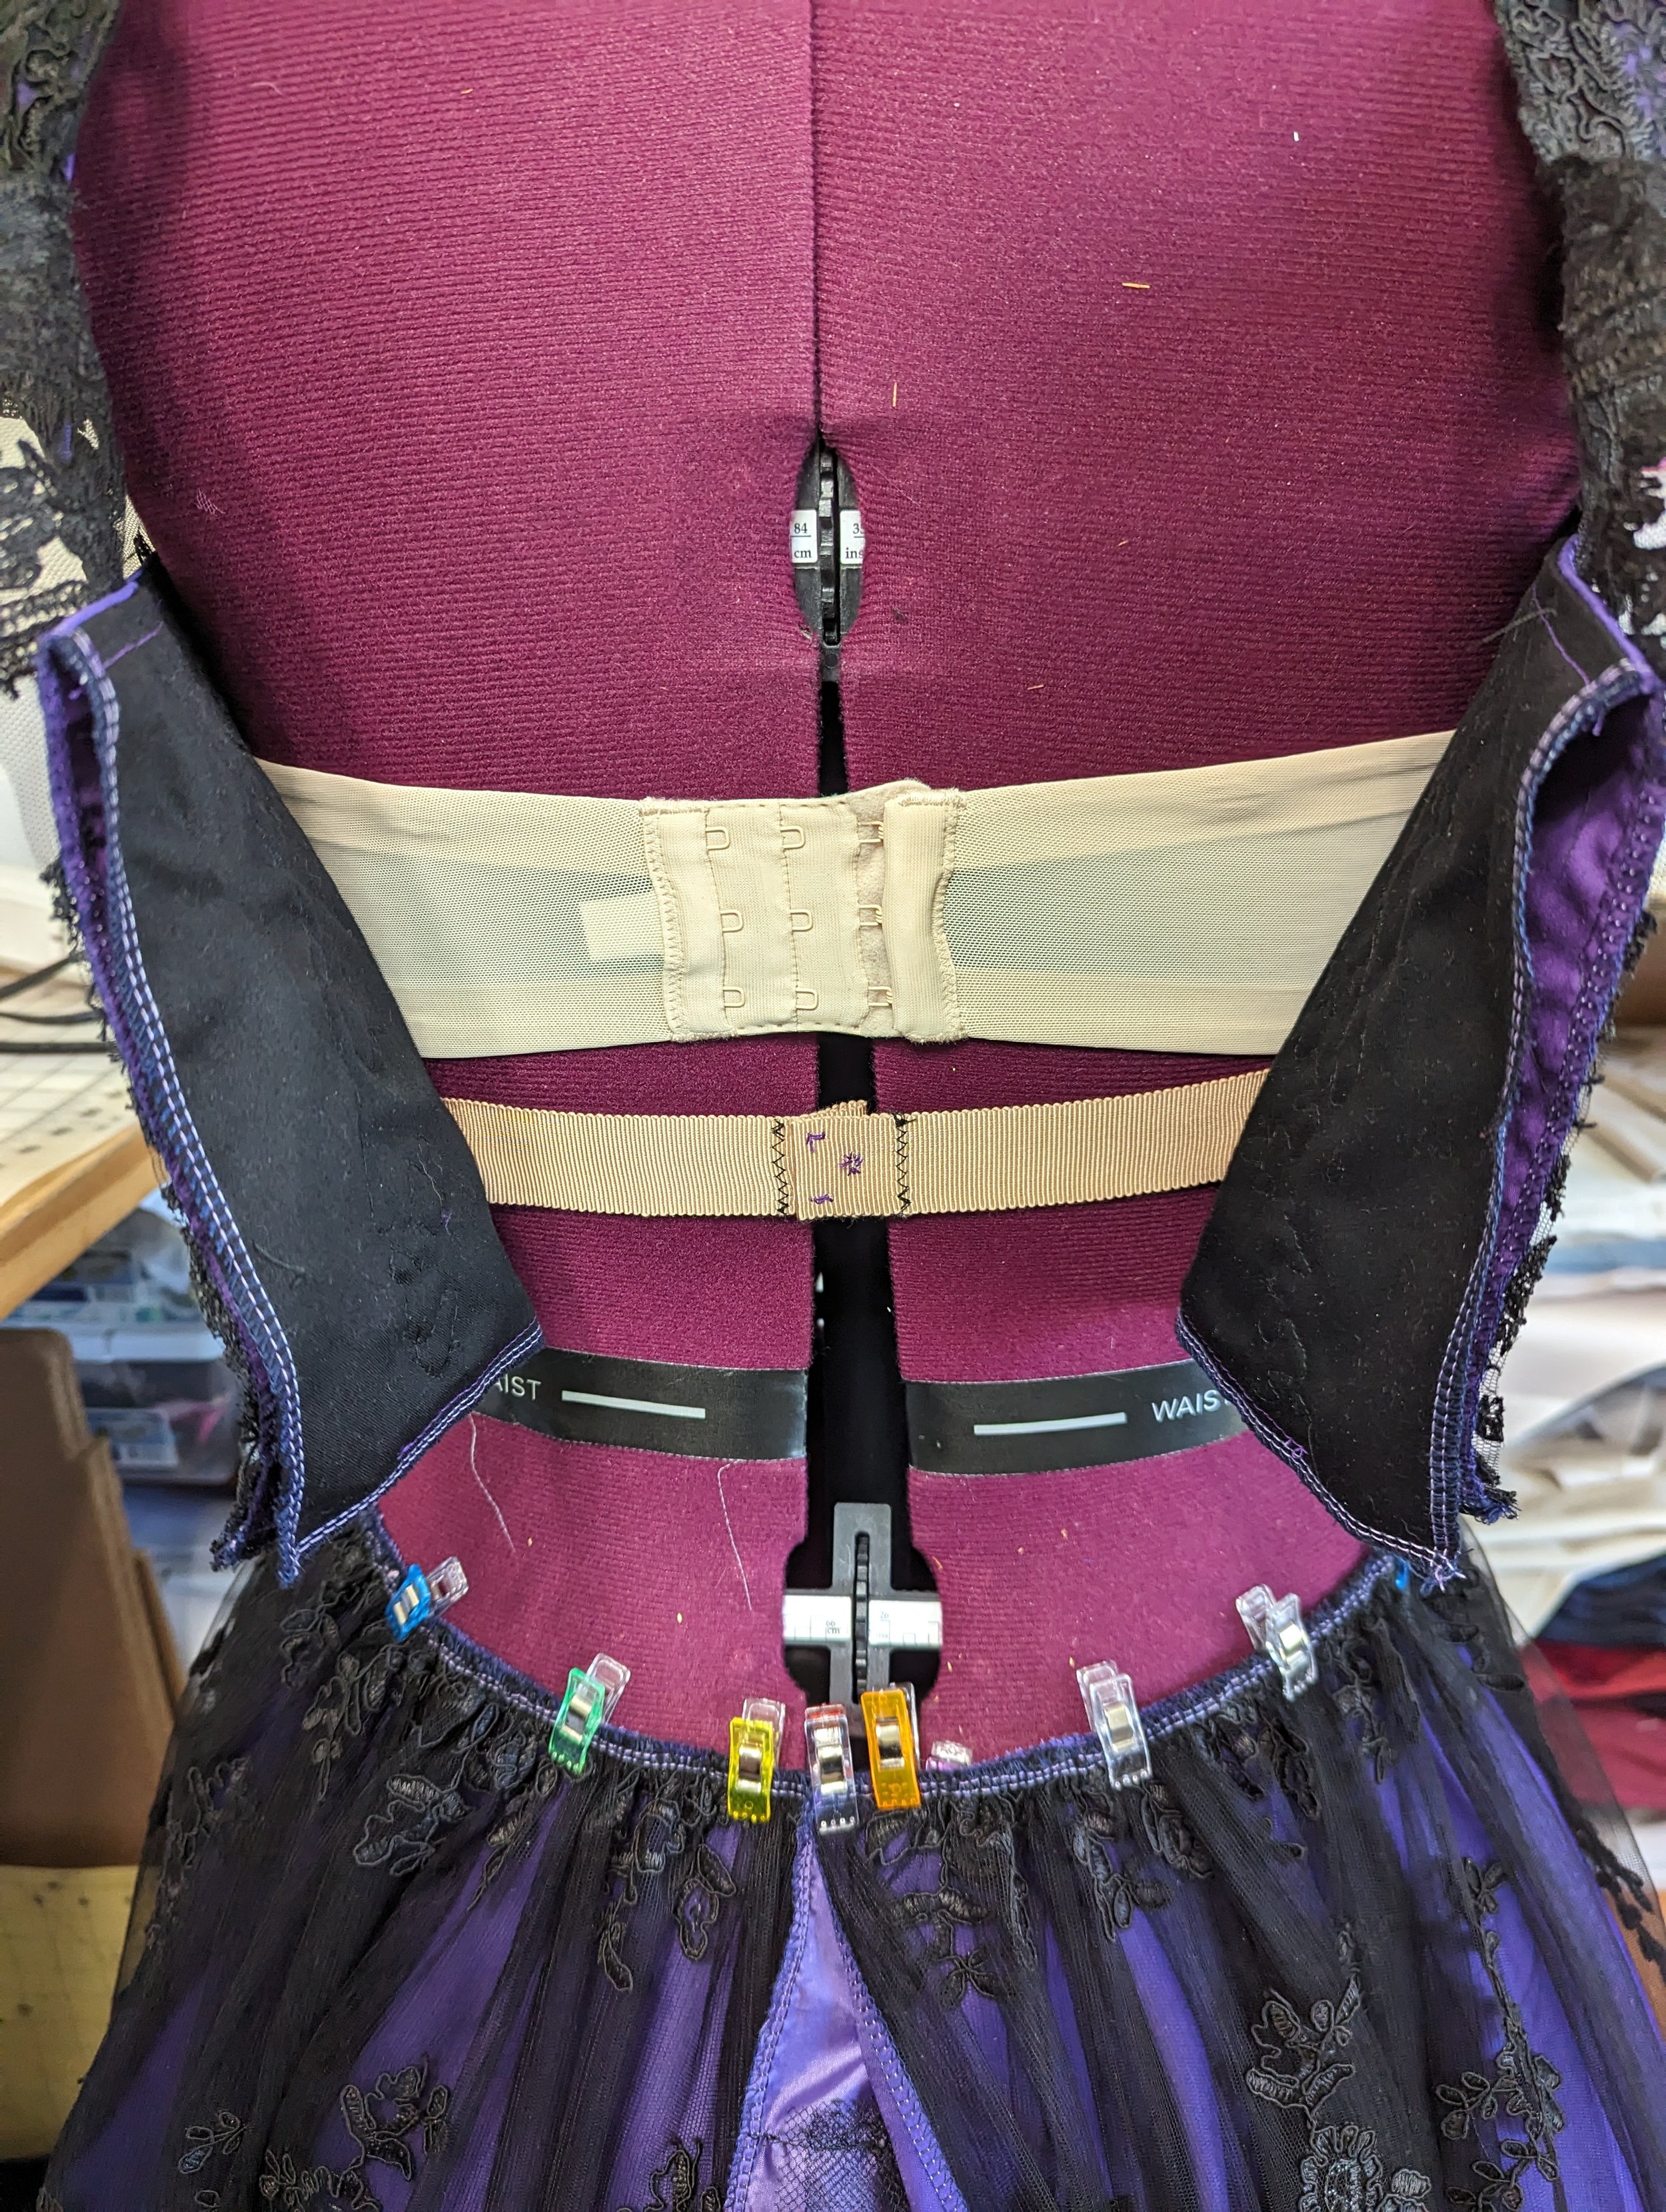
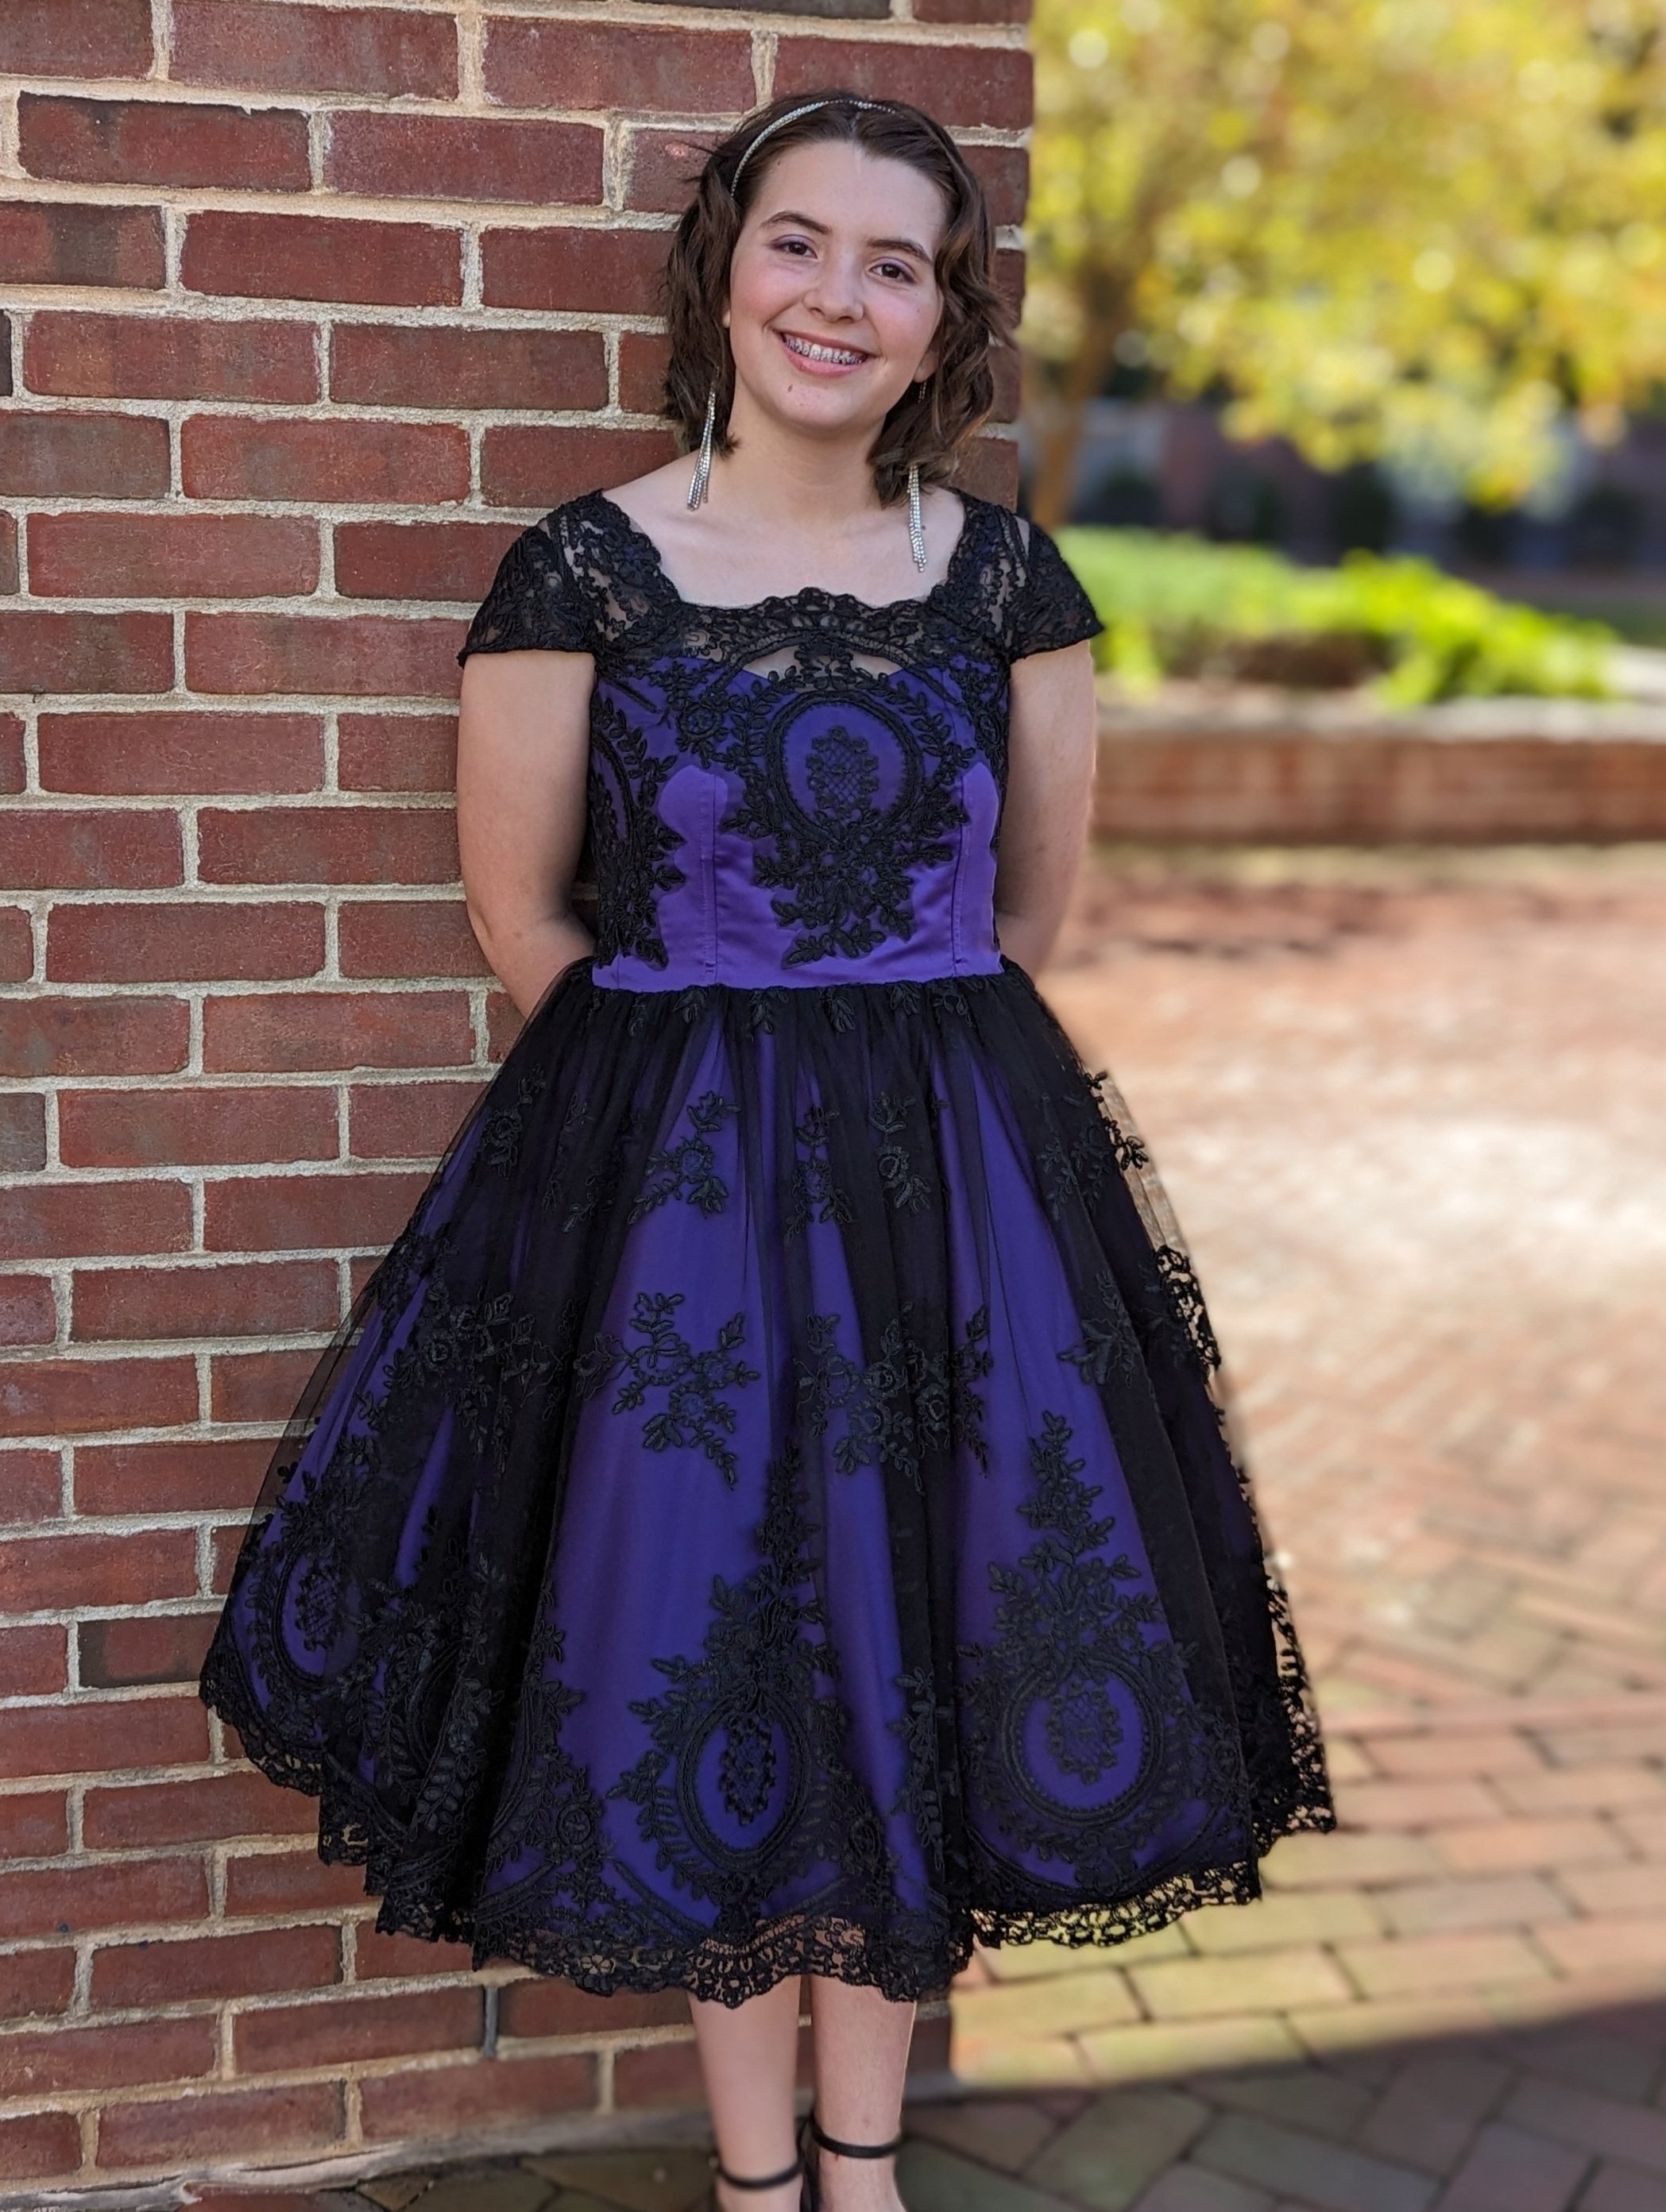
I forgot that one thing that delayed me was waiting to figure out the bra situation. We decided to buy a strapless bra online and this is what arrived. Apparently it’s tough finding a strapless bra that is not a pushup bra! I returned this one and we thankfully found one at Target. After that, I put it on the dress form and made the final purple bodice. I also decided last minute to add spaghetti straps. I wanted to have something to build the lace sleeves from. I also didn’t trust my bodice and waist stay to hold up the weight of the dress, though they probably would have been fine, especially with the lace overlay. Something about watching my daughter jump up and down with the strapless test bodice and skirt pinned together, telling me, “it stays up great!” while I watched it slip incrementally down, down, down . . . I added the straps and it ended up being very helpful with the lace and my peace of mind!
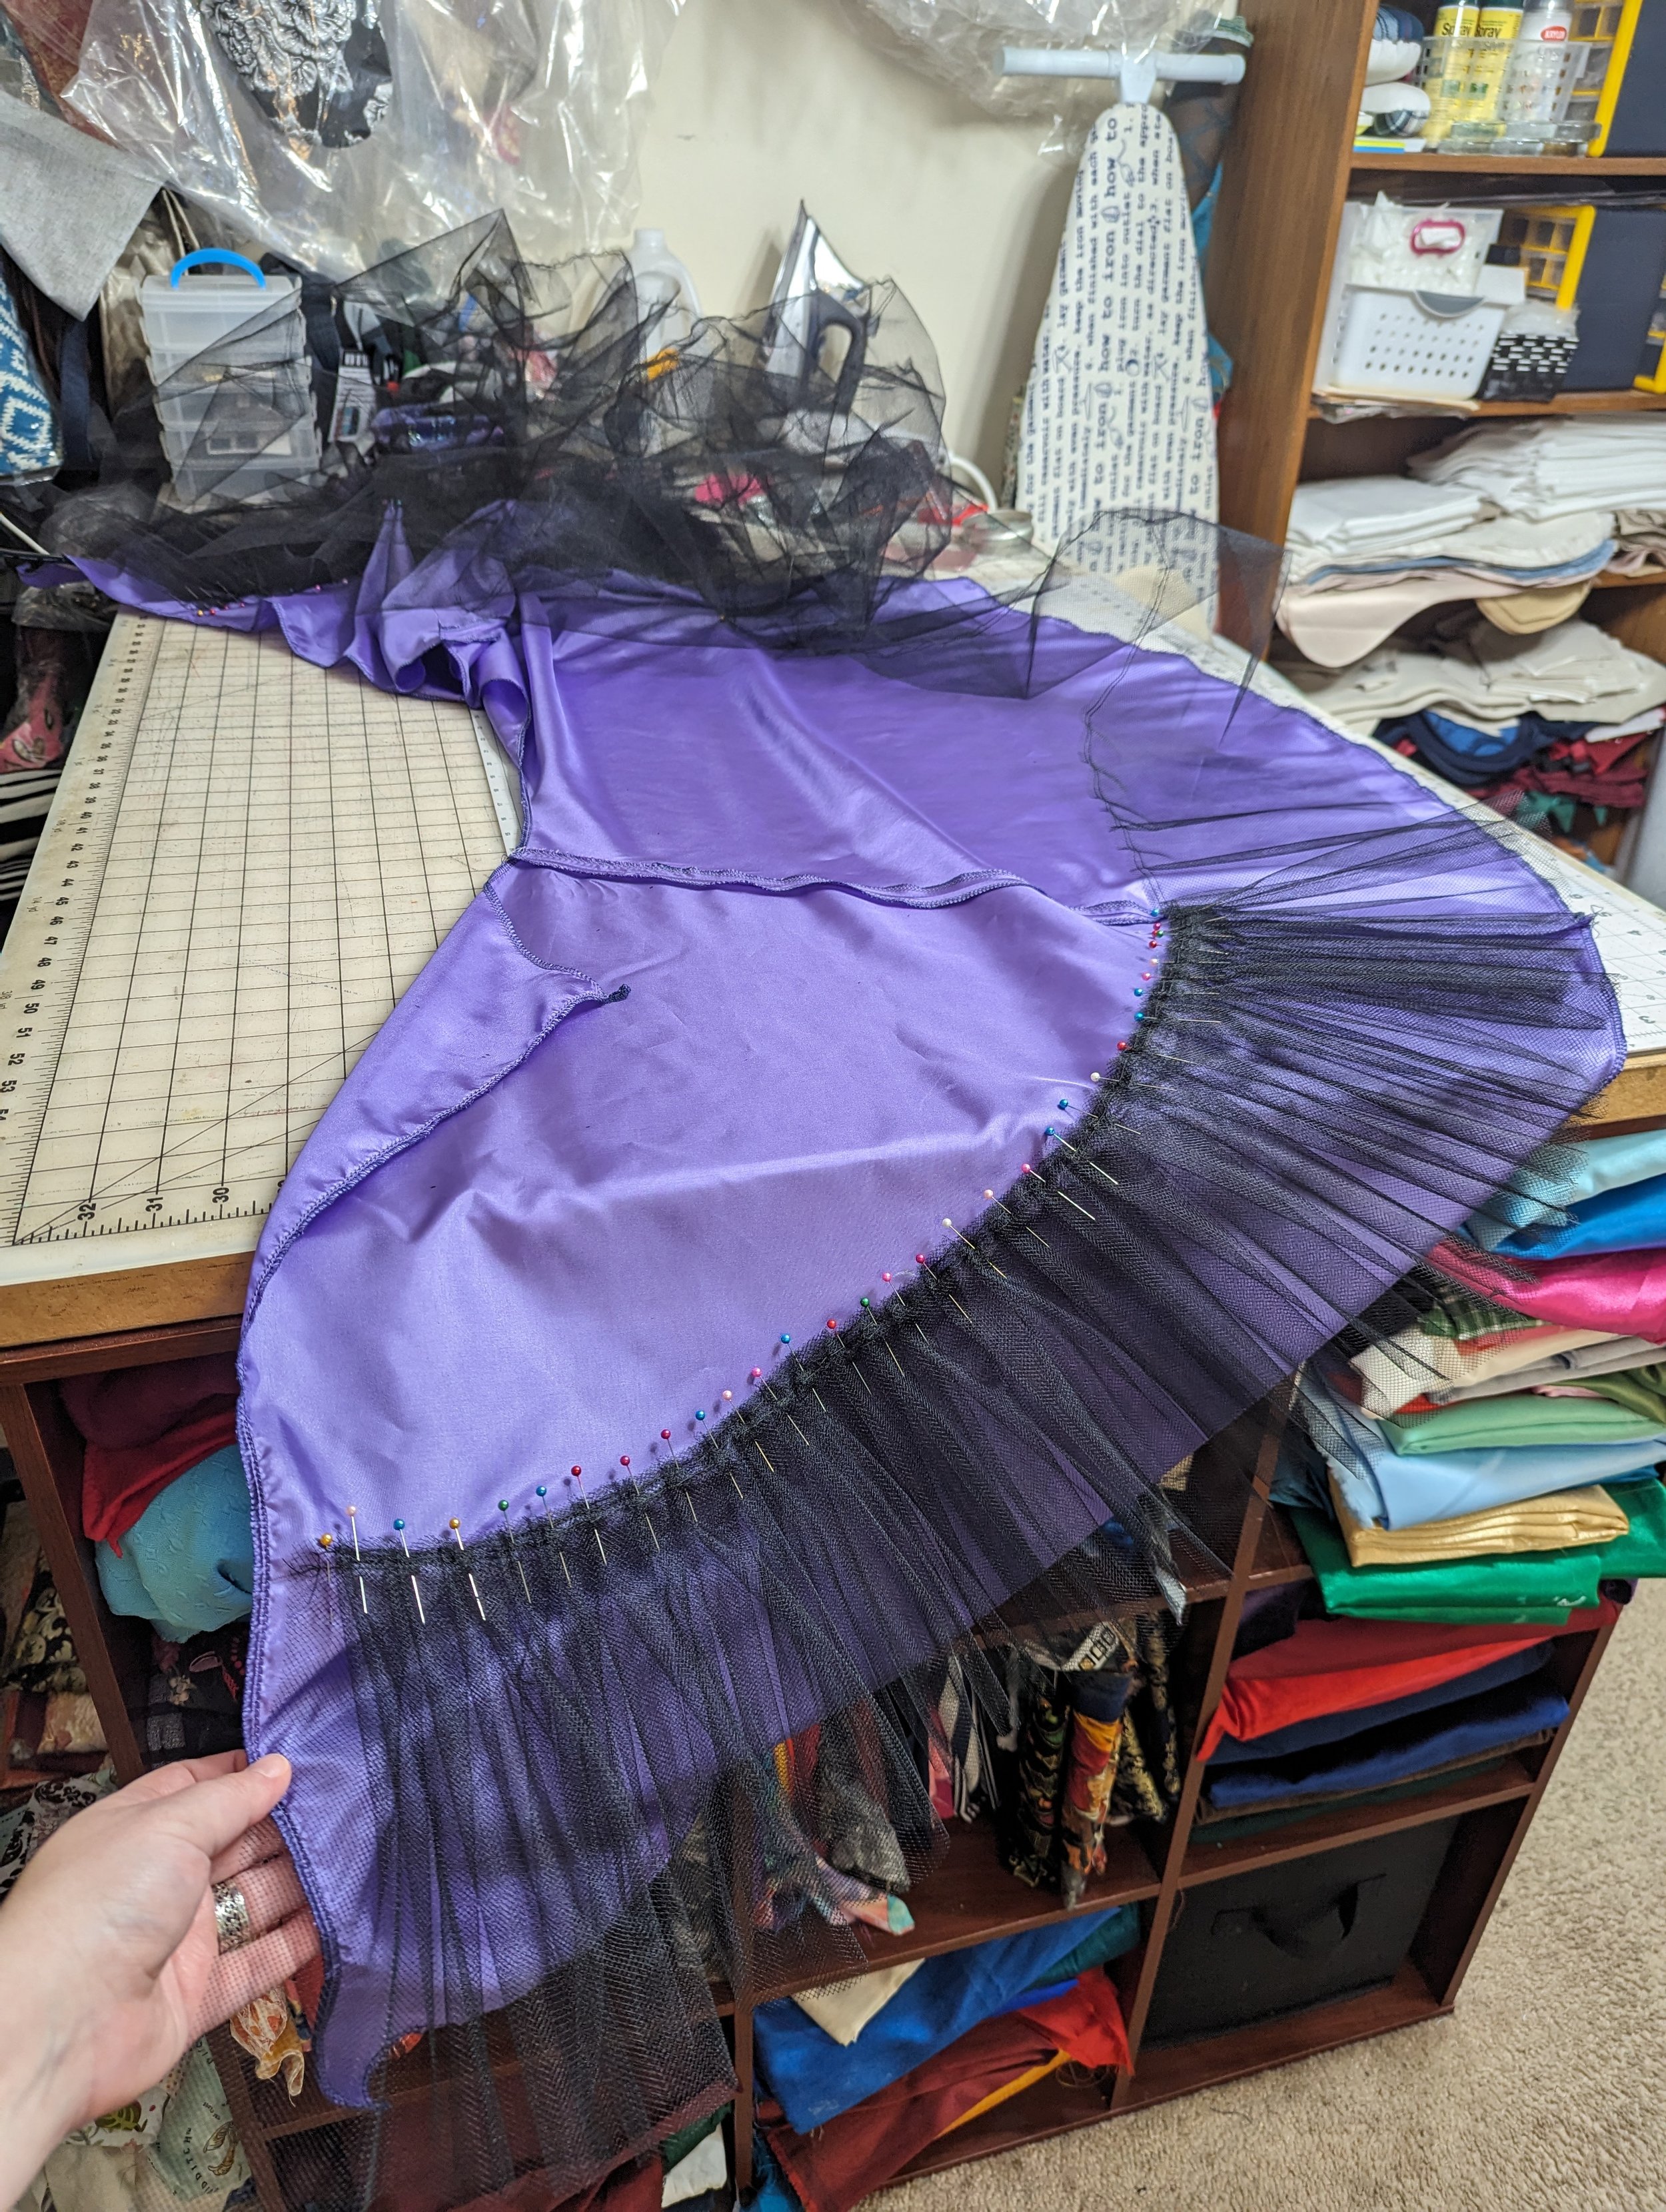
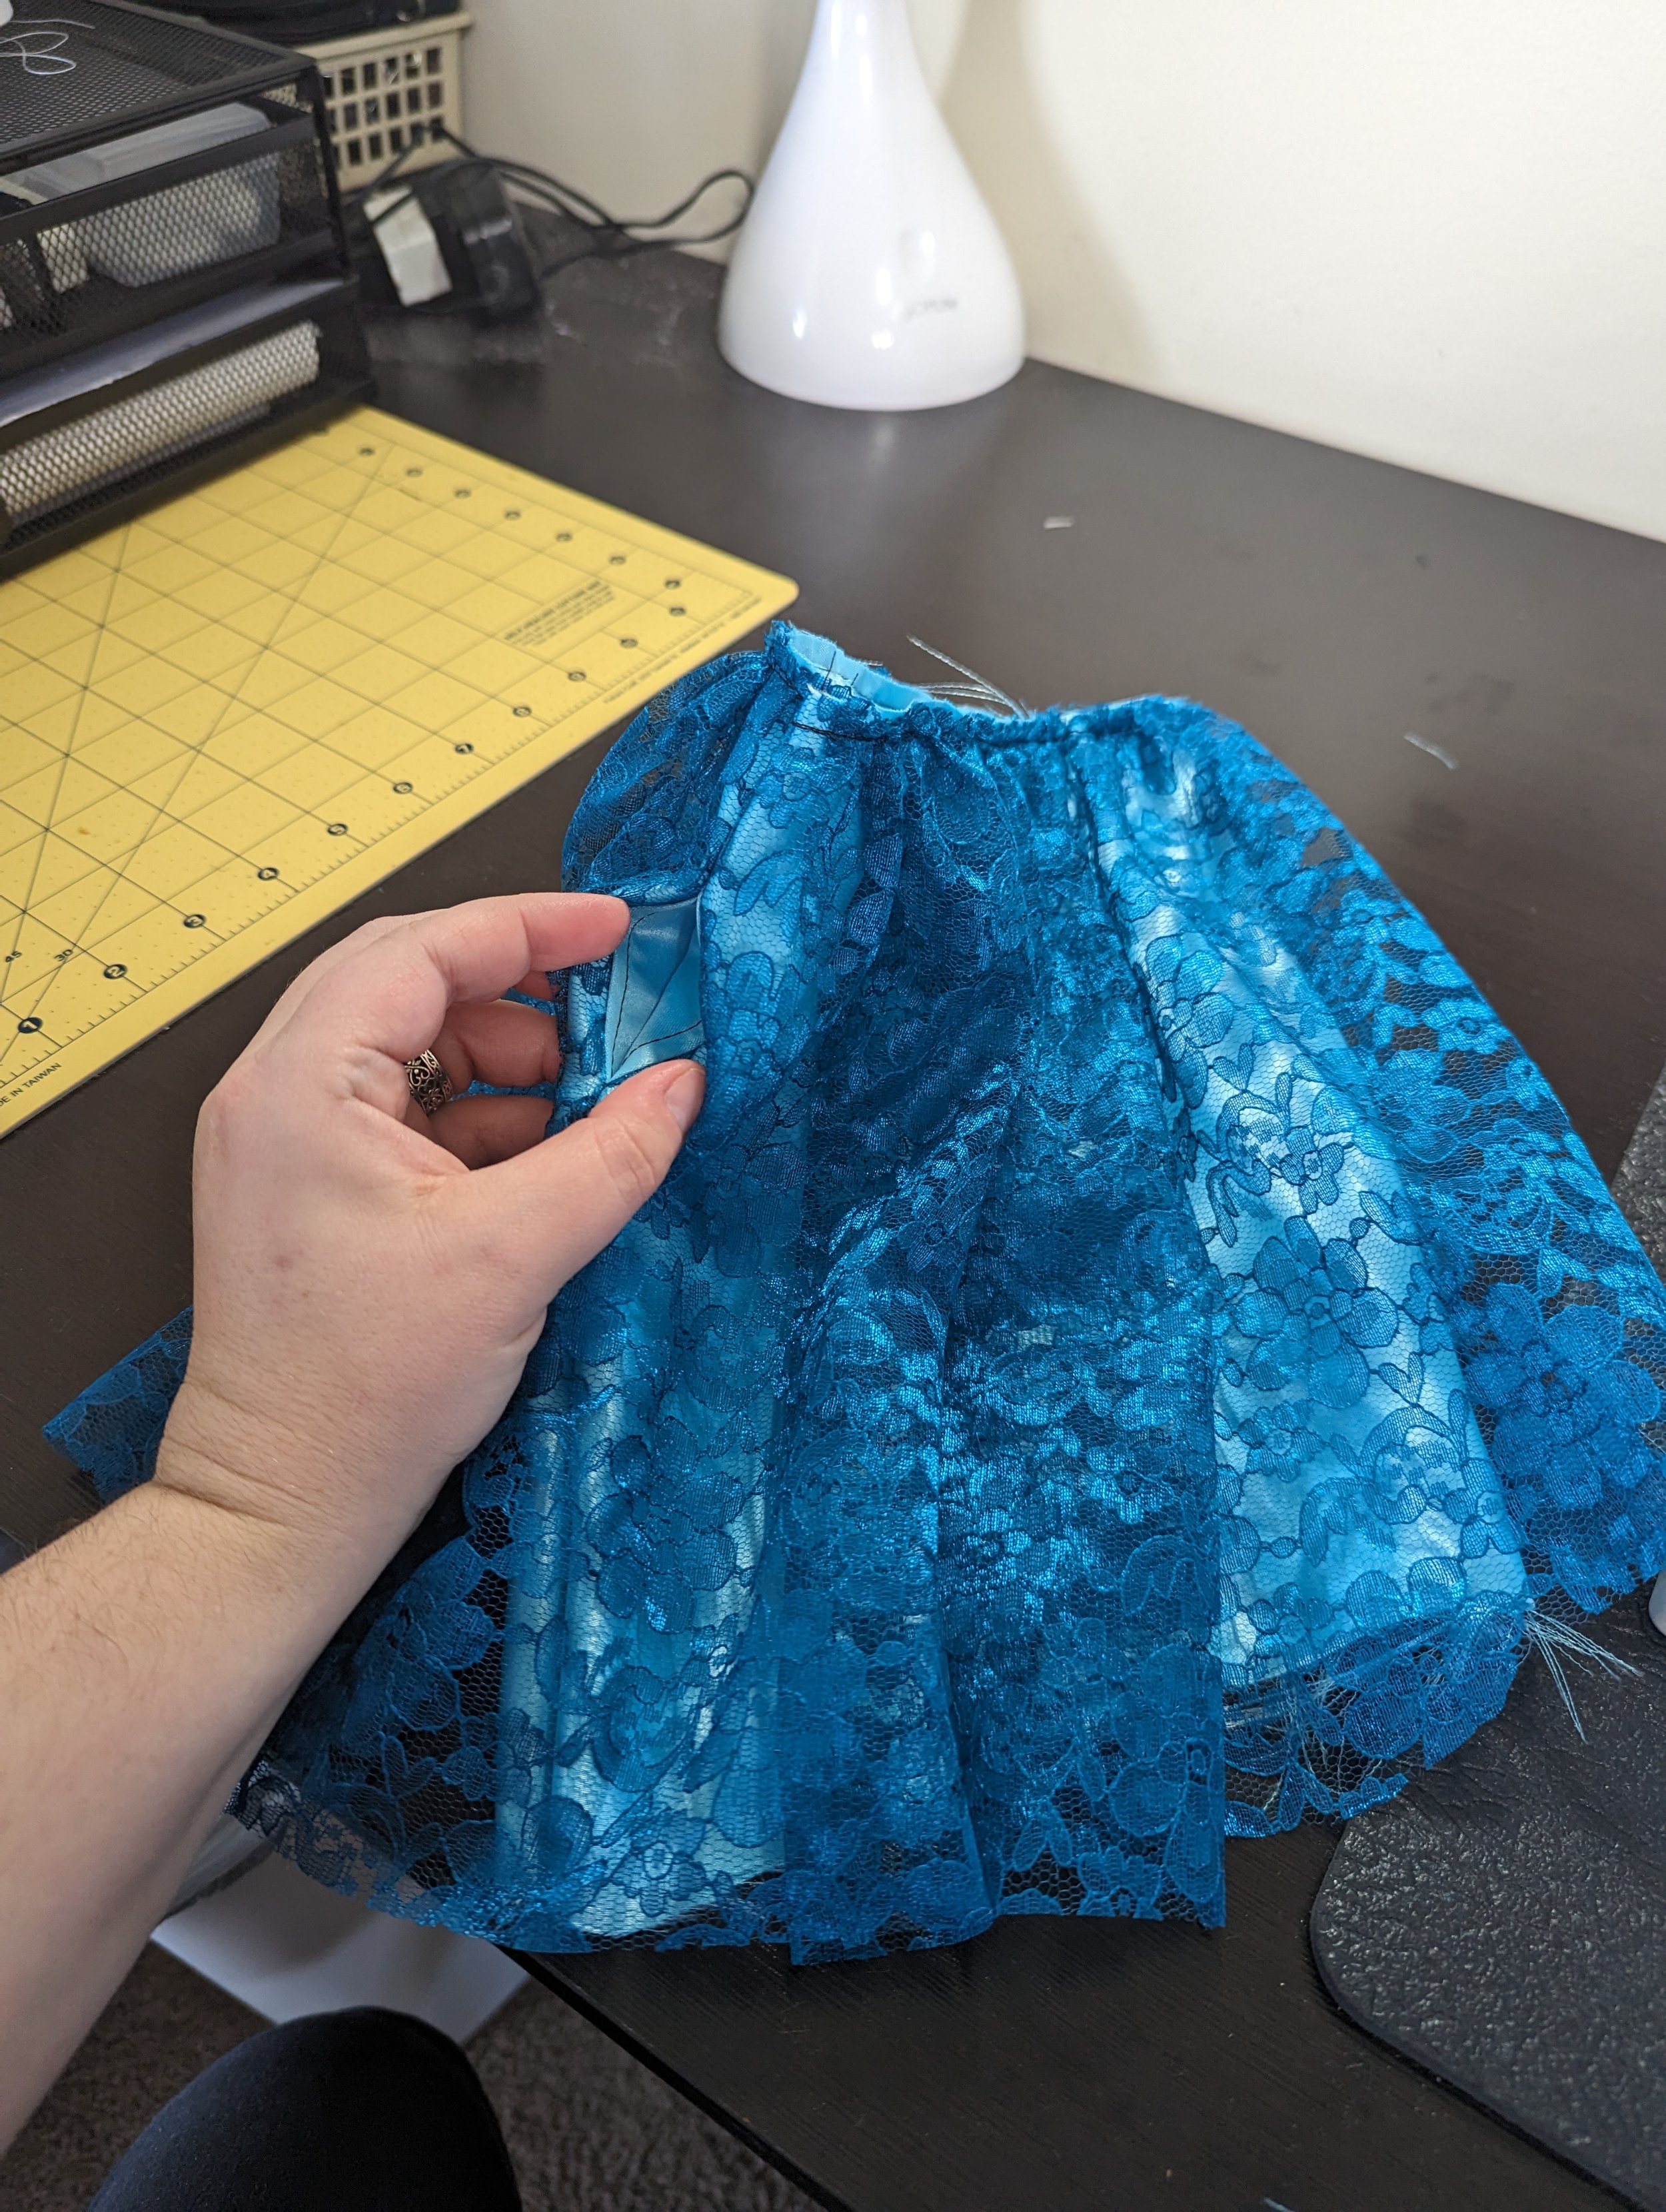
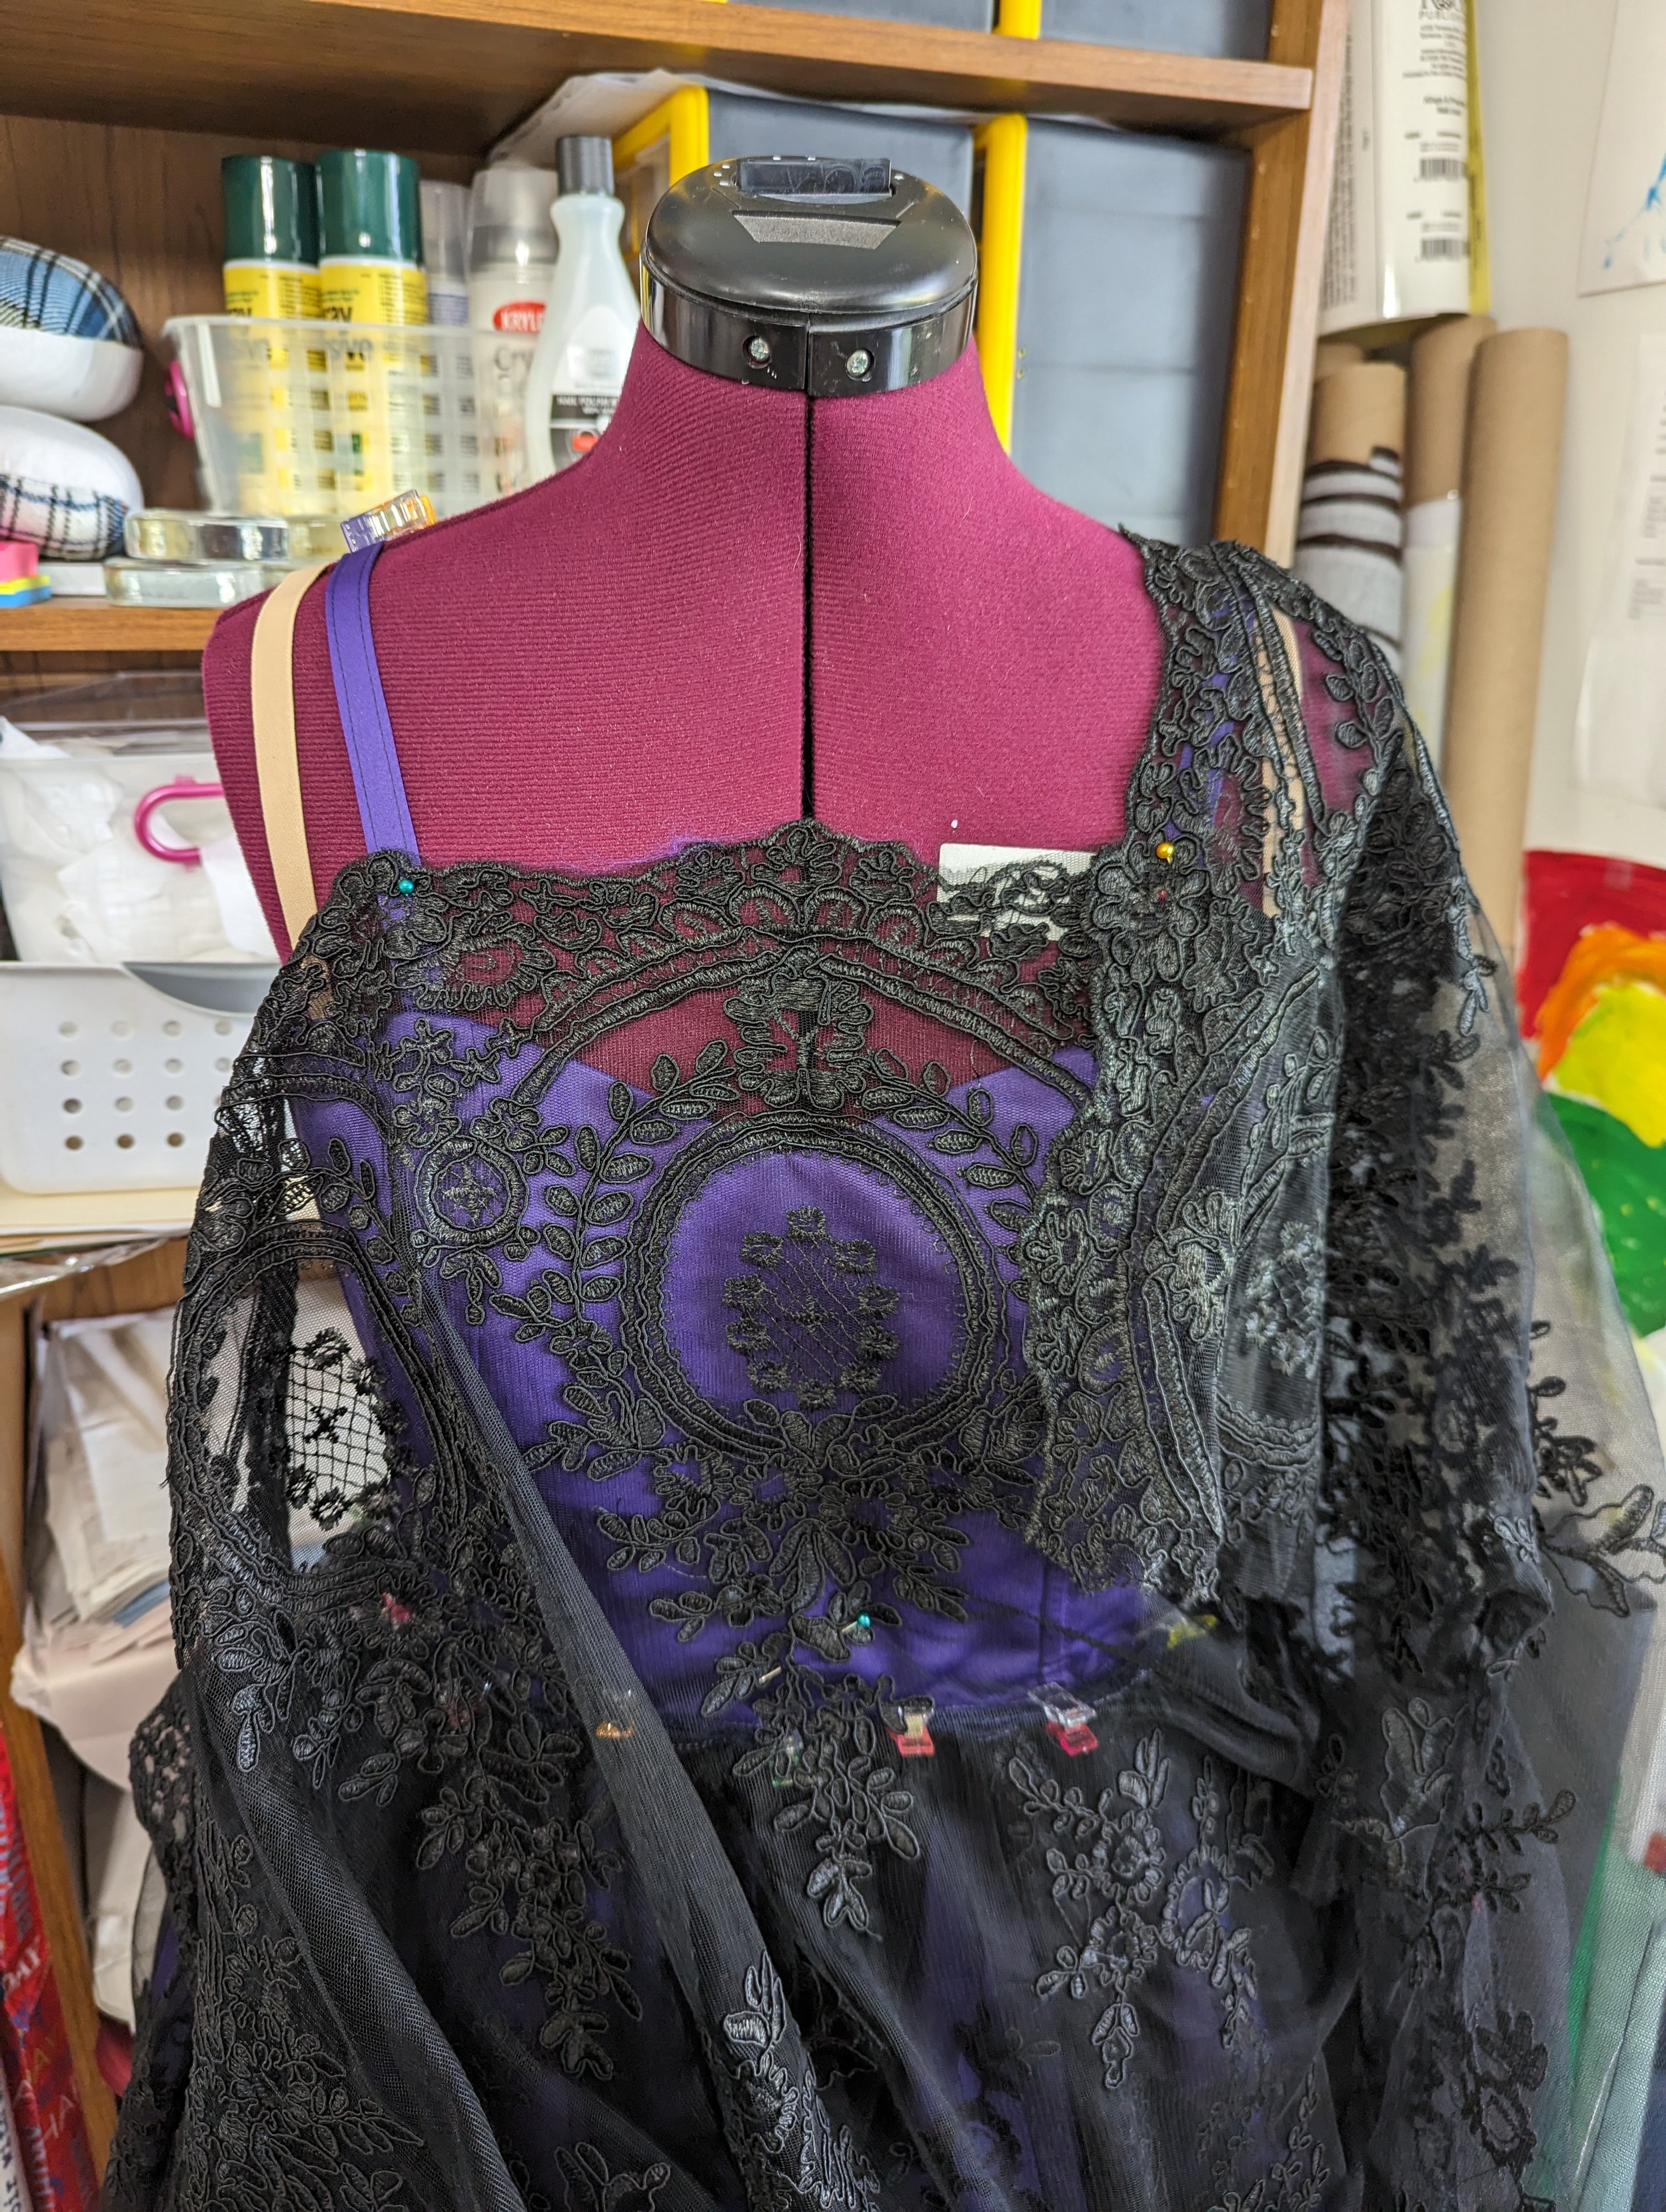
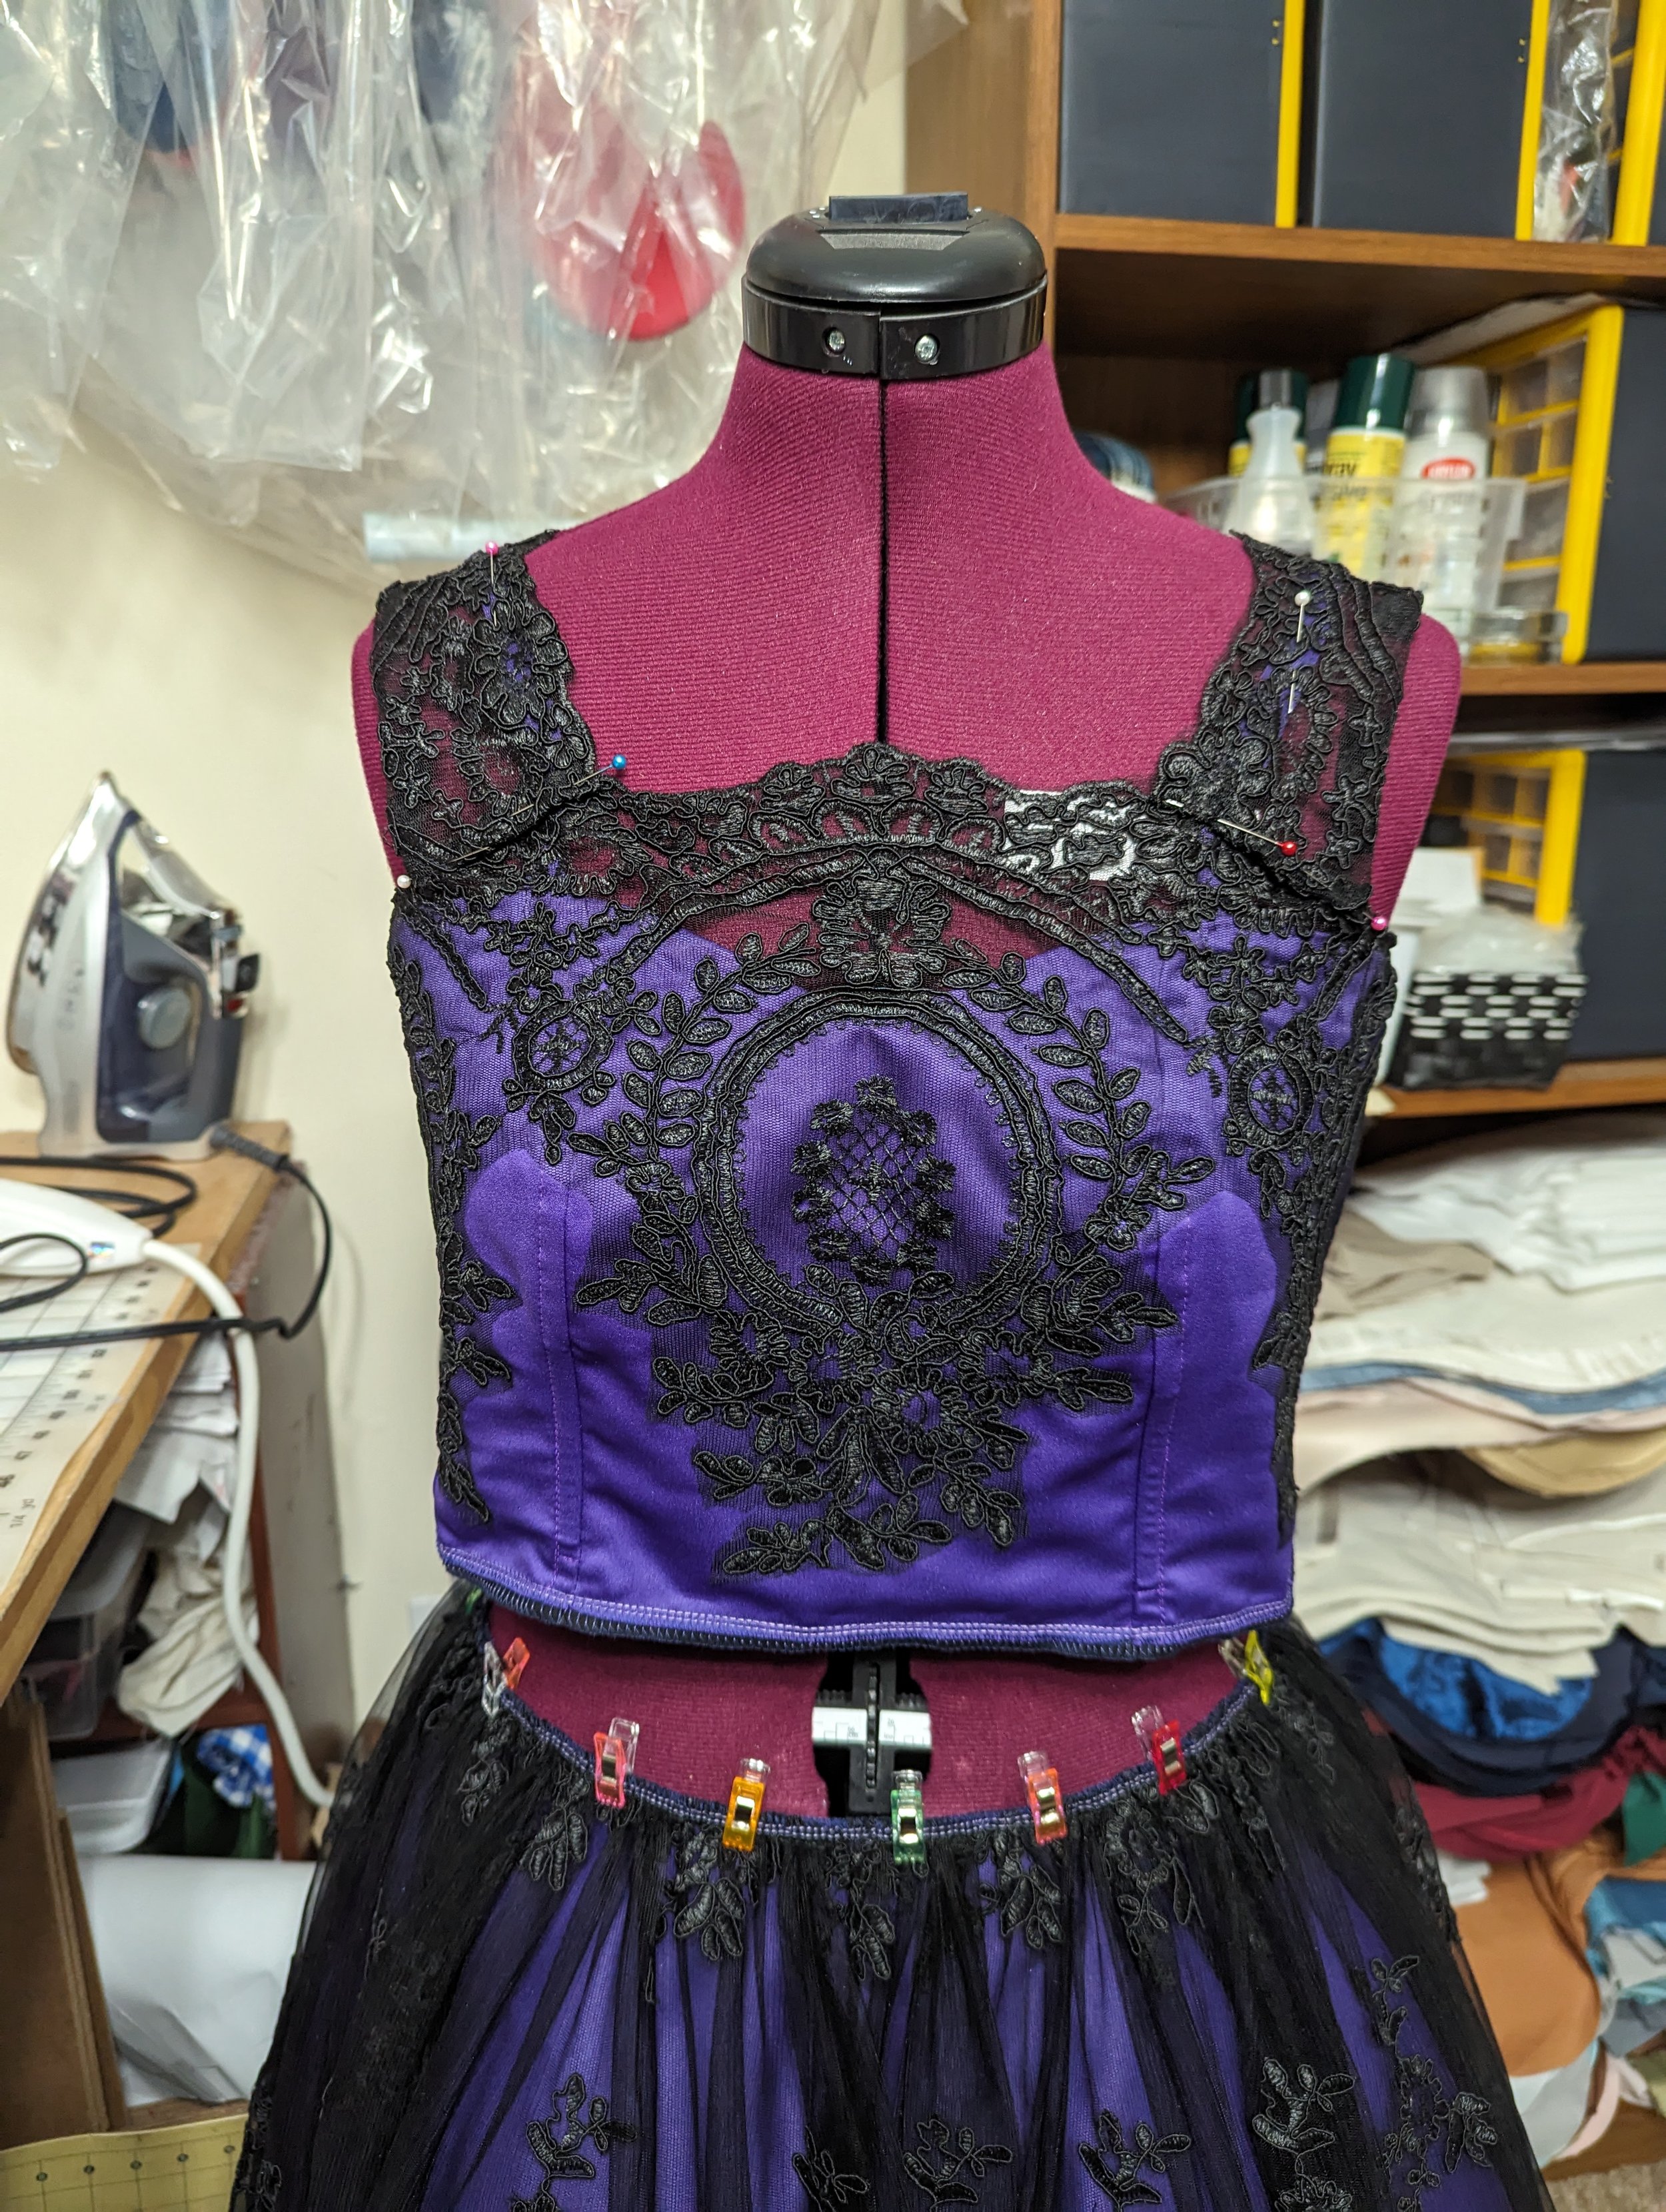
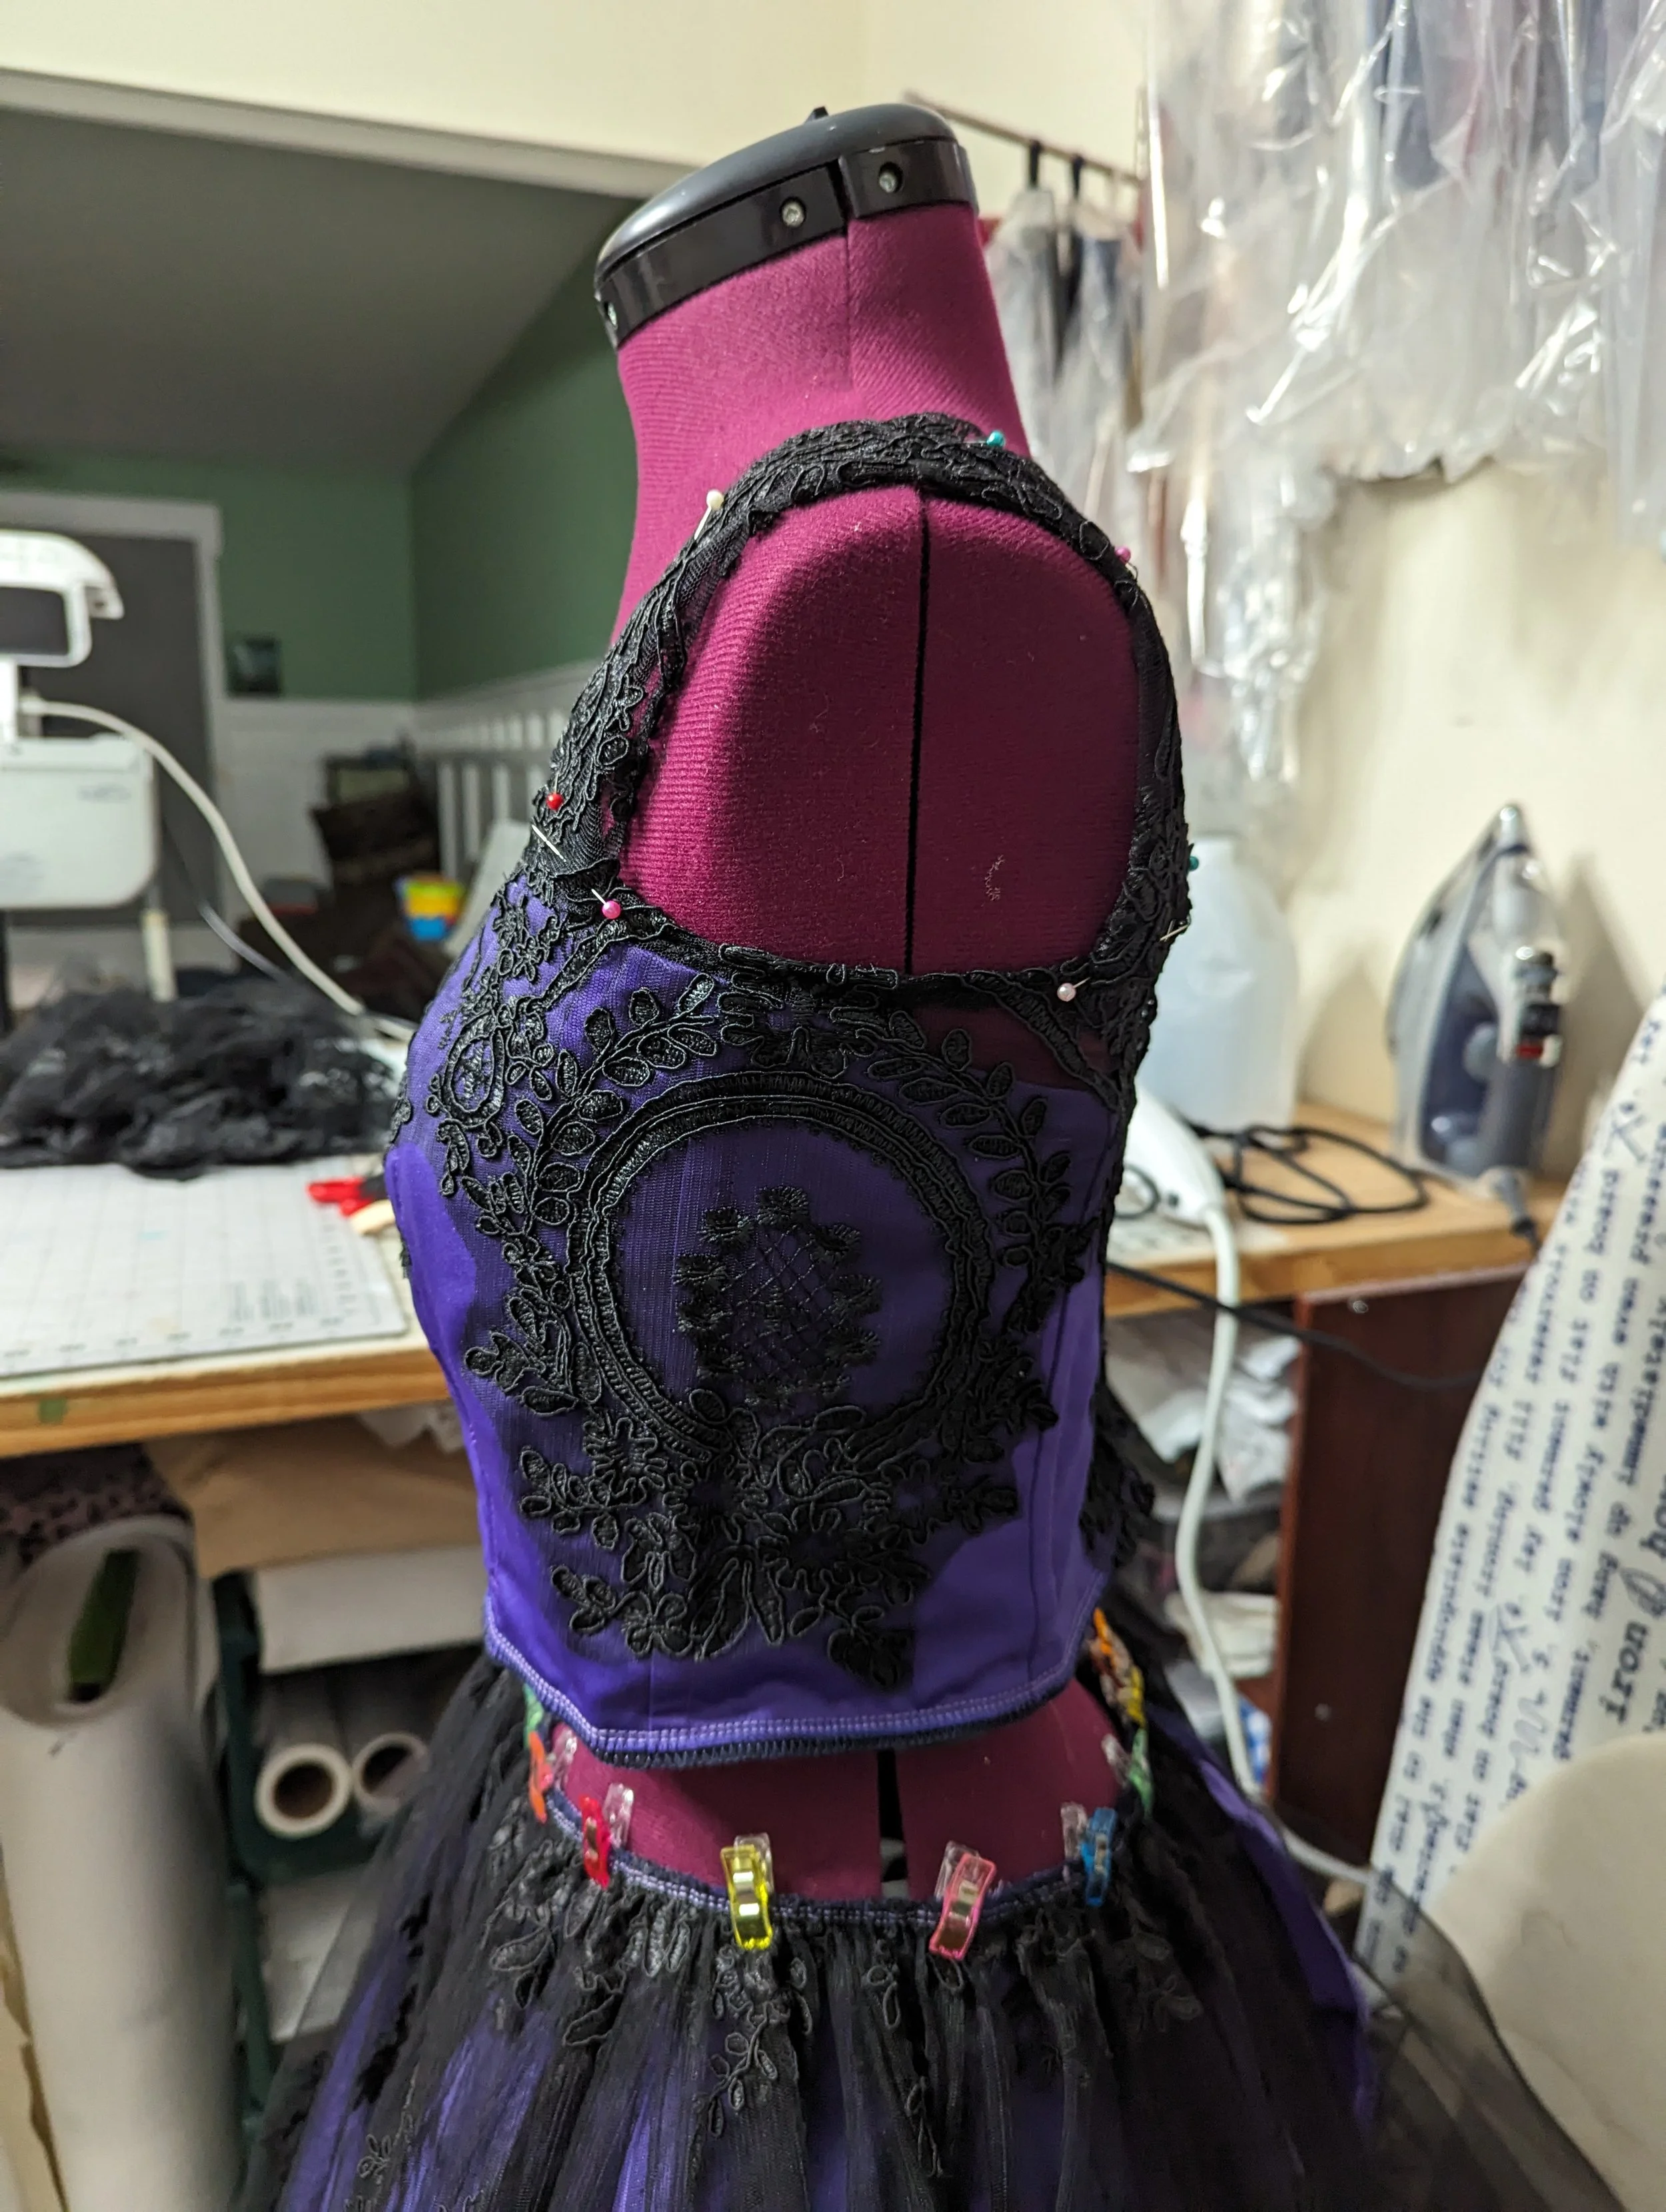
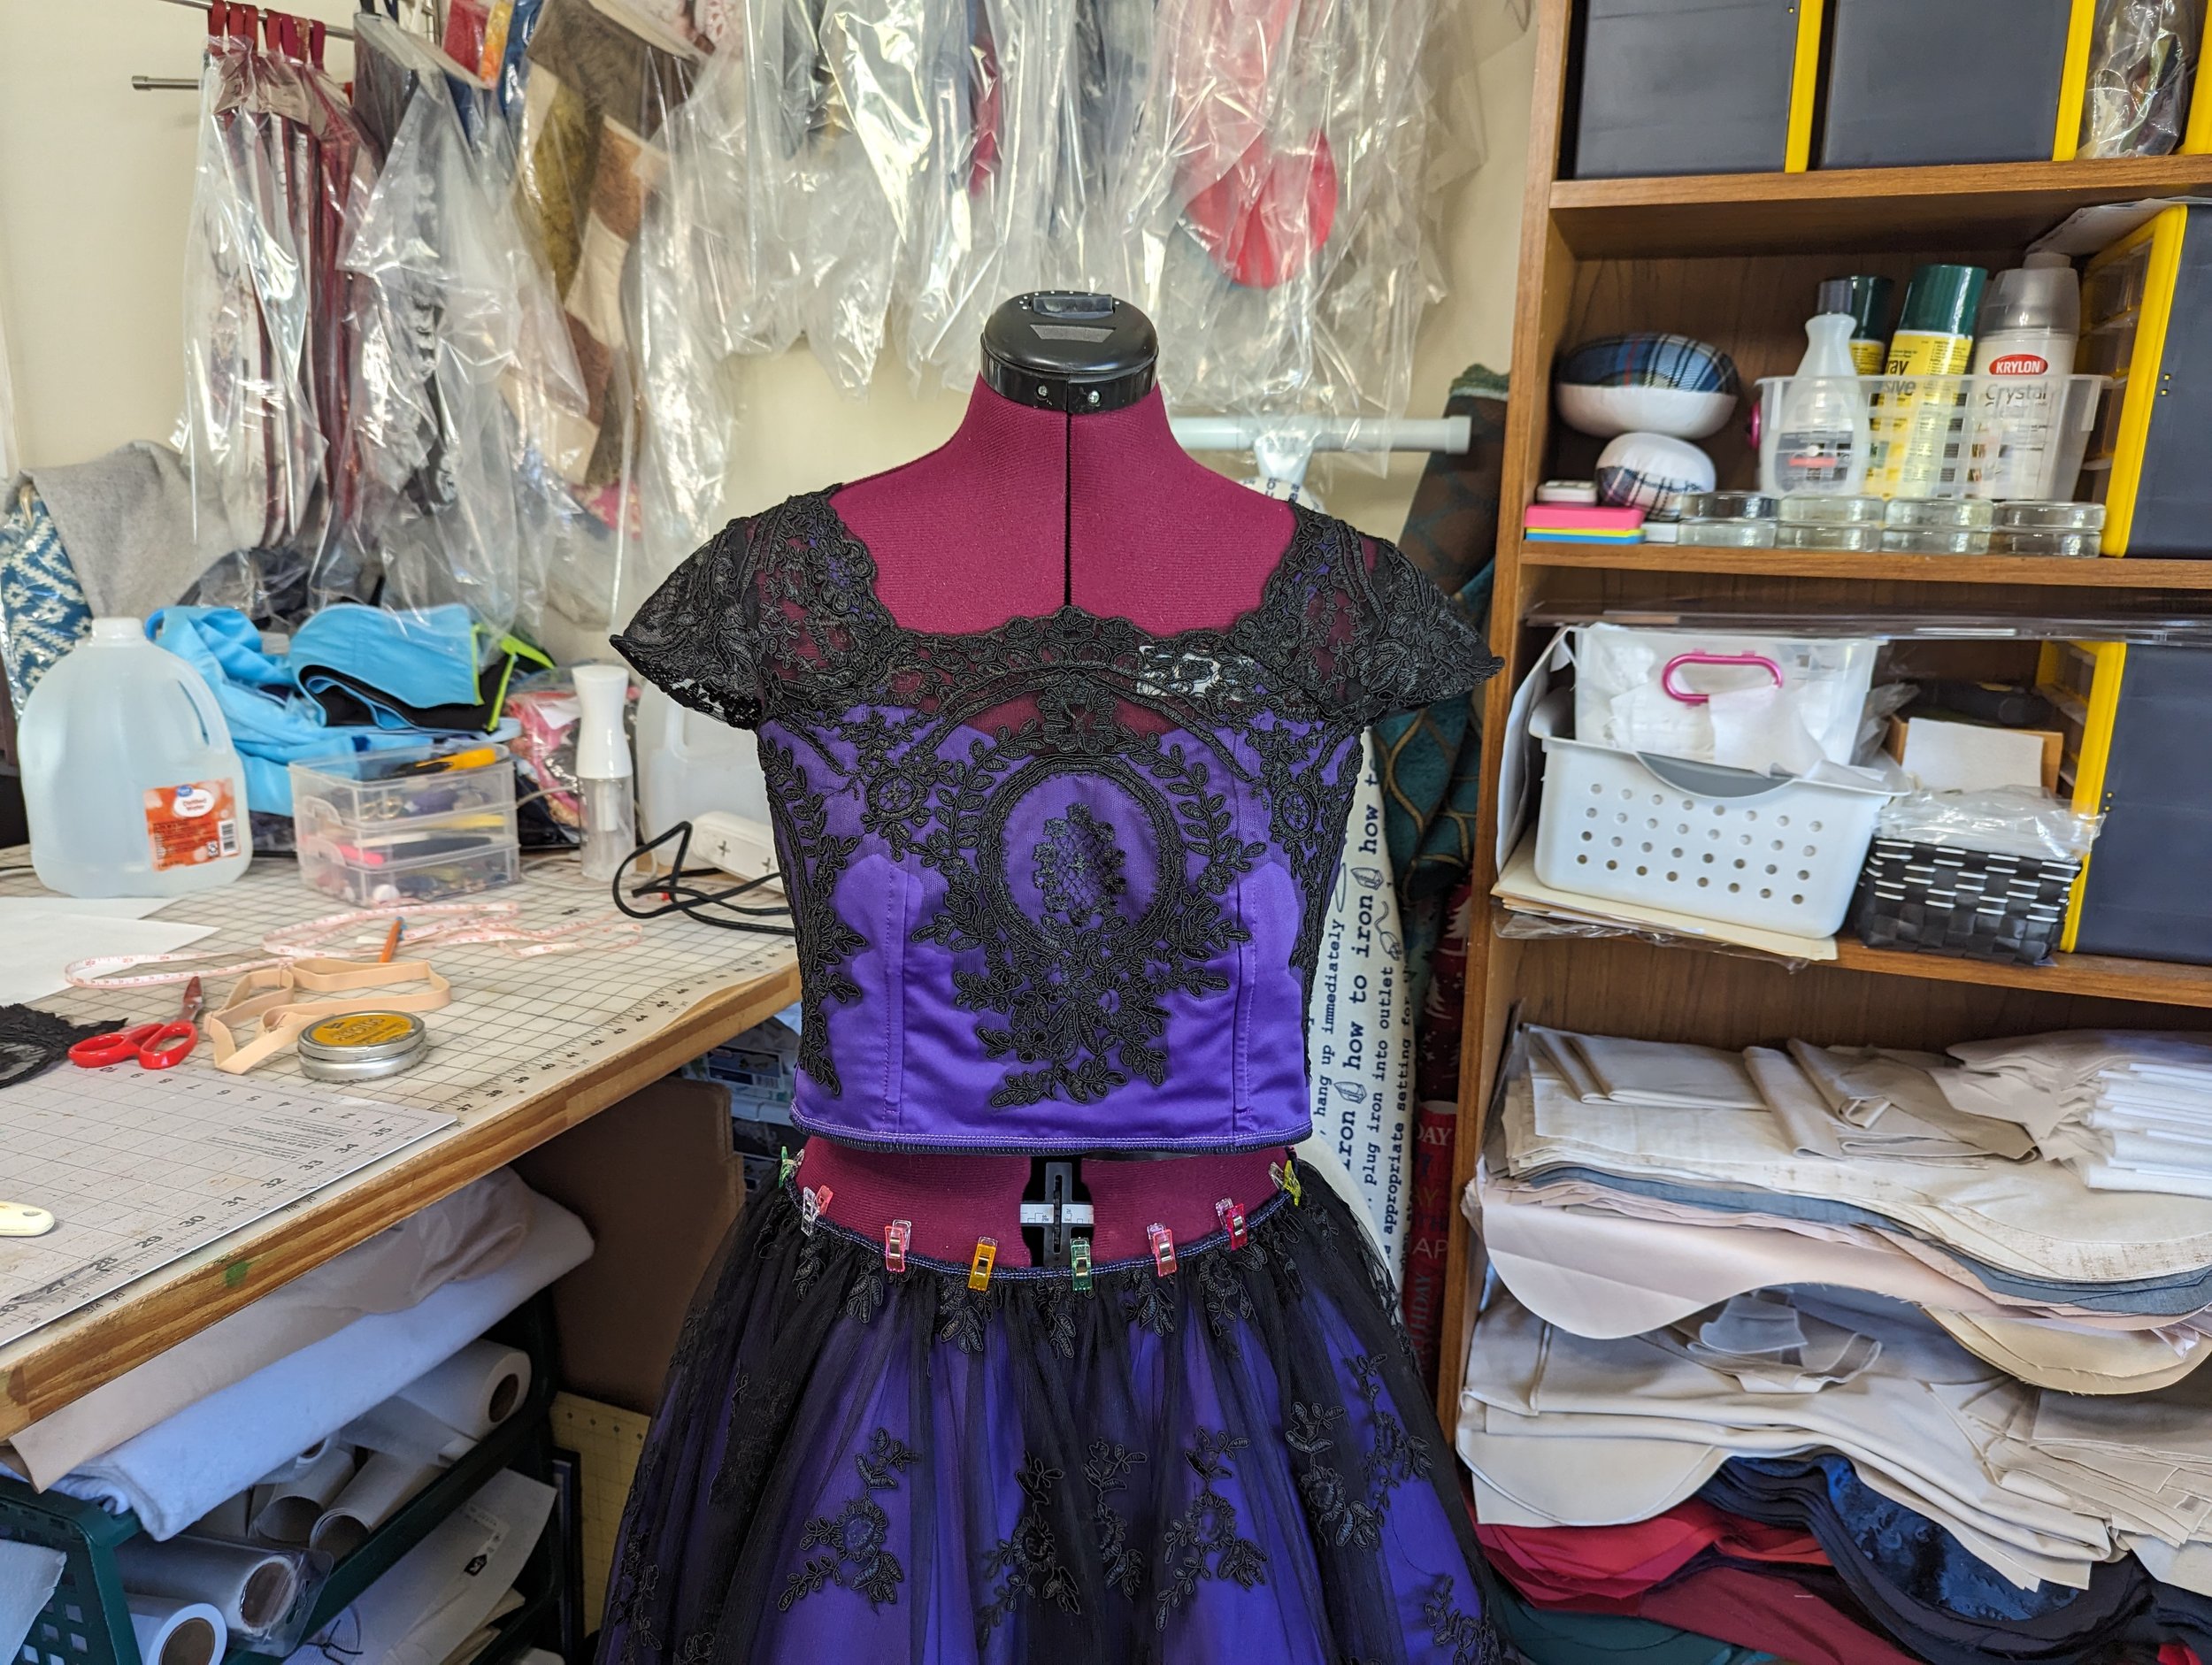
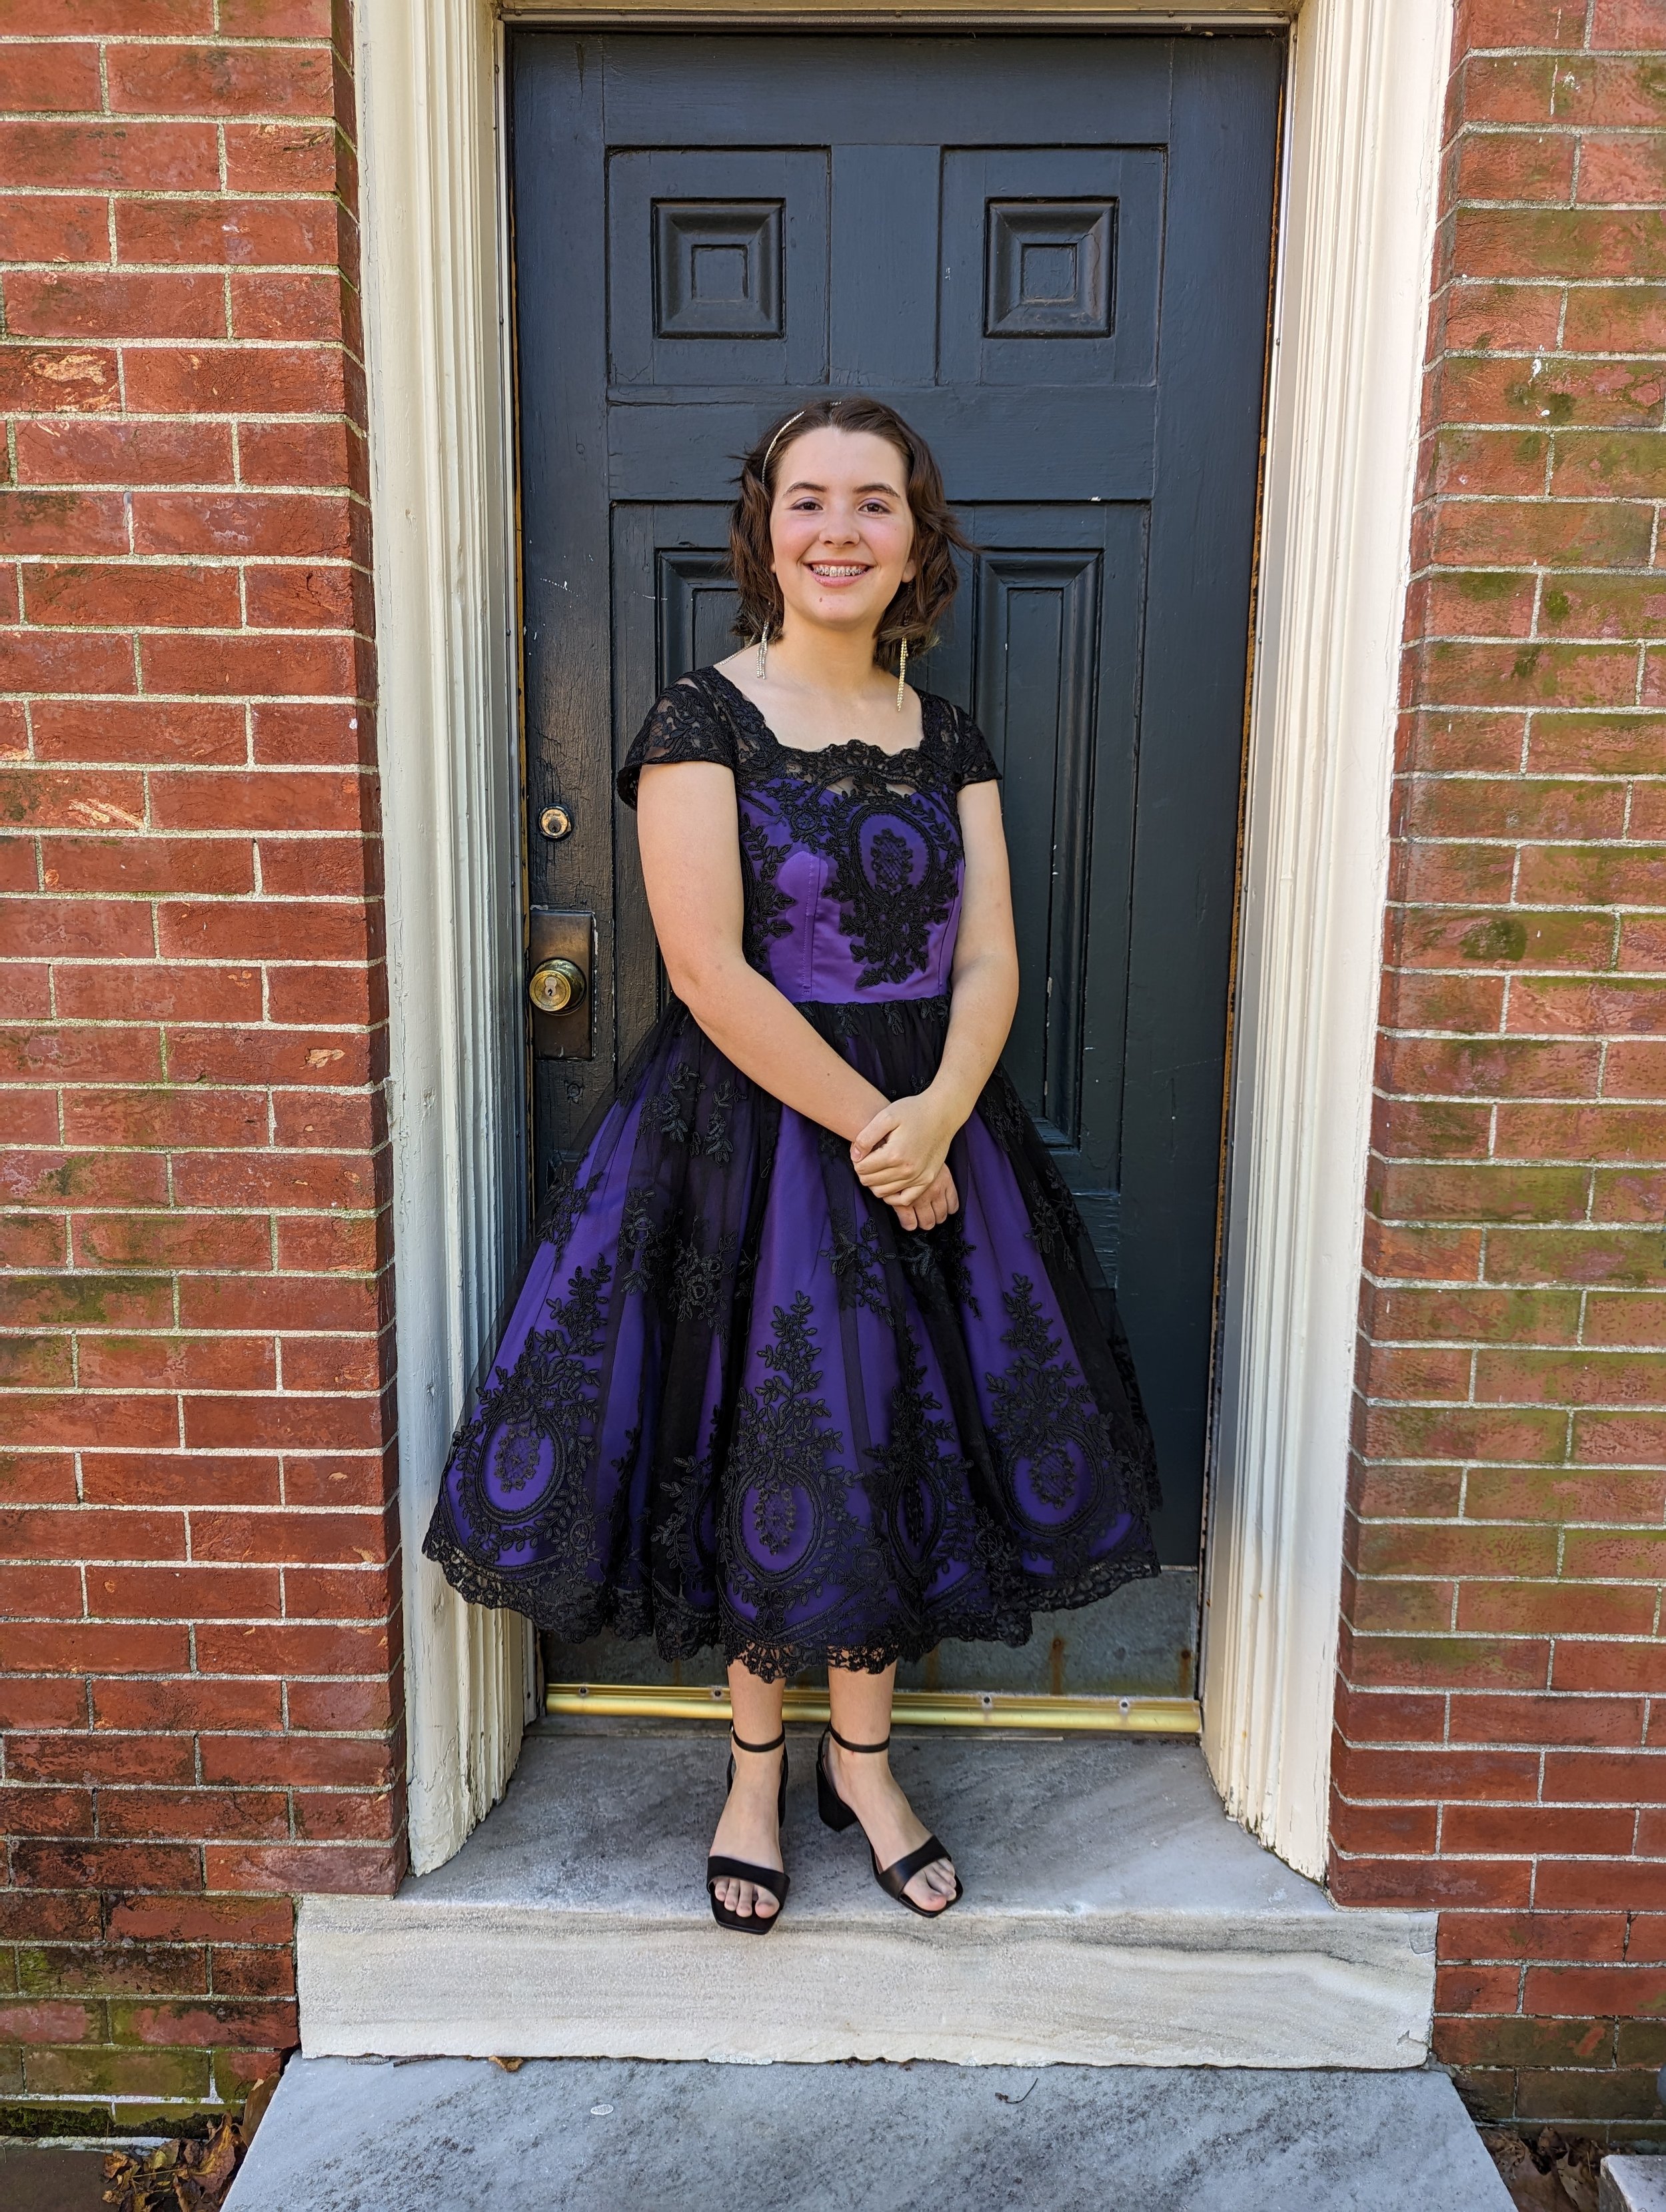
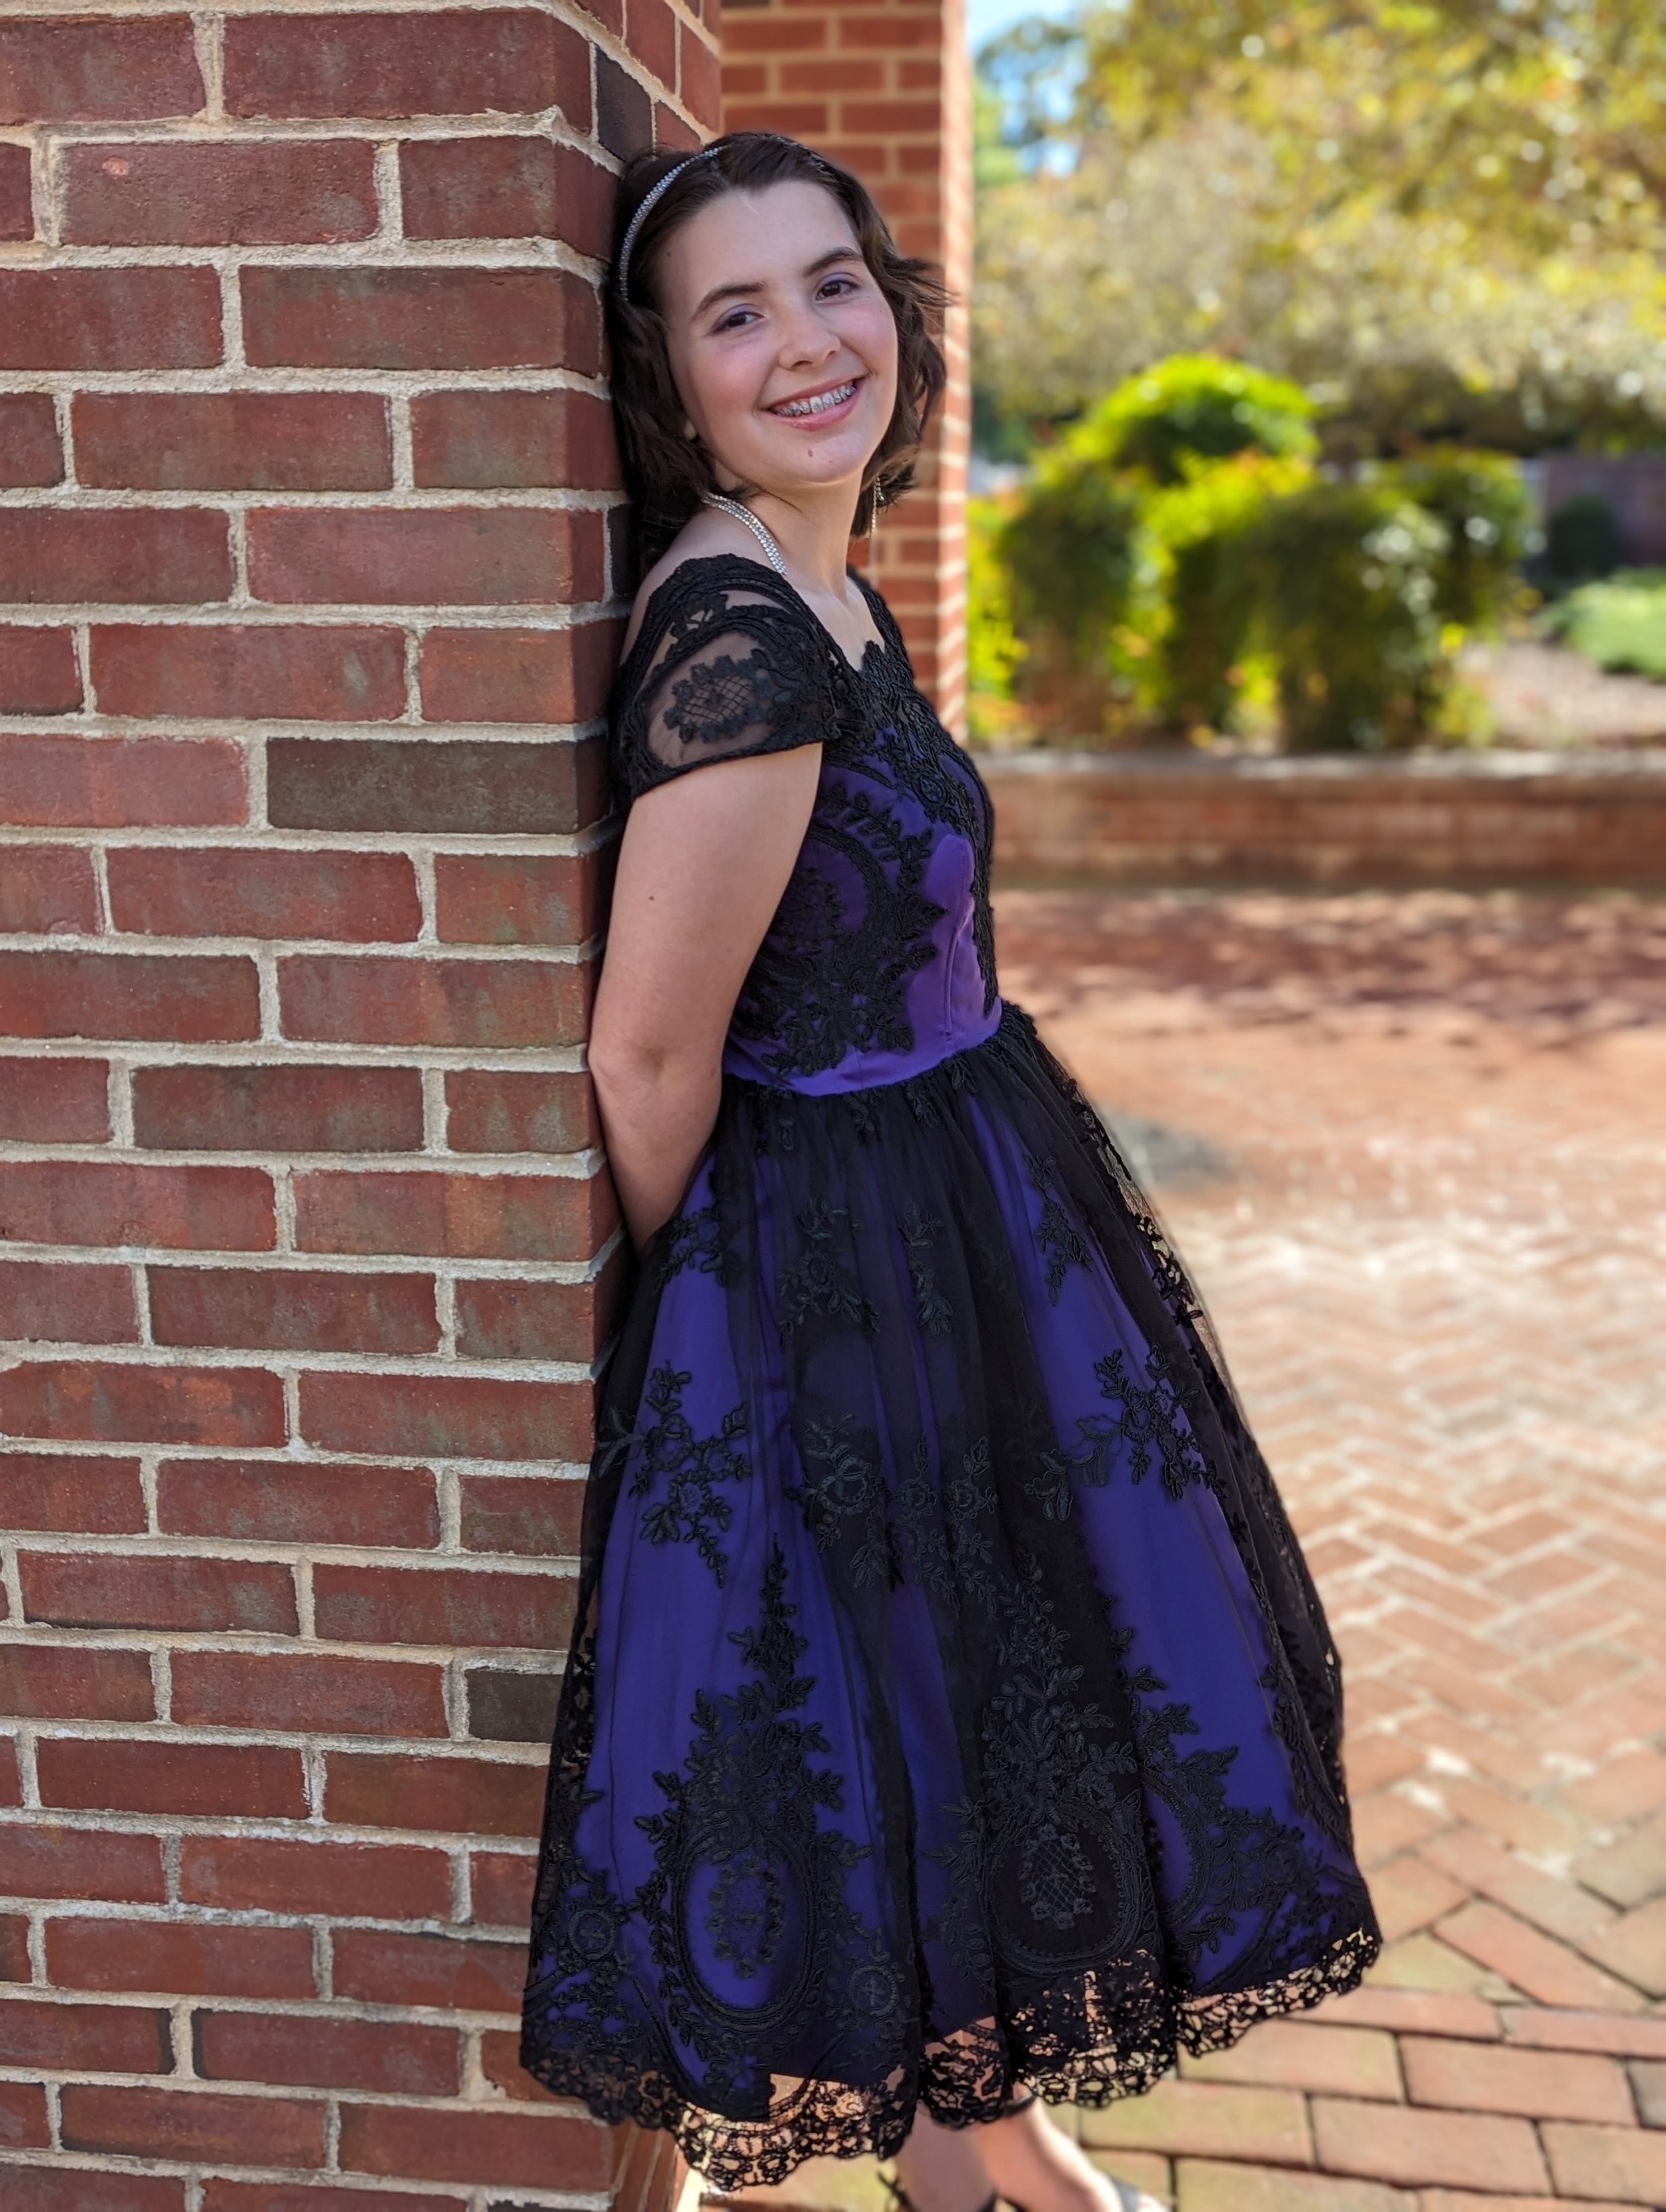
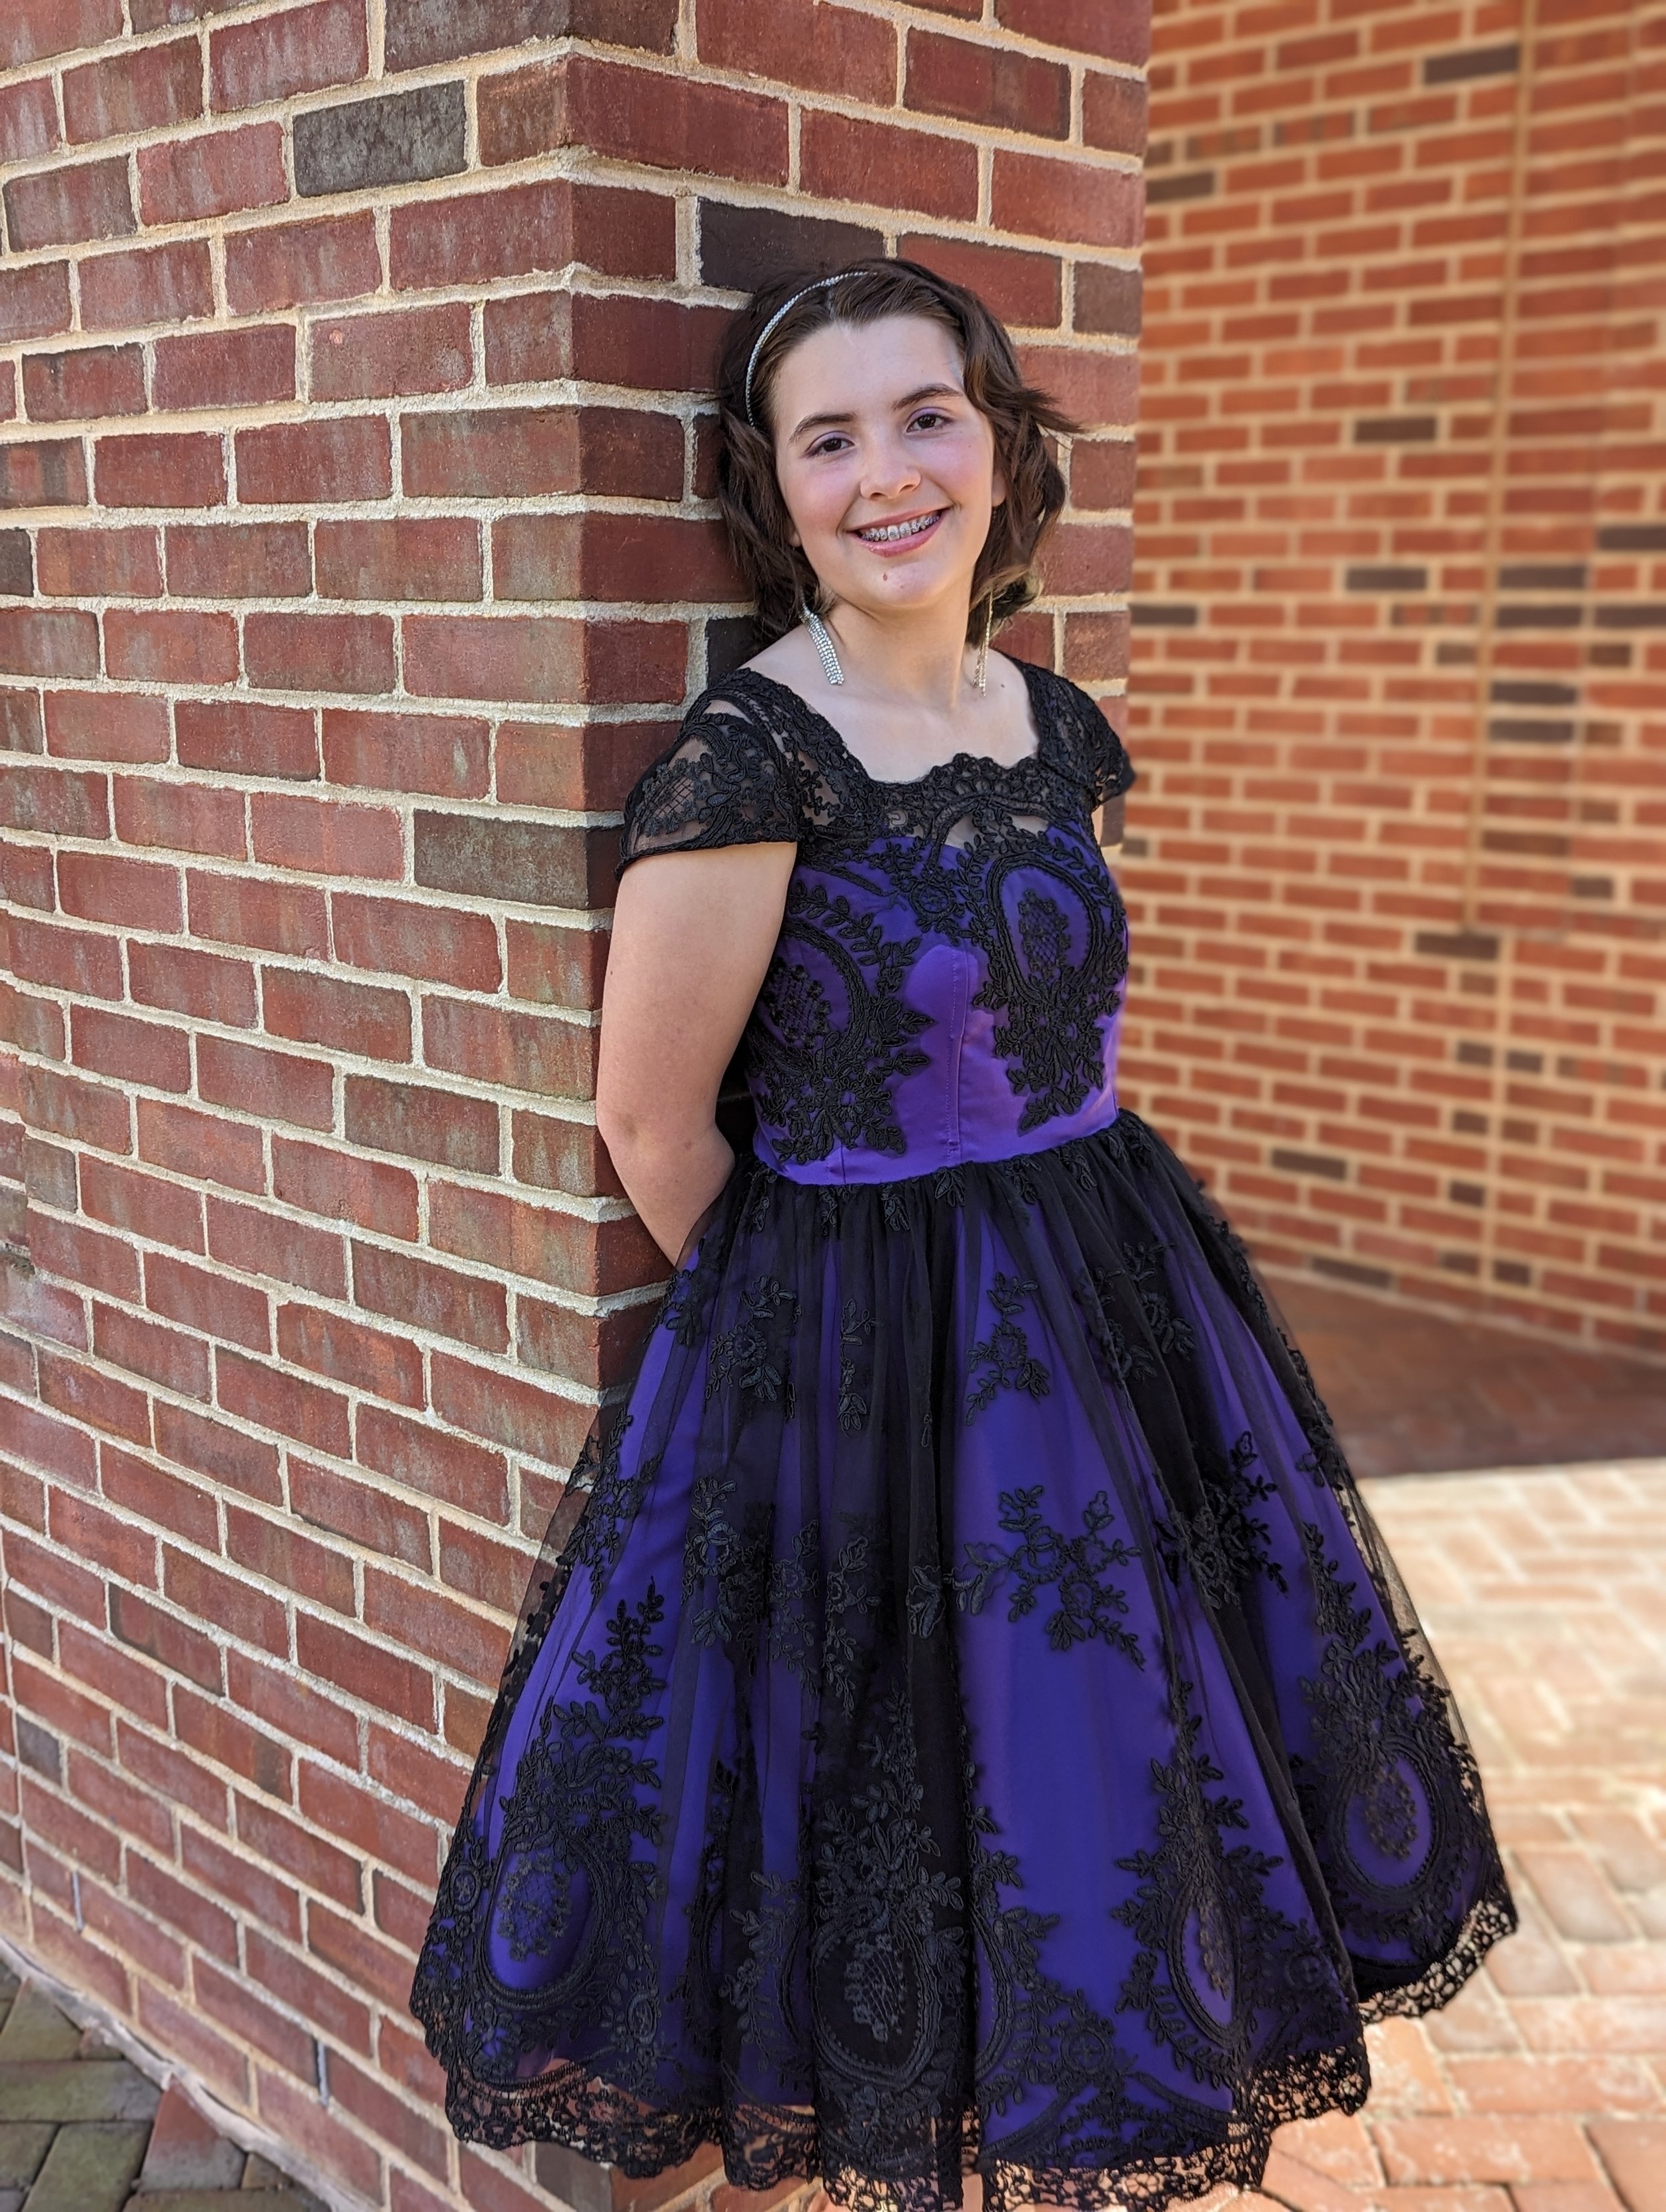
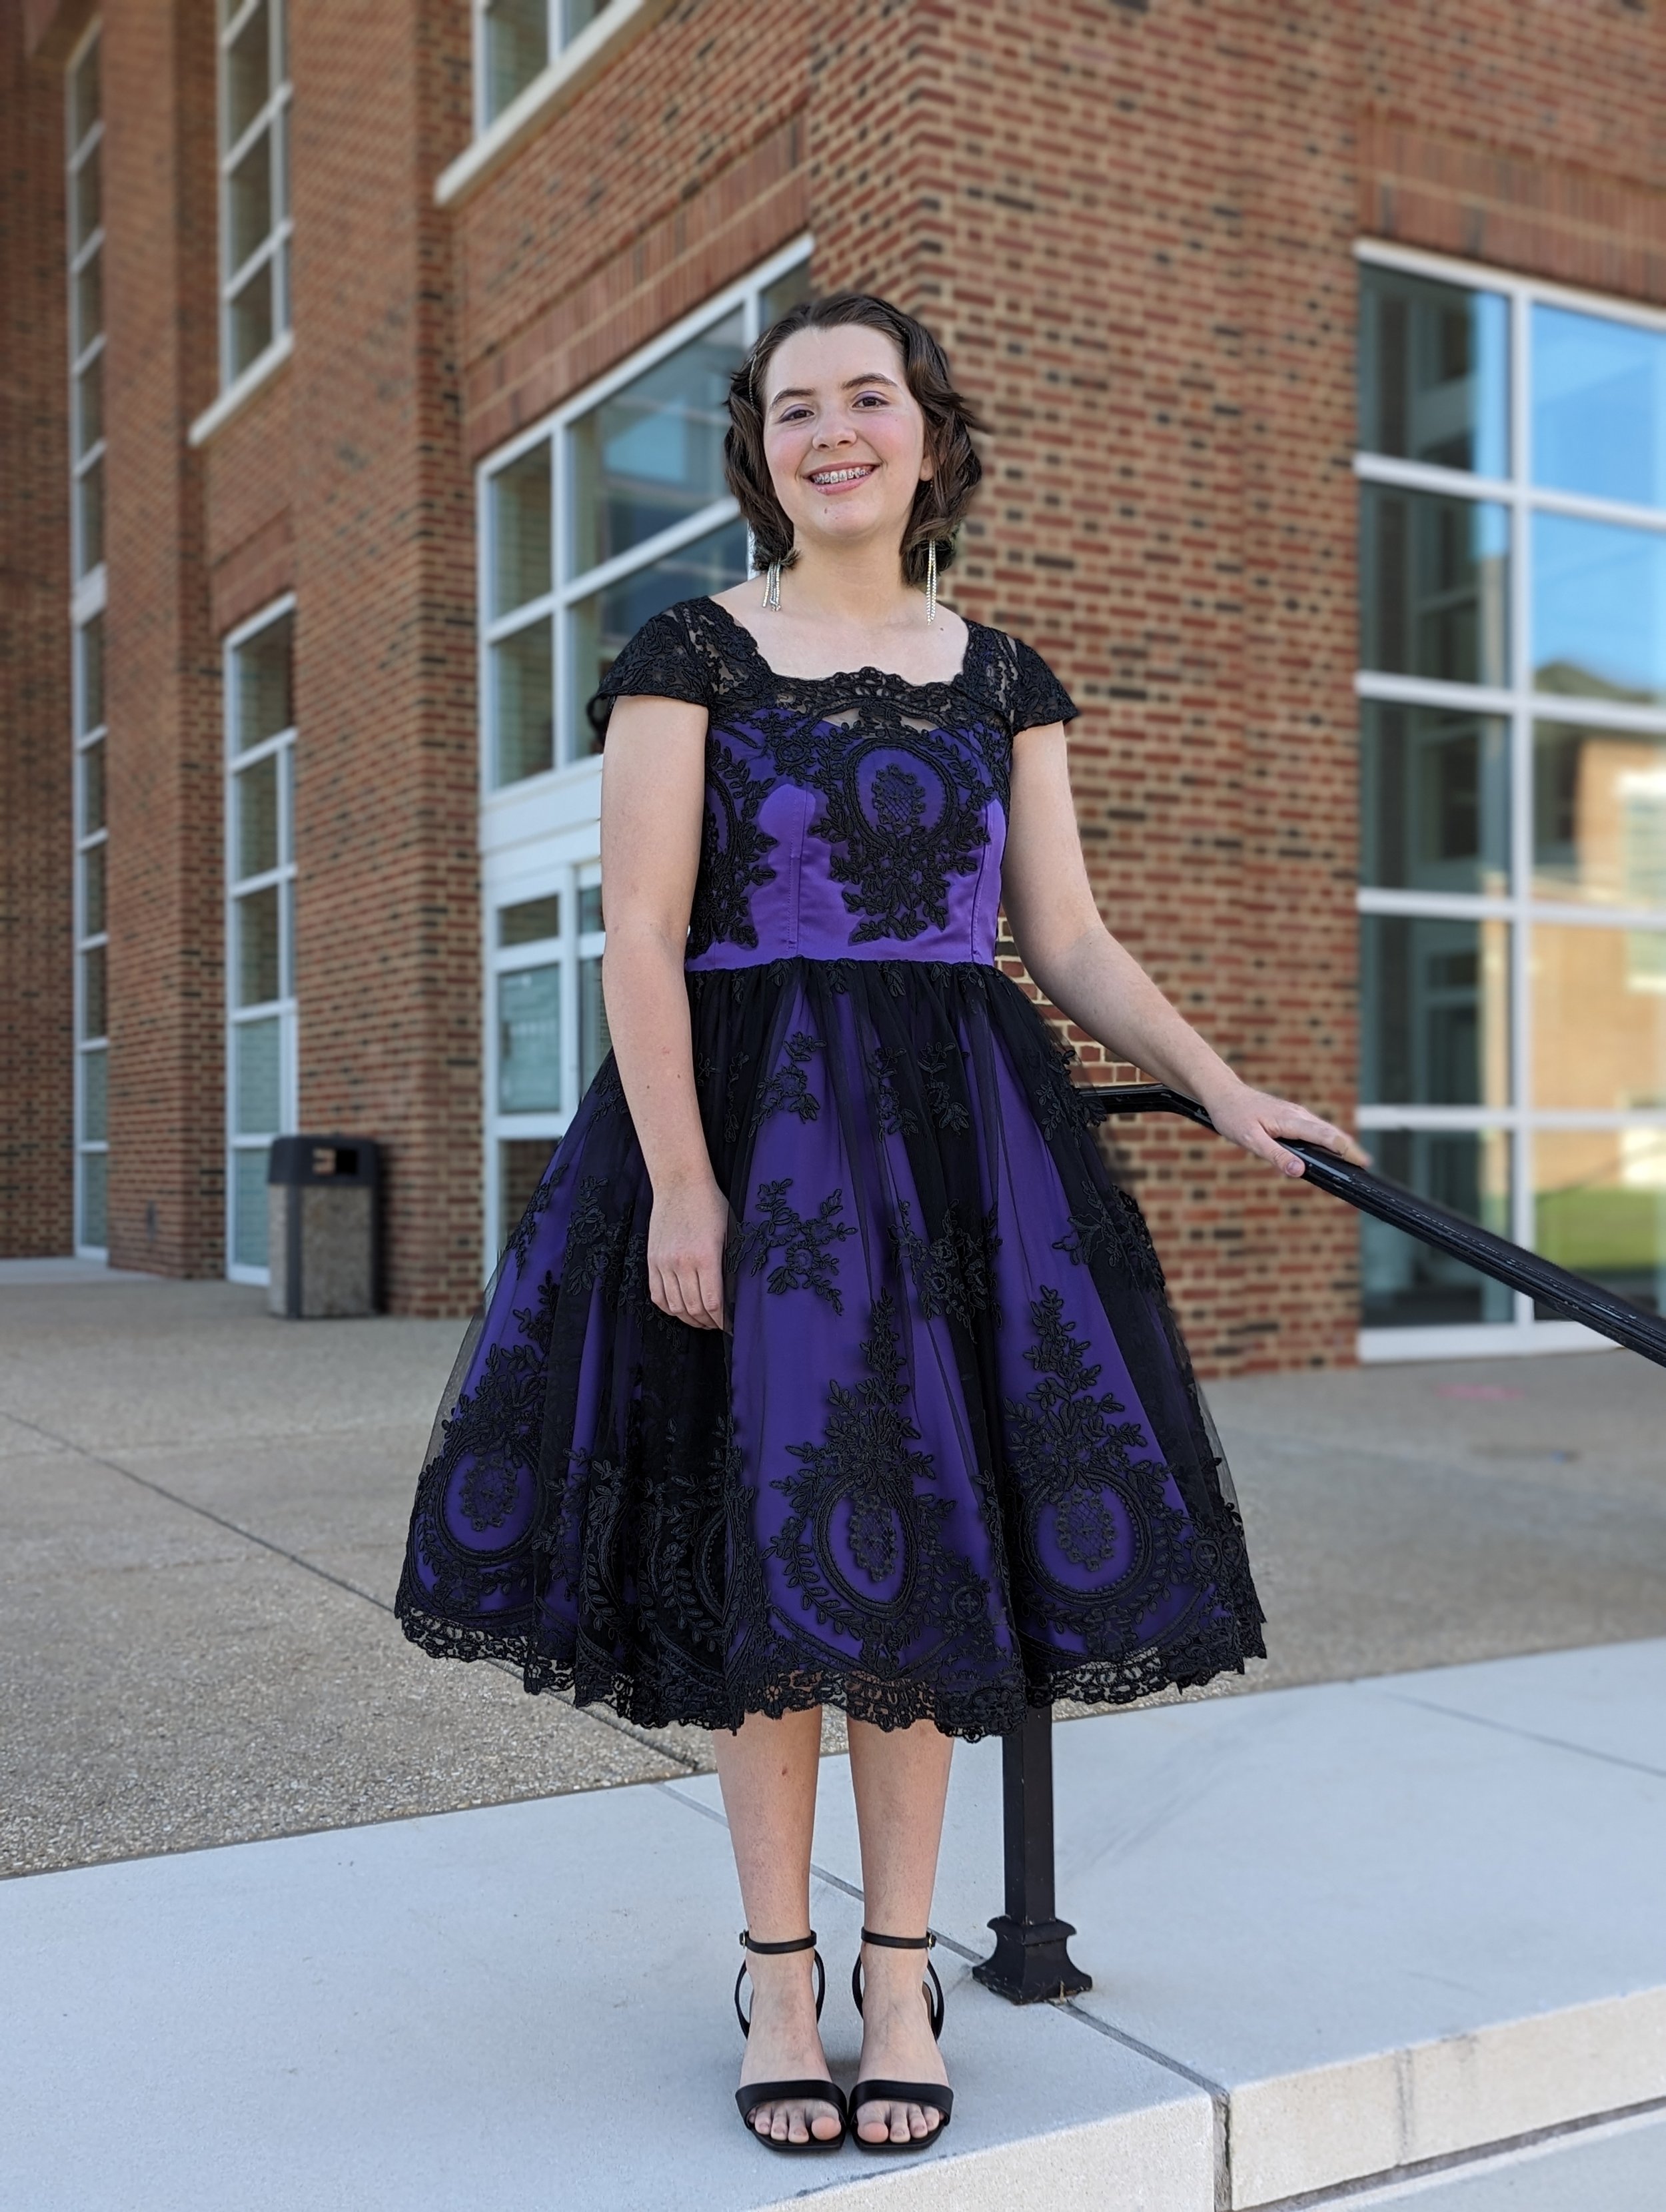
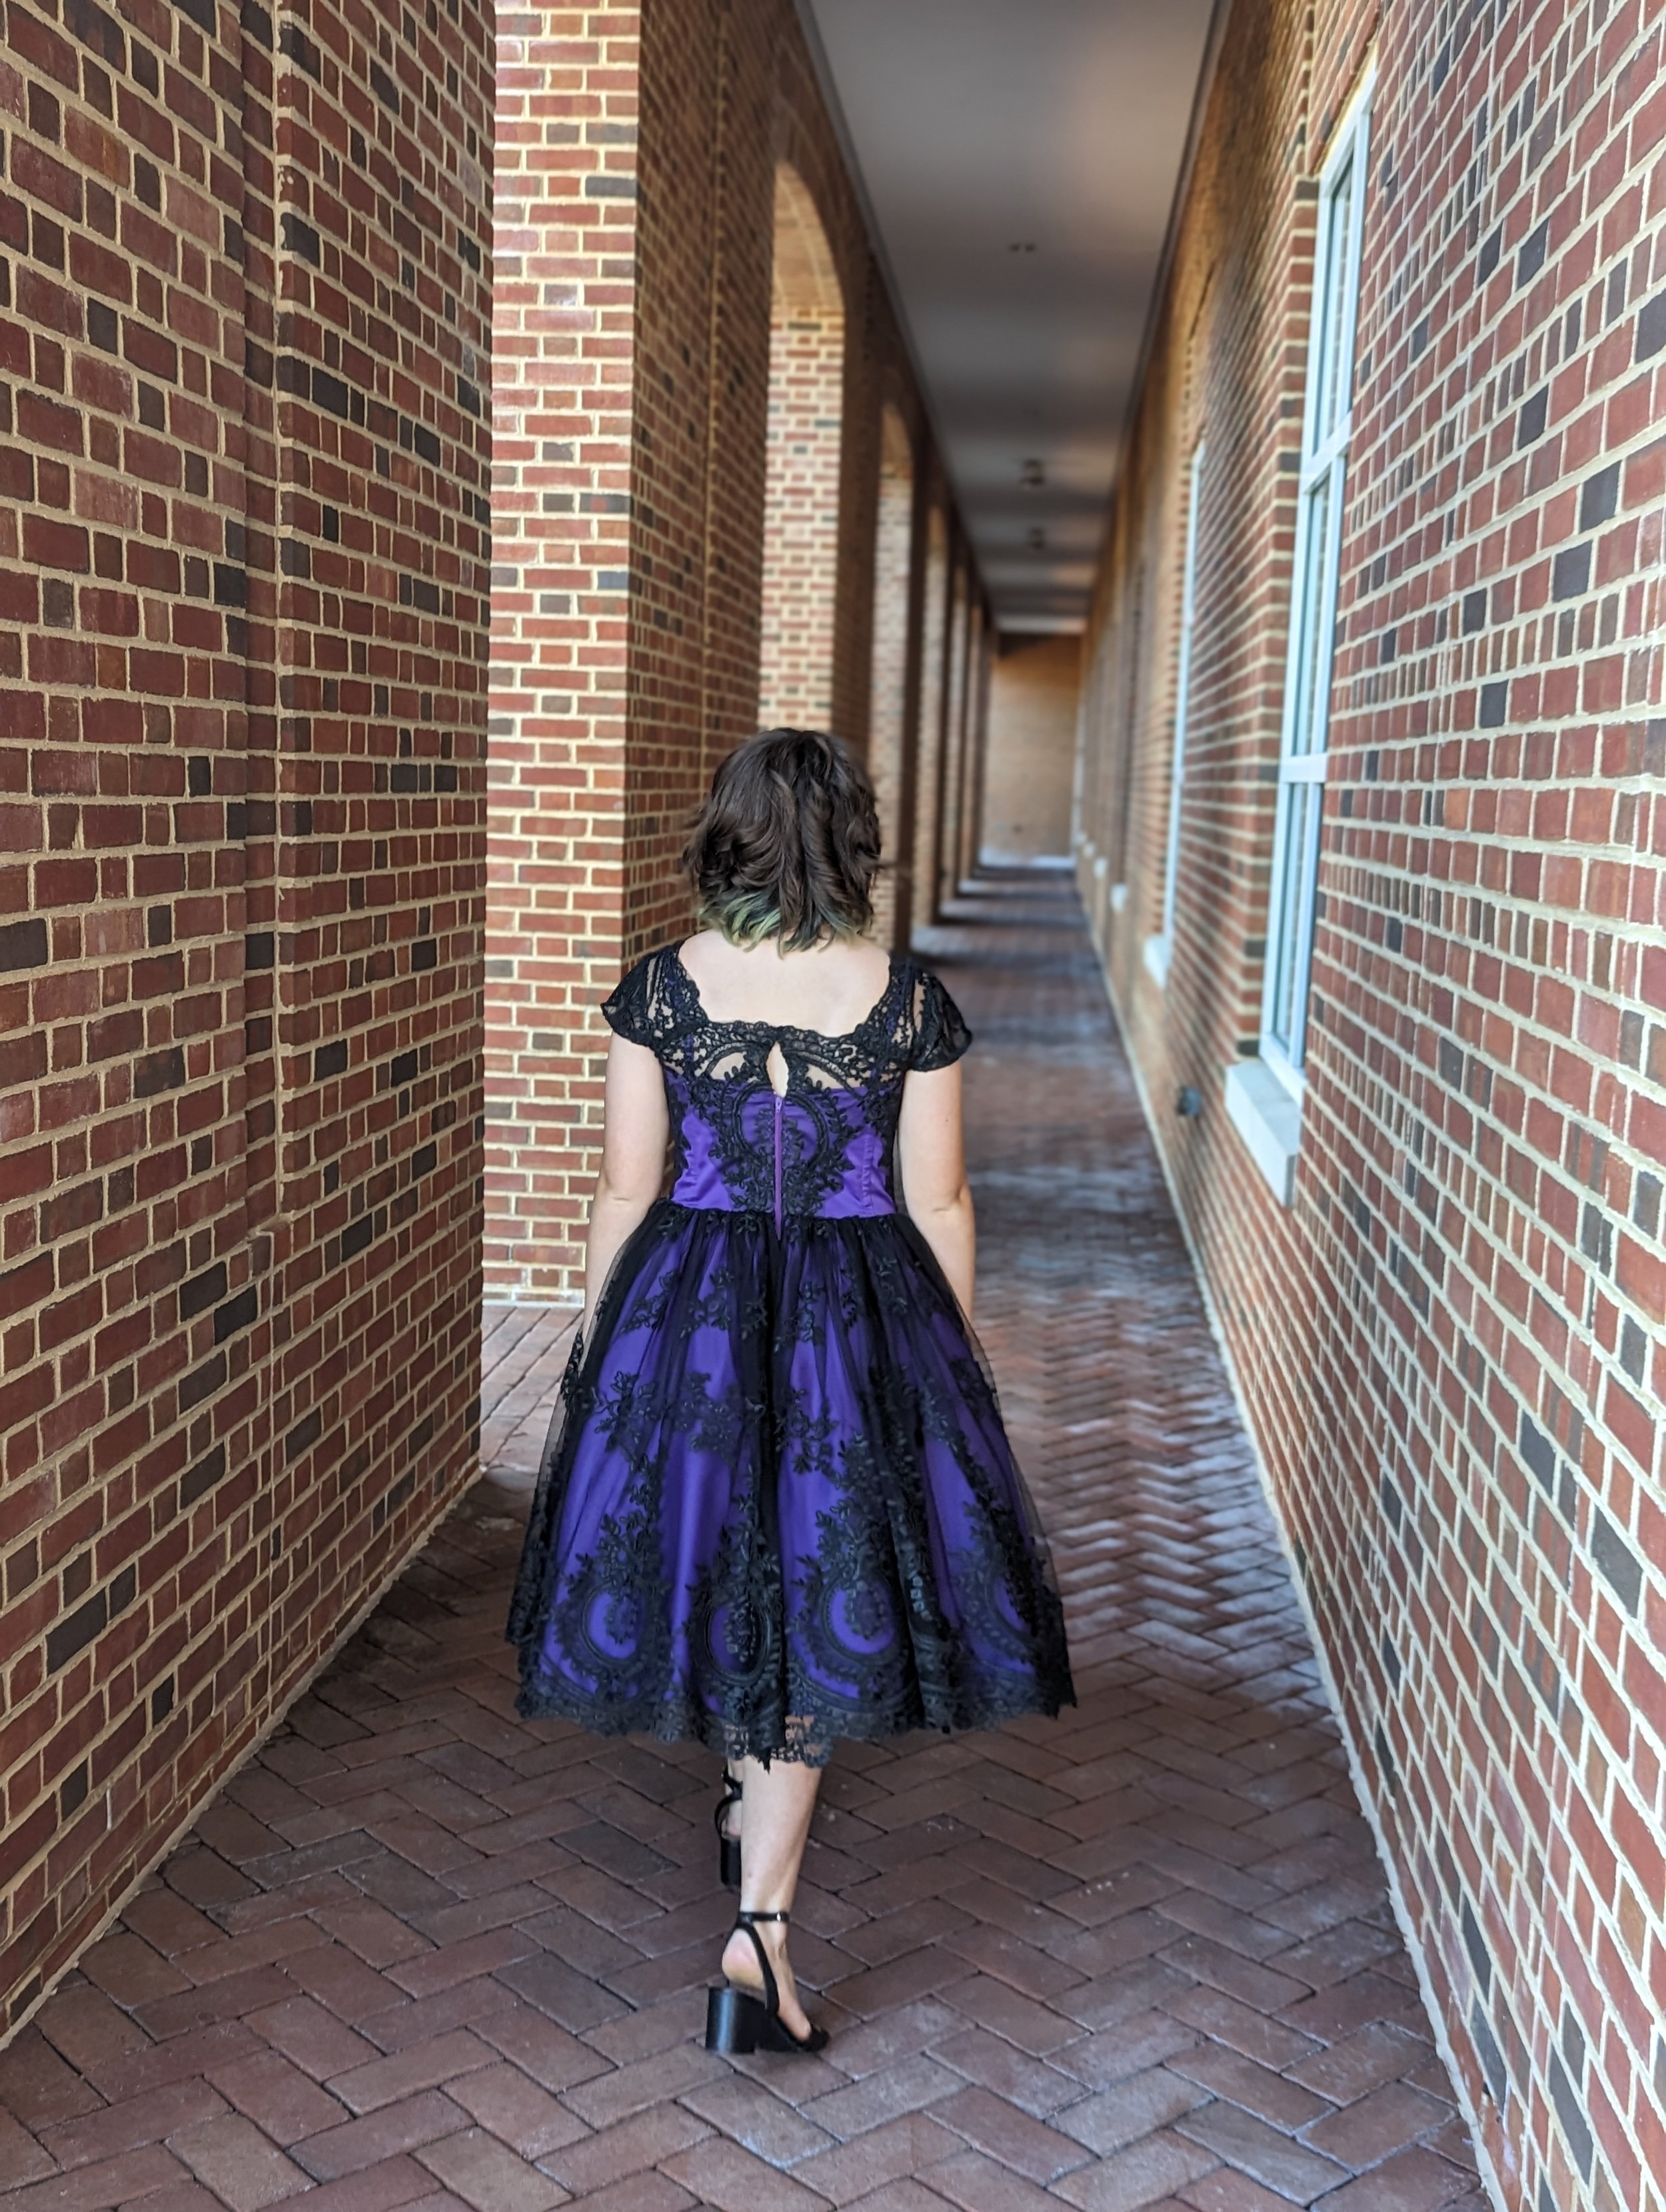
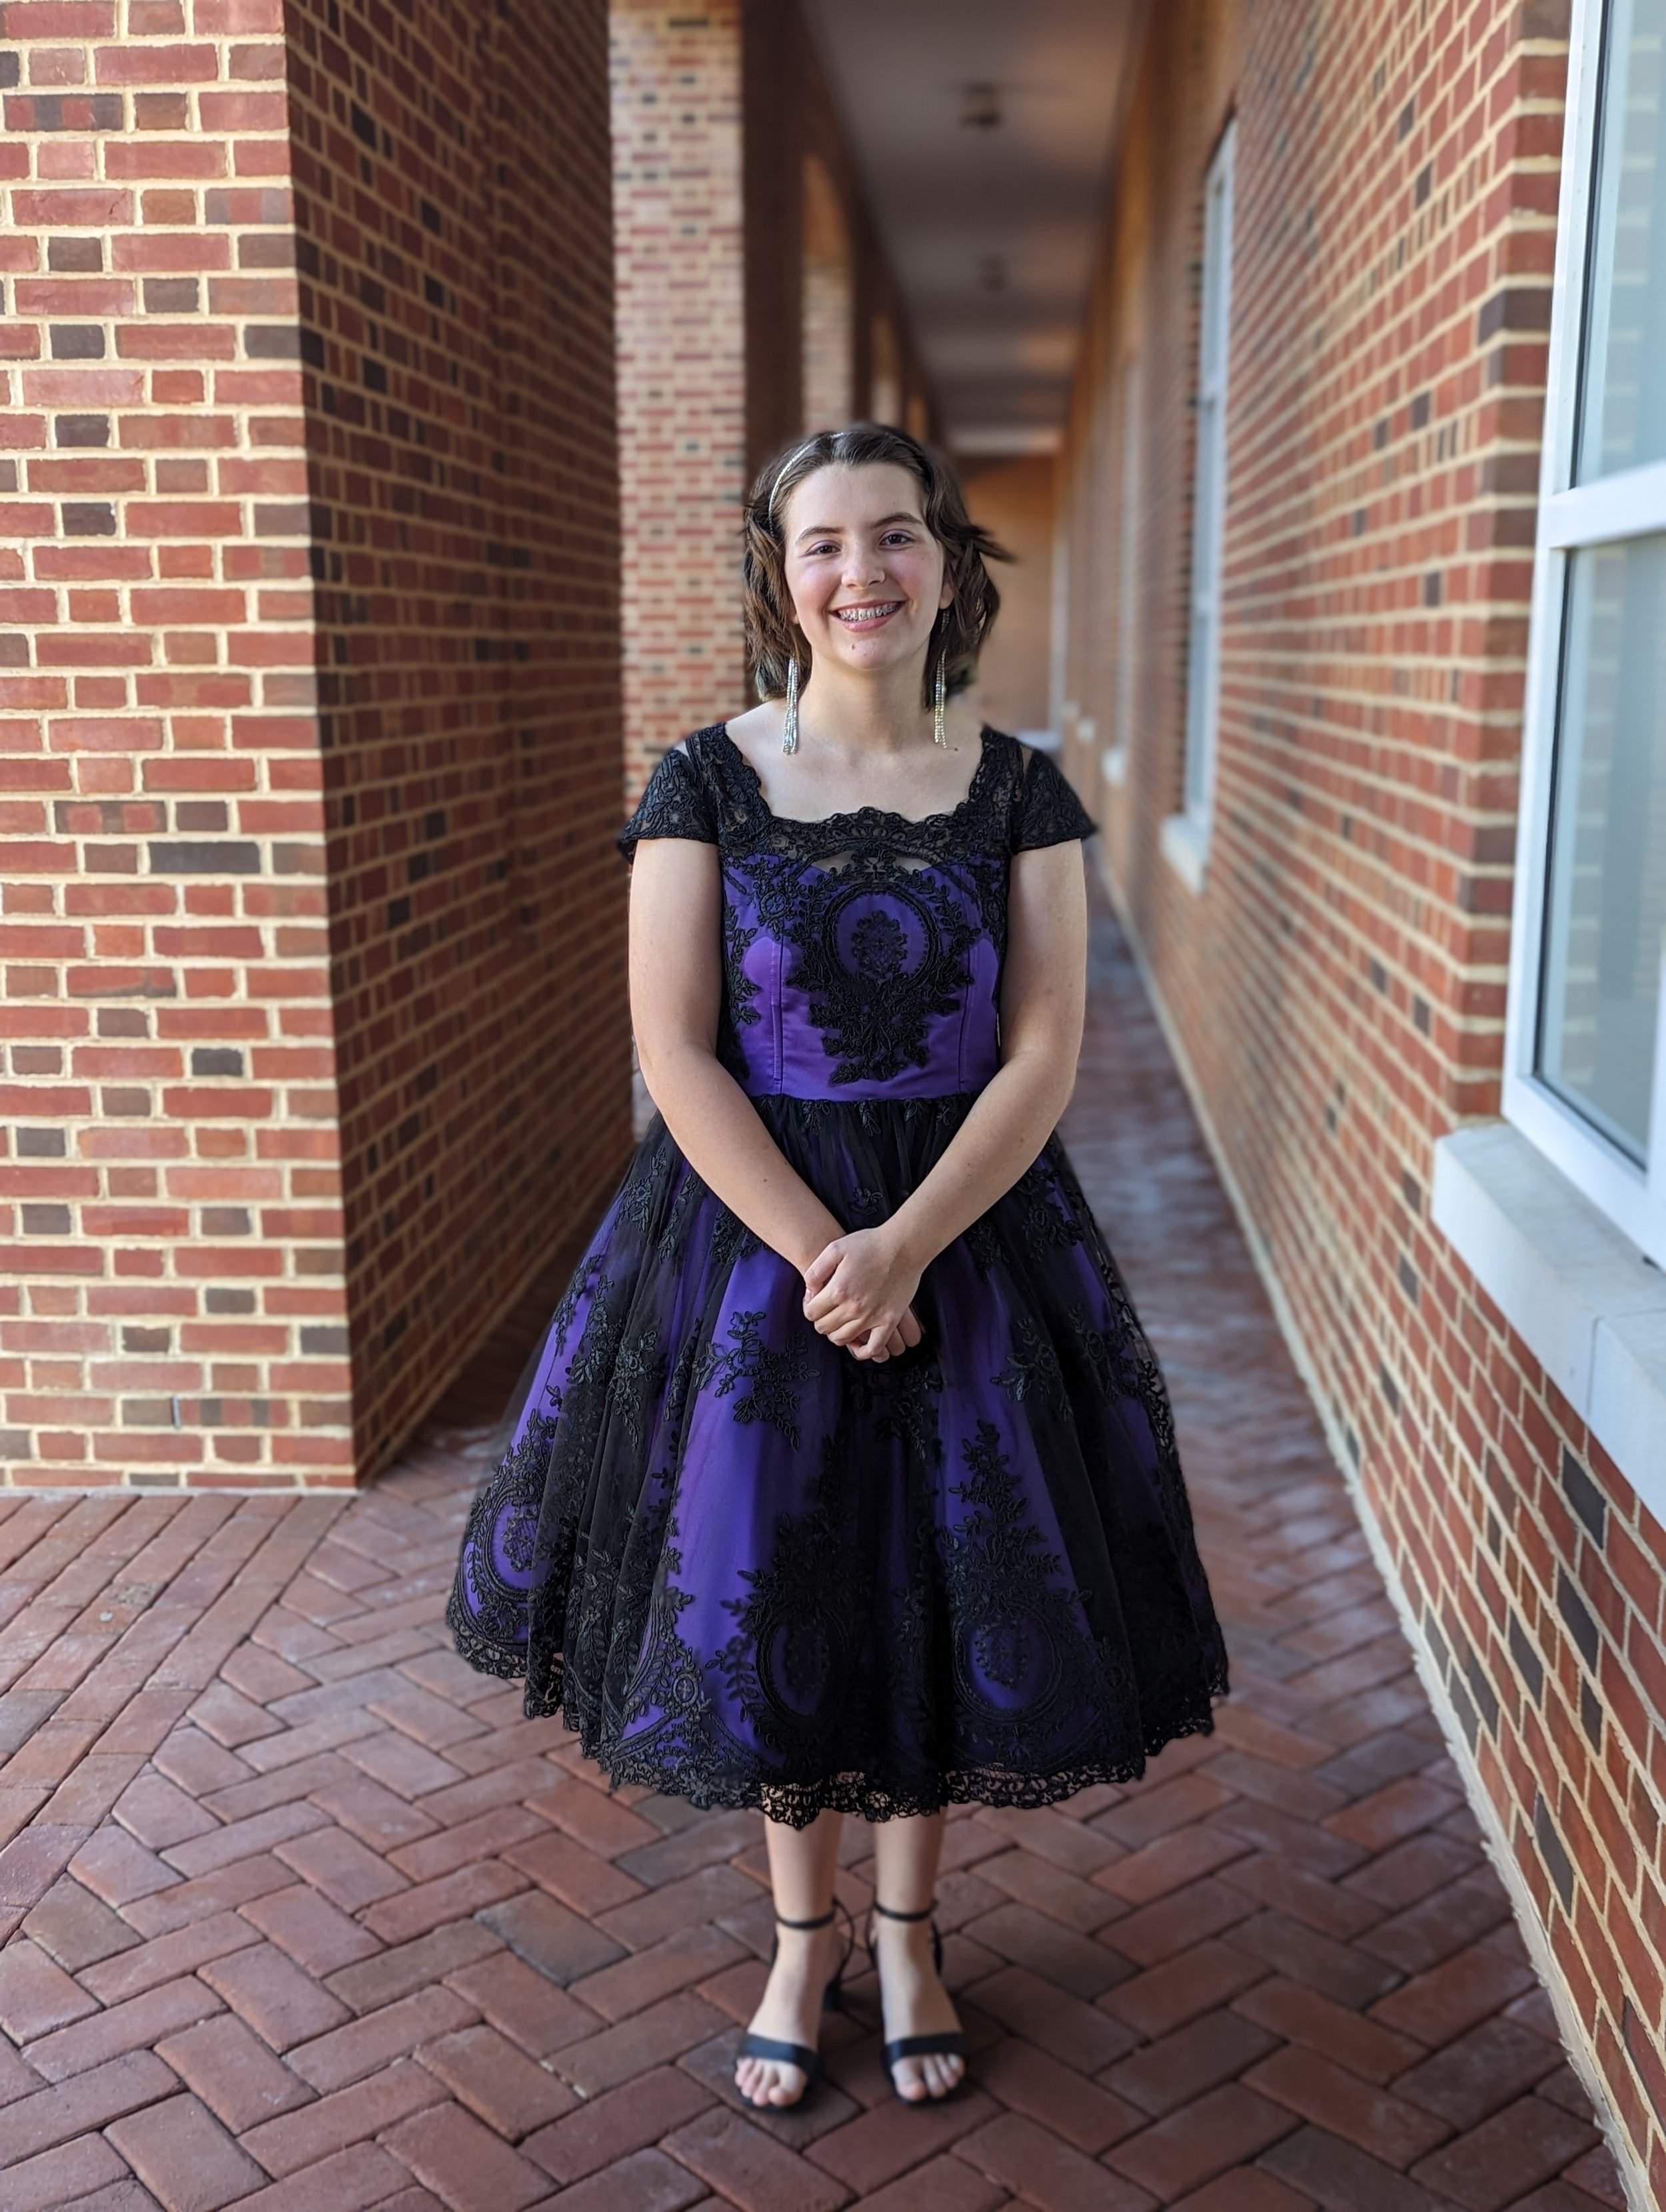
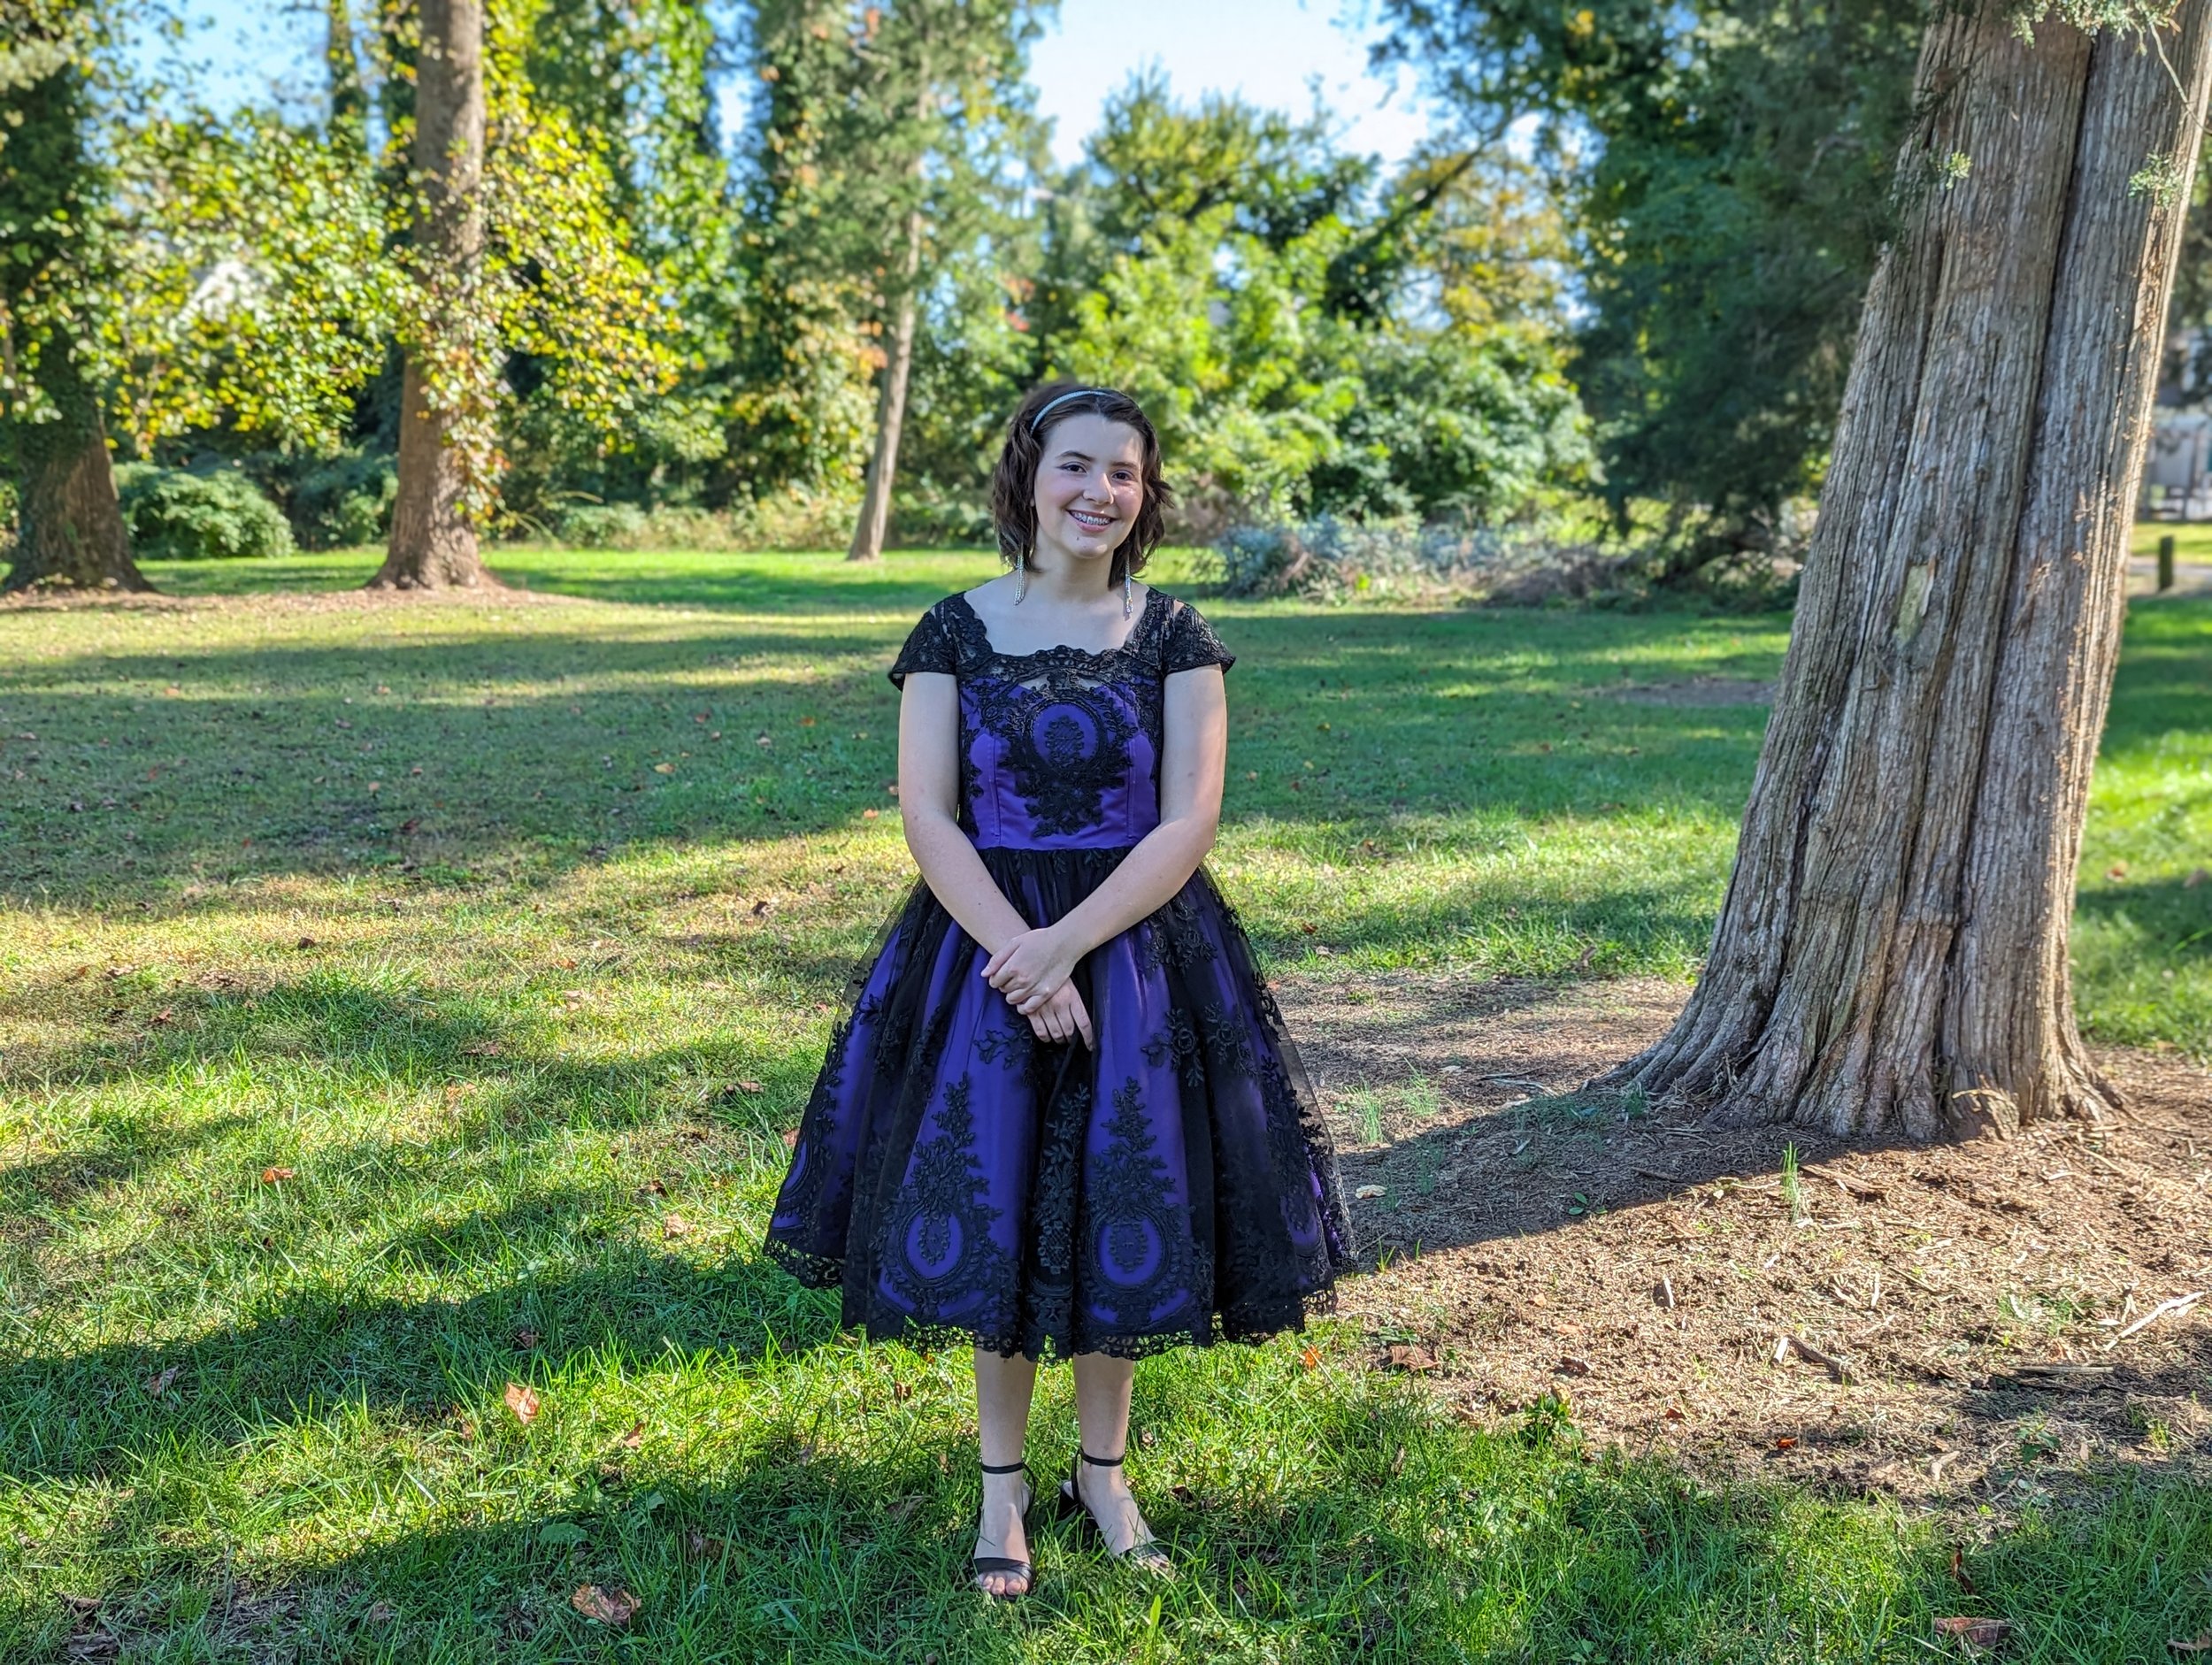
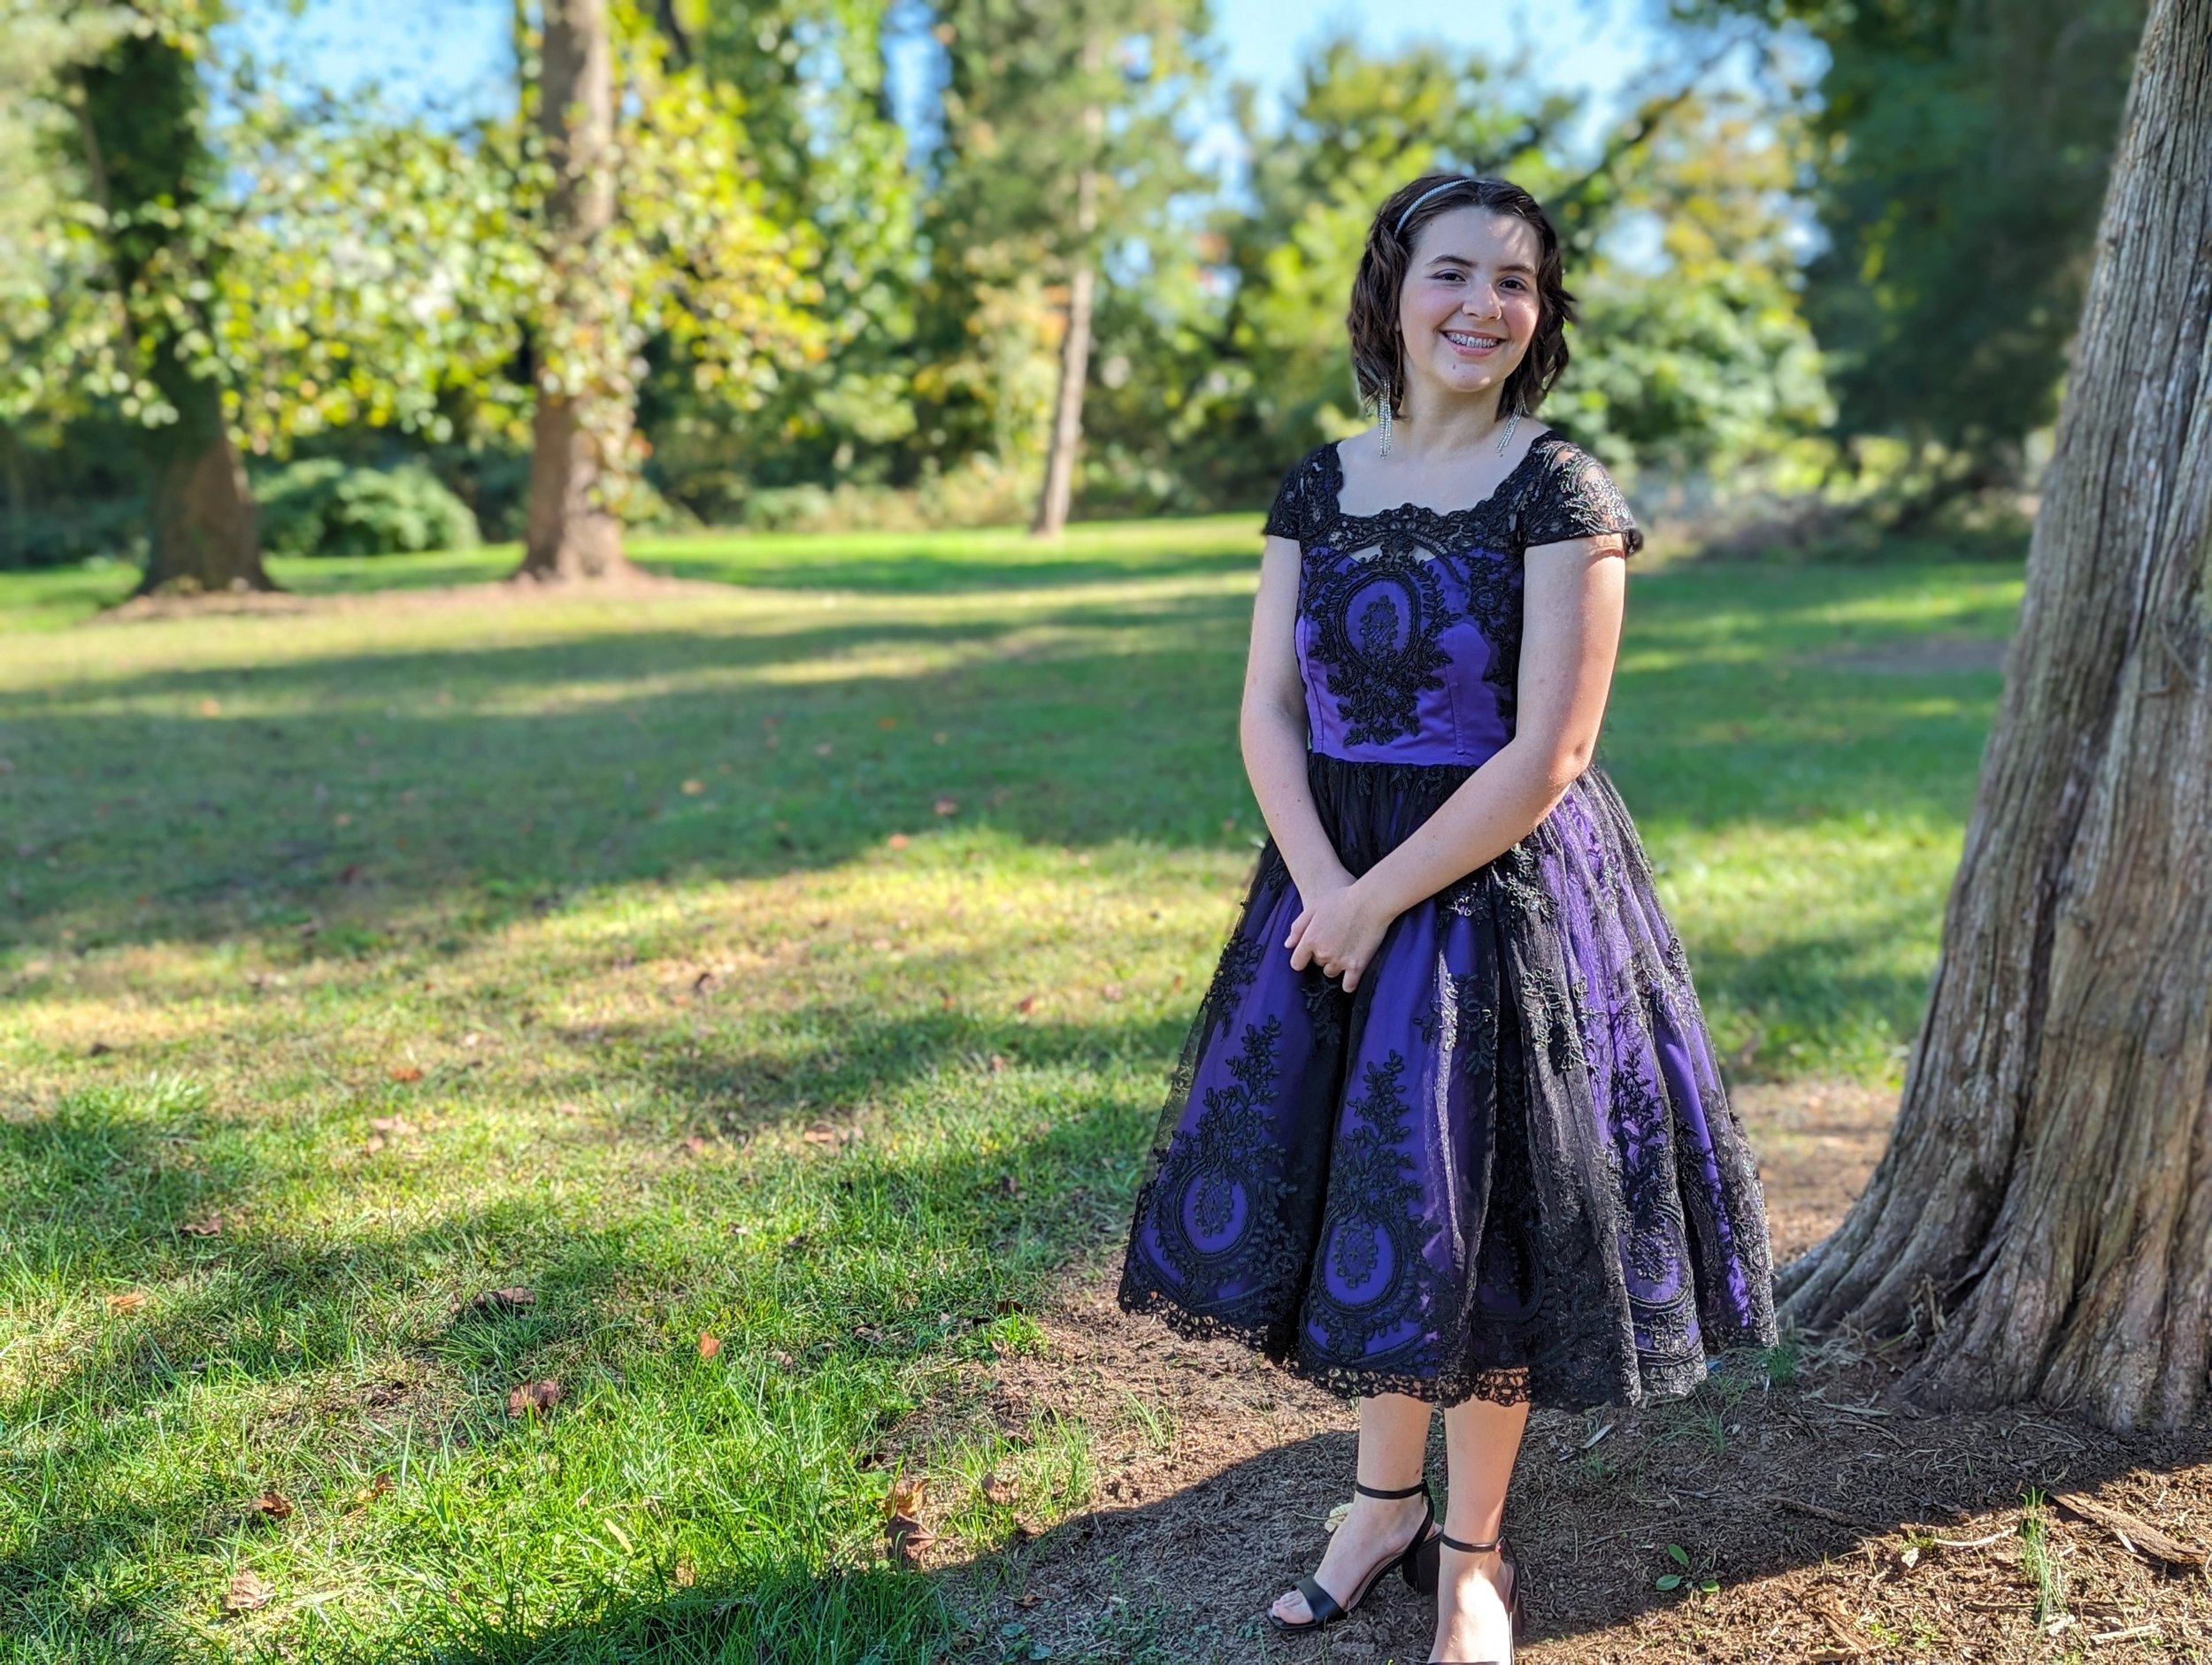
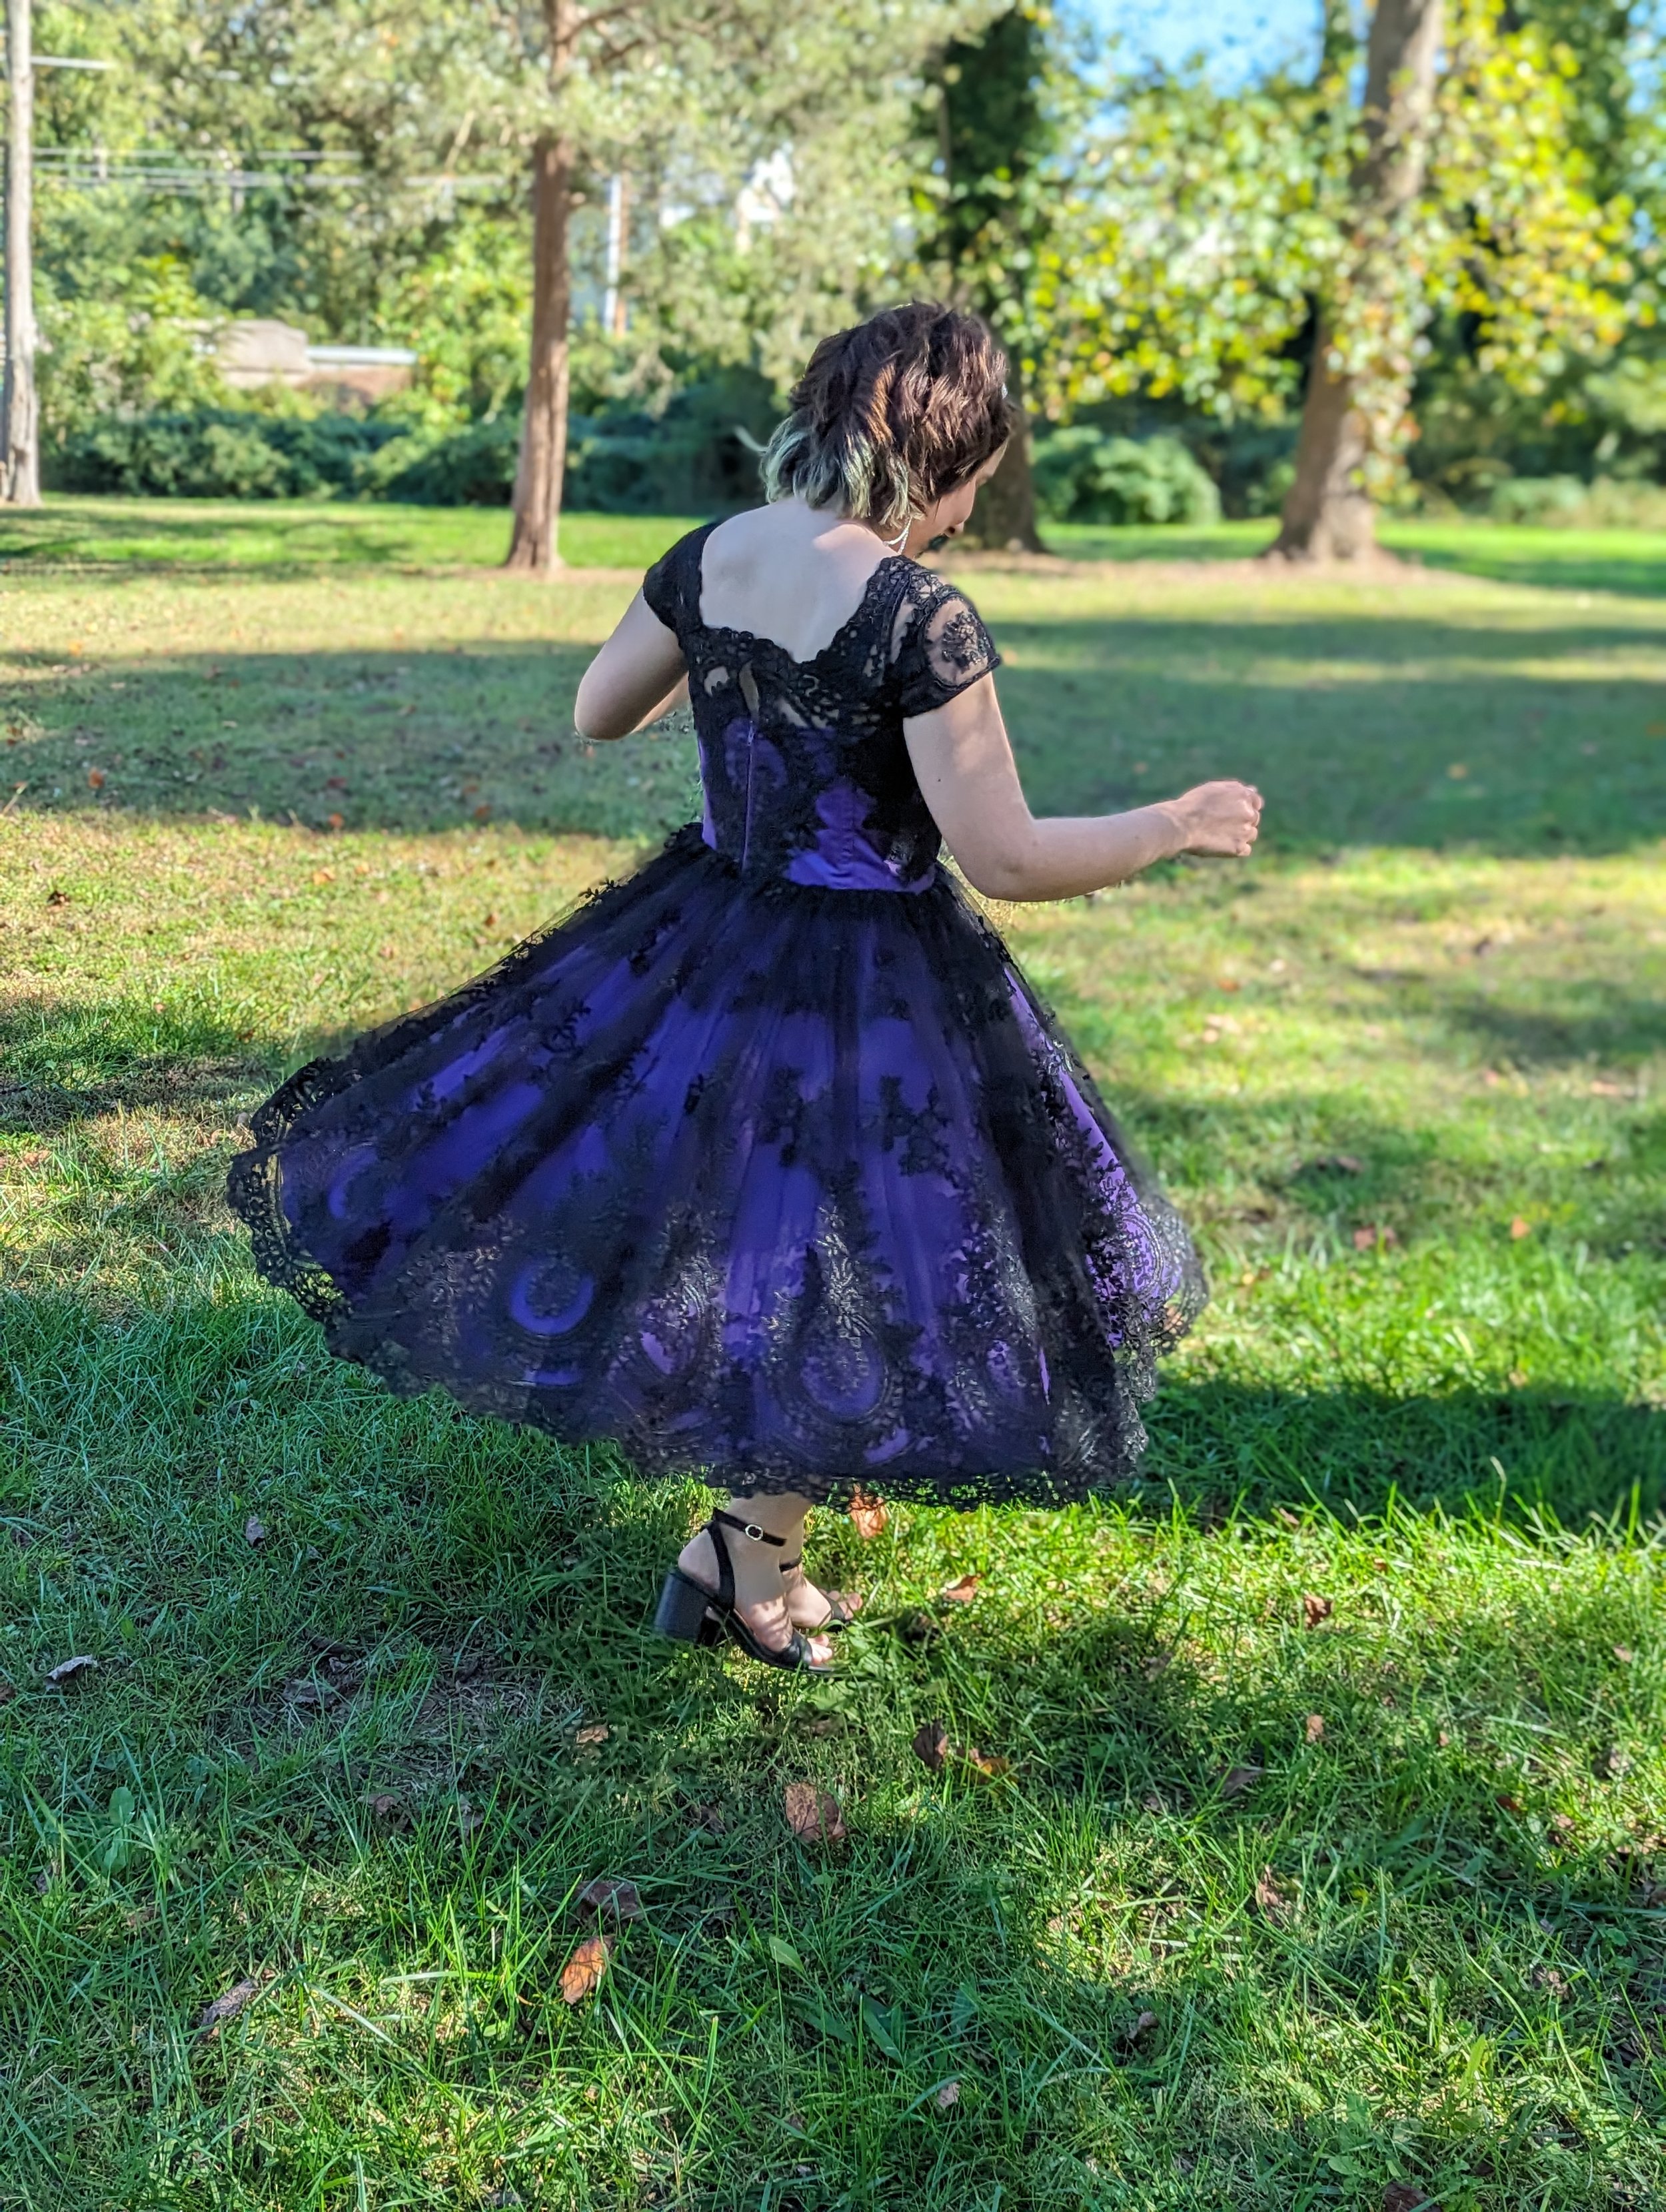
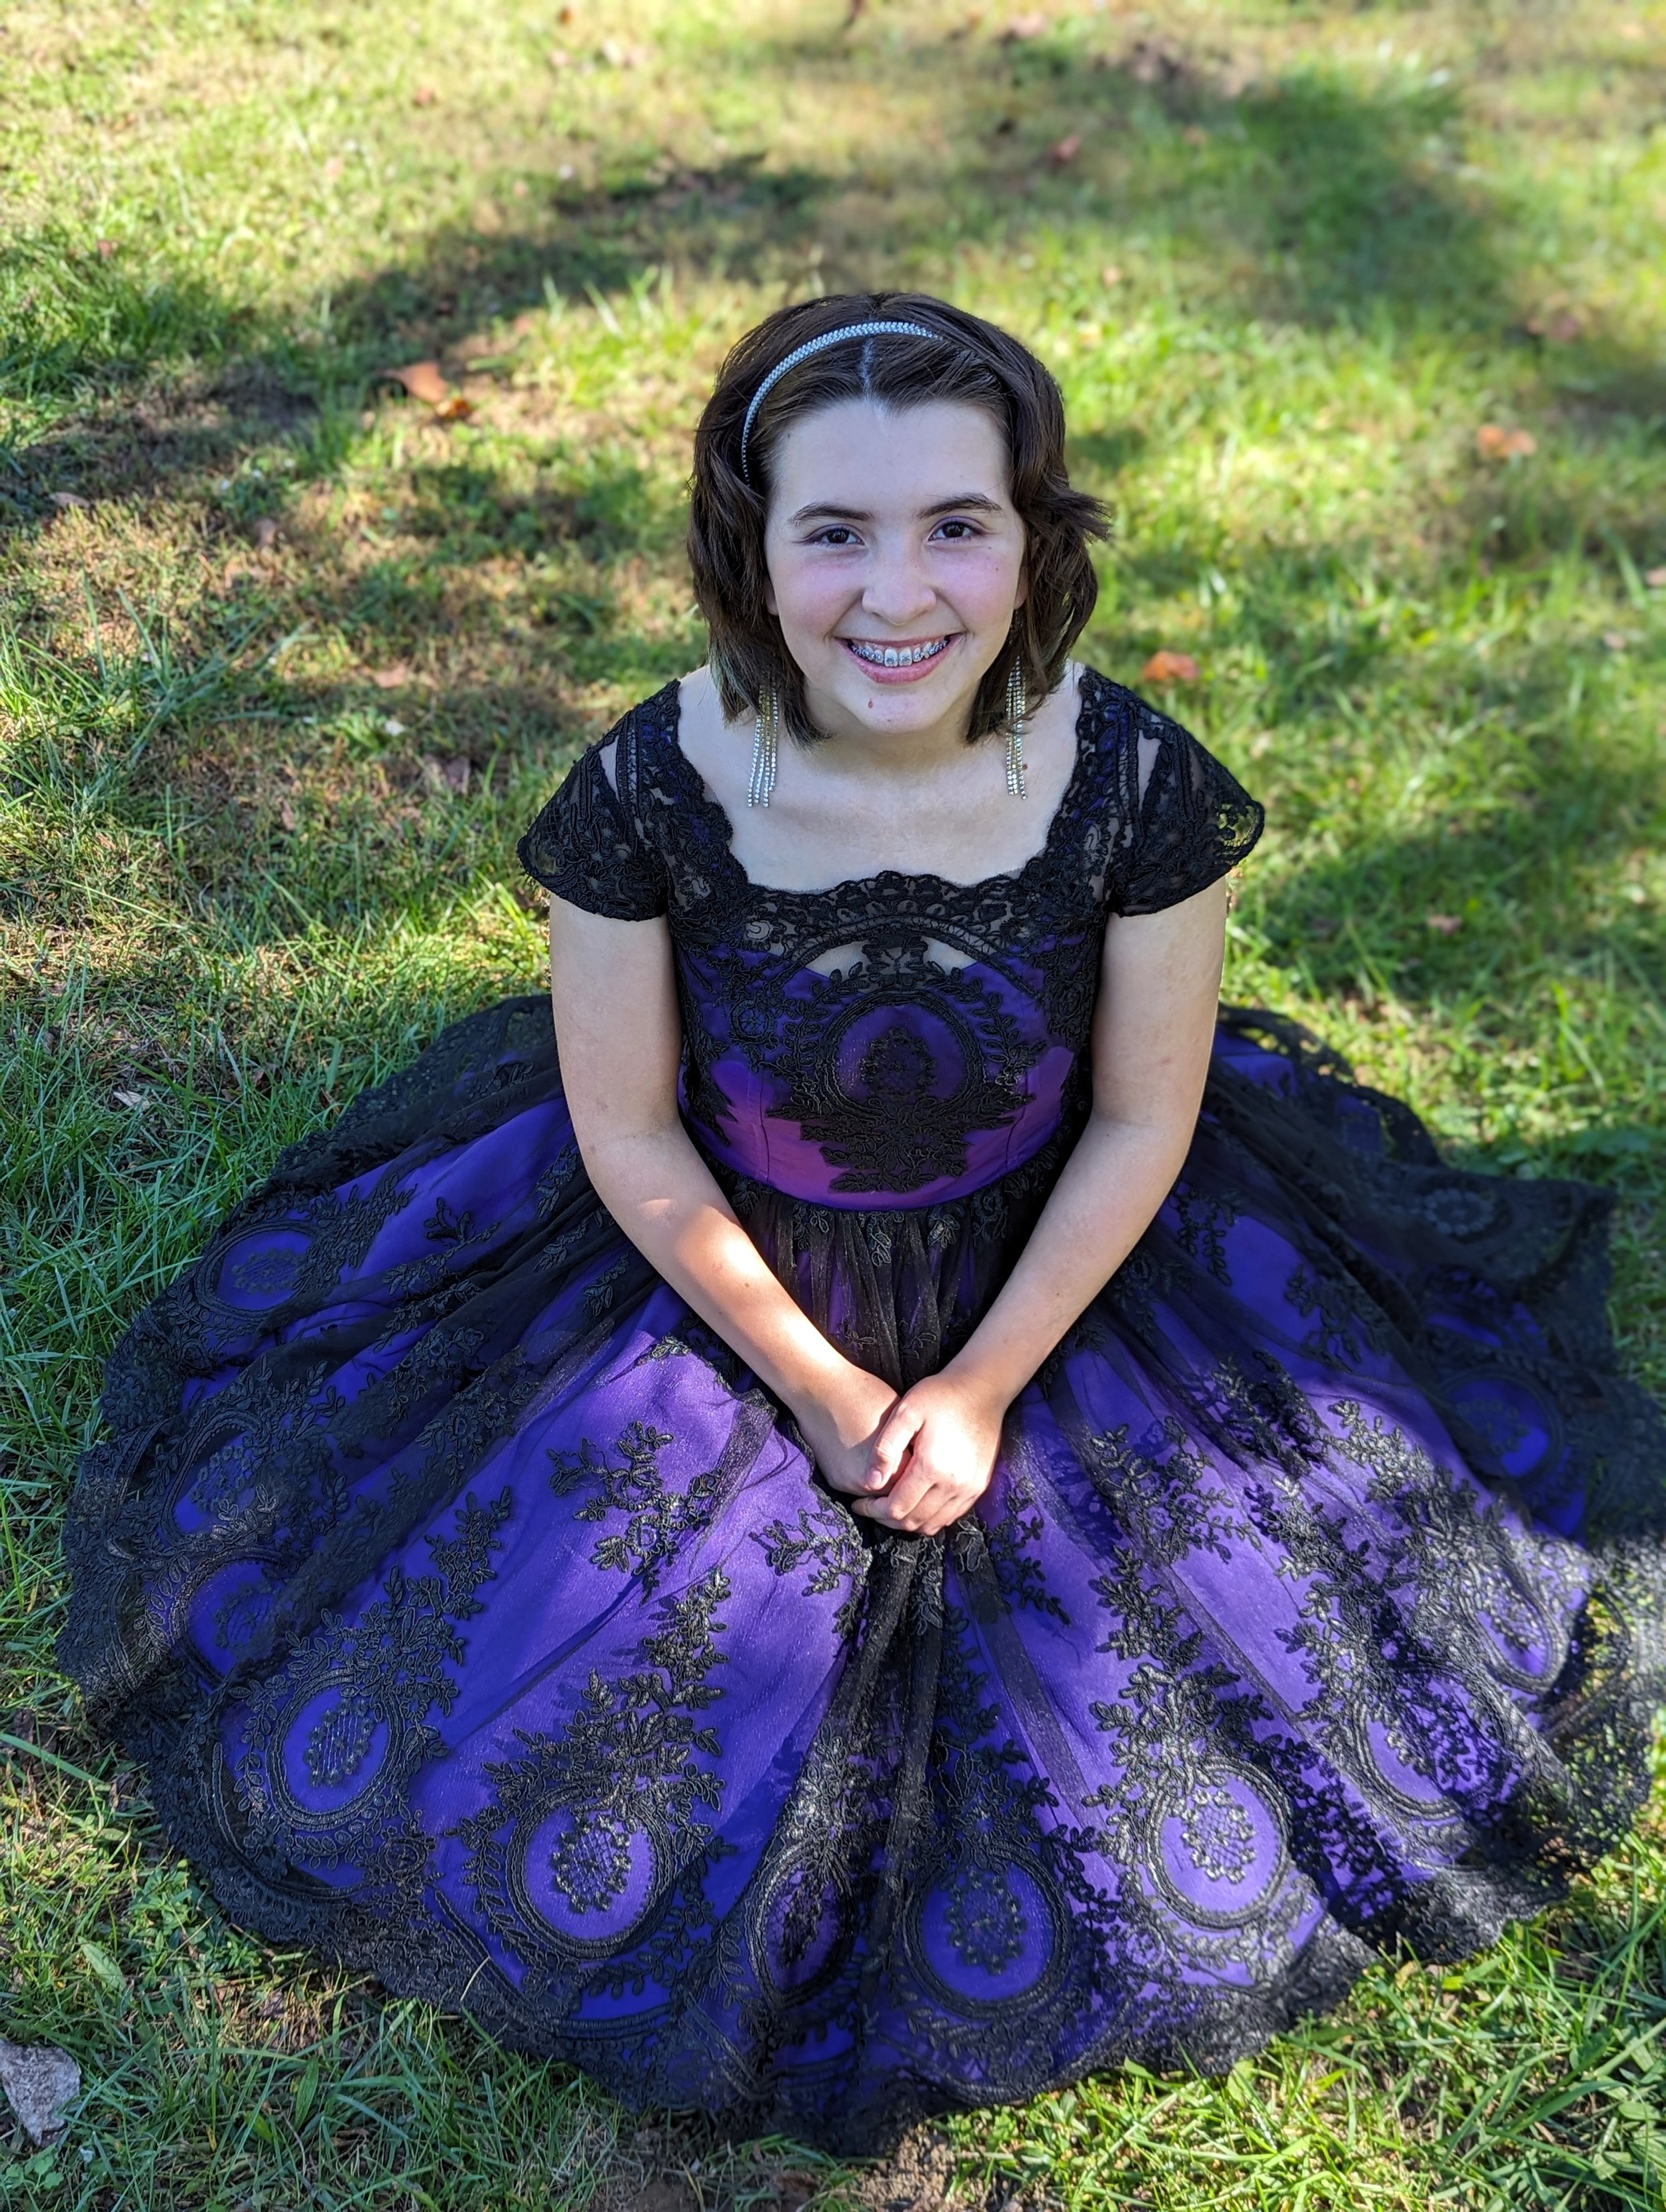
The lace was one thing I had not figured out completely beforehand. I started by draping the lace on the dress form and trying to figure out how to do this. I even bought a square-necked woven dress pattern, thinking I could use it to create a pattern. Eventually, I decided I didn’t need that, and just draped it until I had it how I wanted. Then I cut, pinned, and sewed it on with my free motion foot, trying to make it look as close to the original as possible. I sewed through both layers of bodice except when sewing next to the back seam, then I switched to just sewing through the exterior (this would make the zipper easier later). I had to cut off the bottom point from the lace design because it would have hung over the skirt by a couple of inches. My daughter is shorter than the model!
I draped the lace over the straps and cut and attached it. The cap sleeves took a little thinking too, especially because I had run out of the lace arcs that are used to form various pieces of the bodice in the original. I used this tutorial and a woven dress pattern I owned to create a cap sleeve. It’s double layered. Finally, the bodice was done and looked great on my daughter! (All these steps were accompanied by lots of fit checks anytime she was home from school.) I then added the waist stay, even with the straps, so it would feel nice and secure.
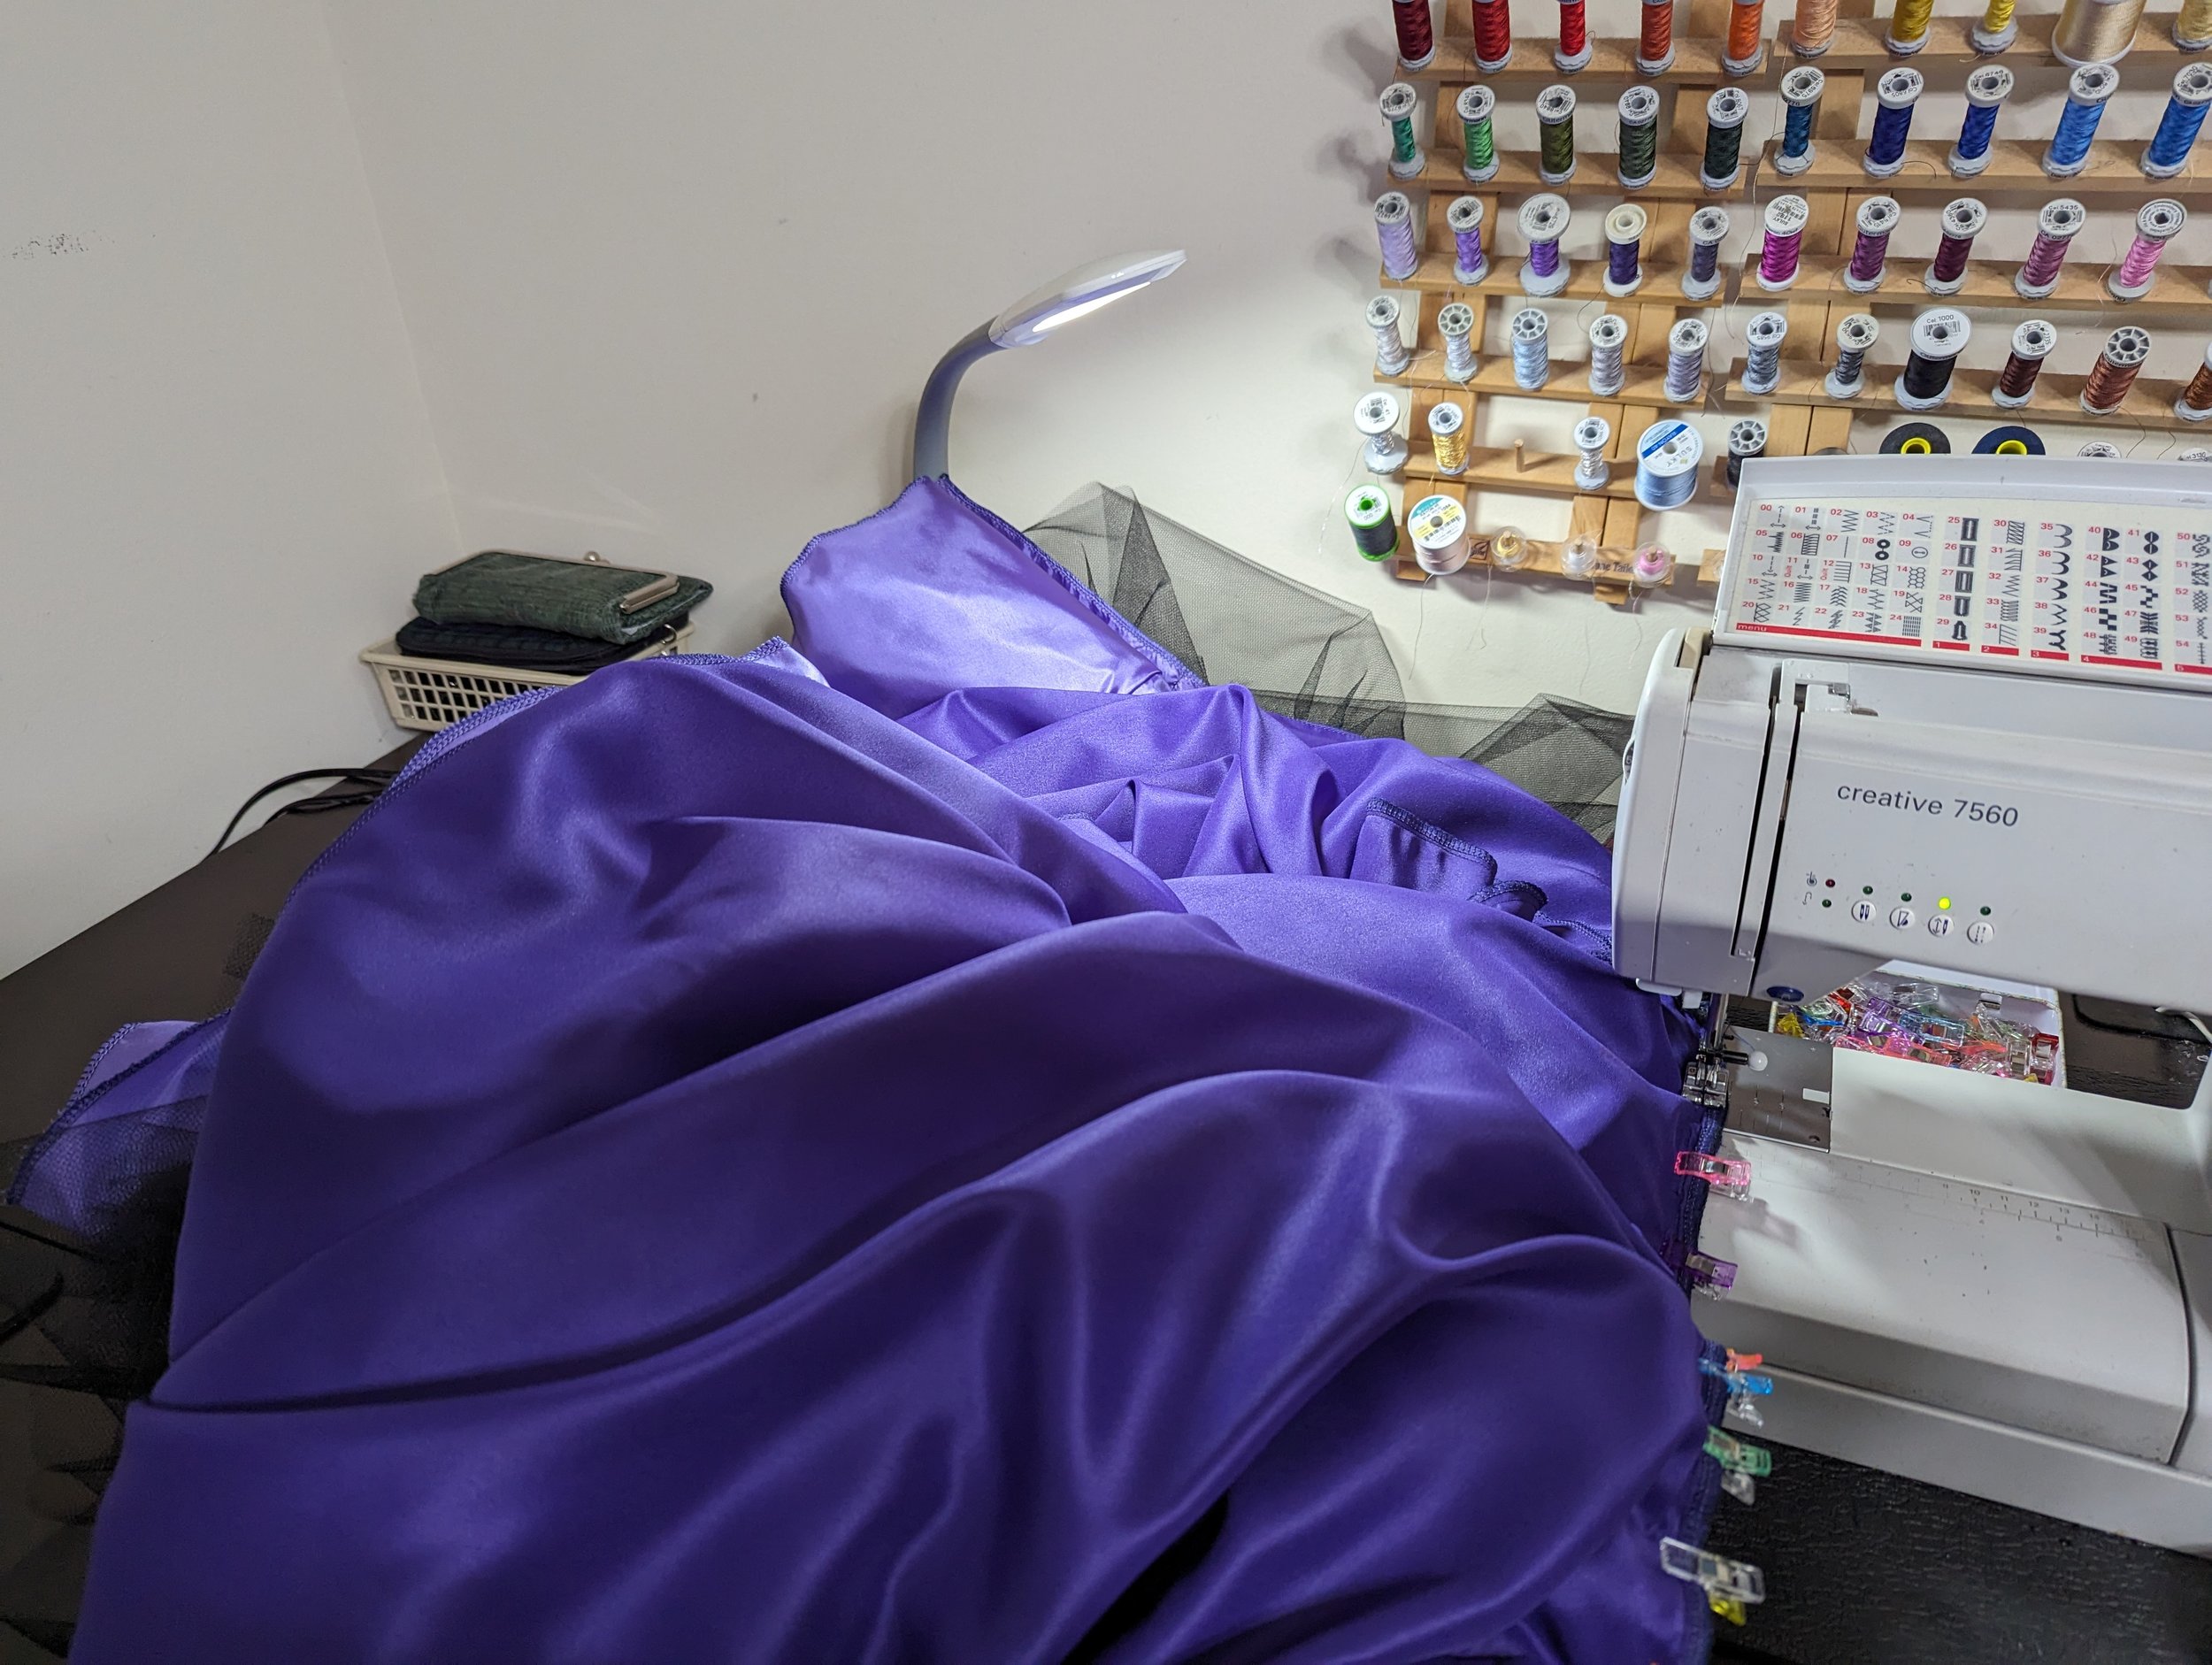
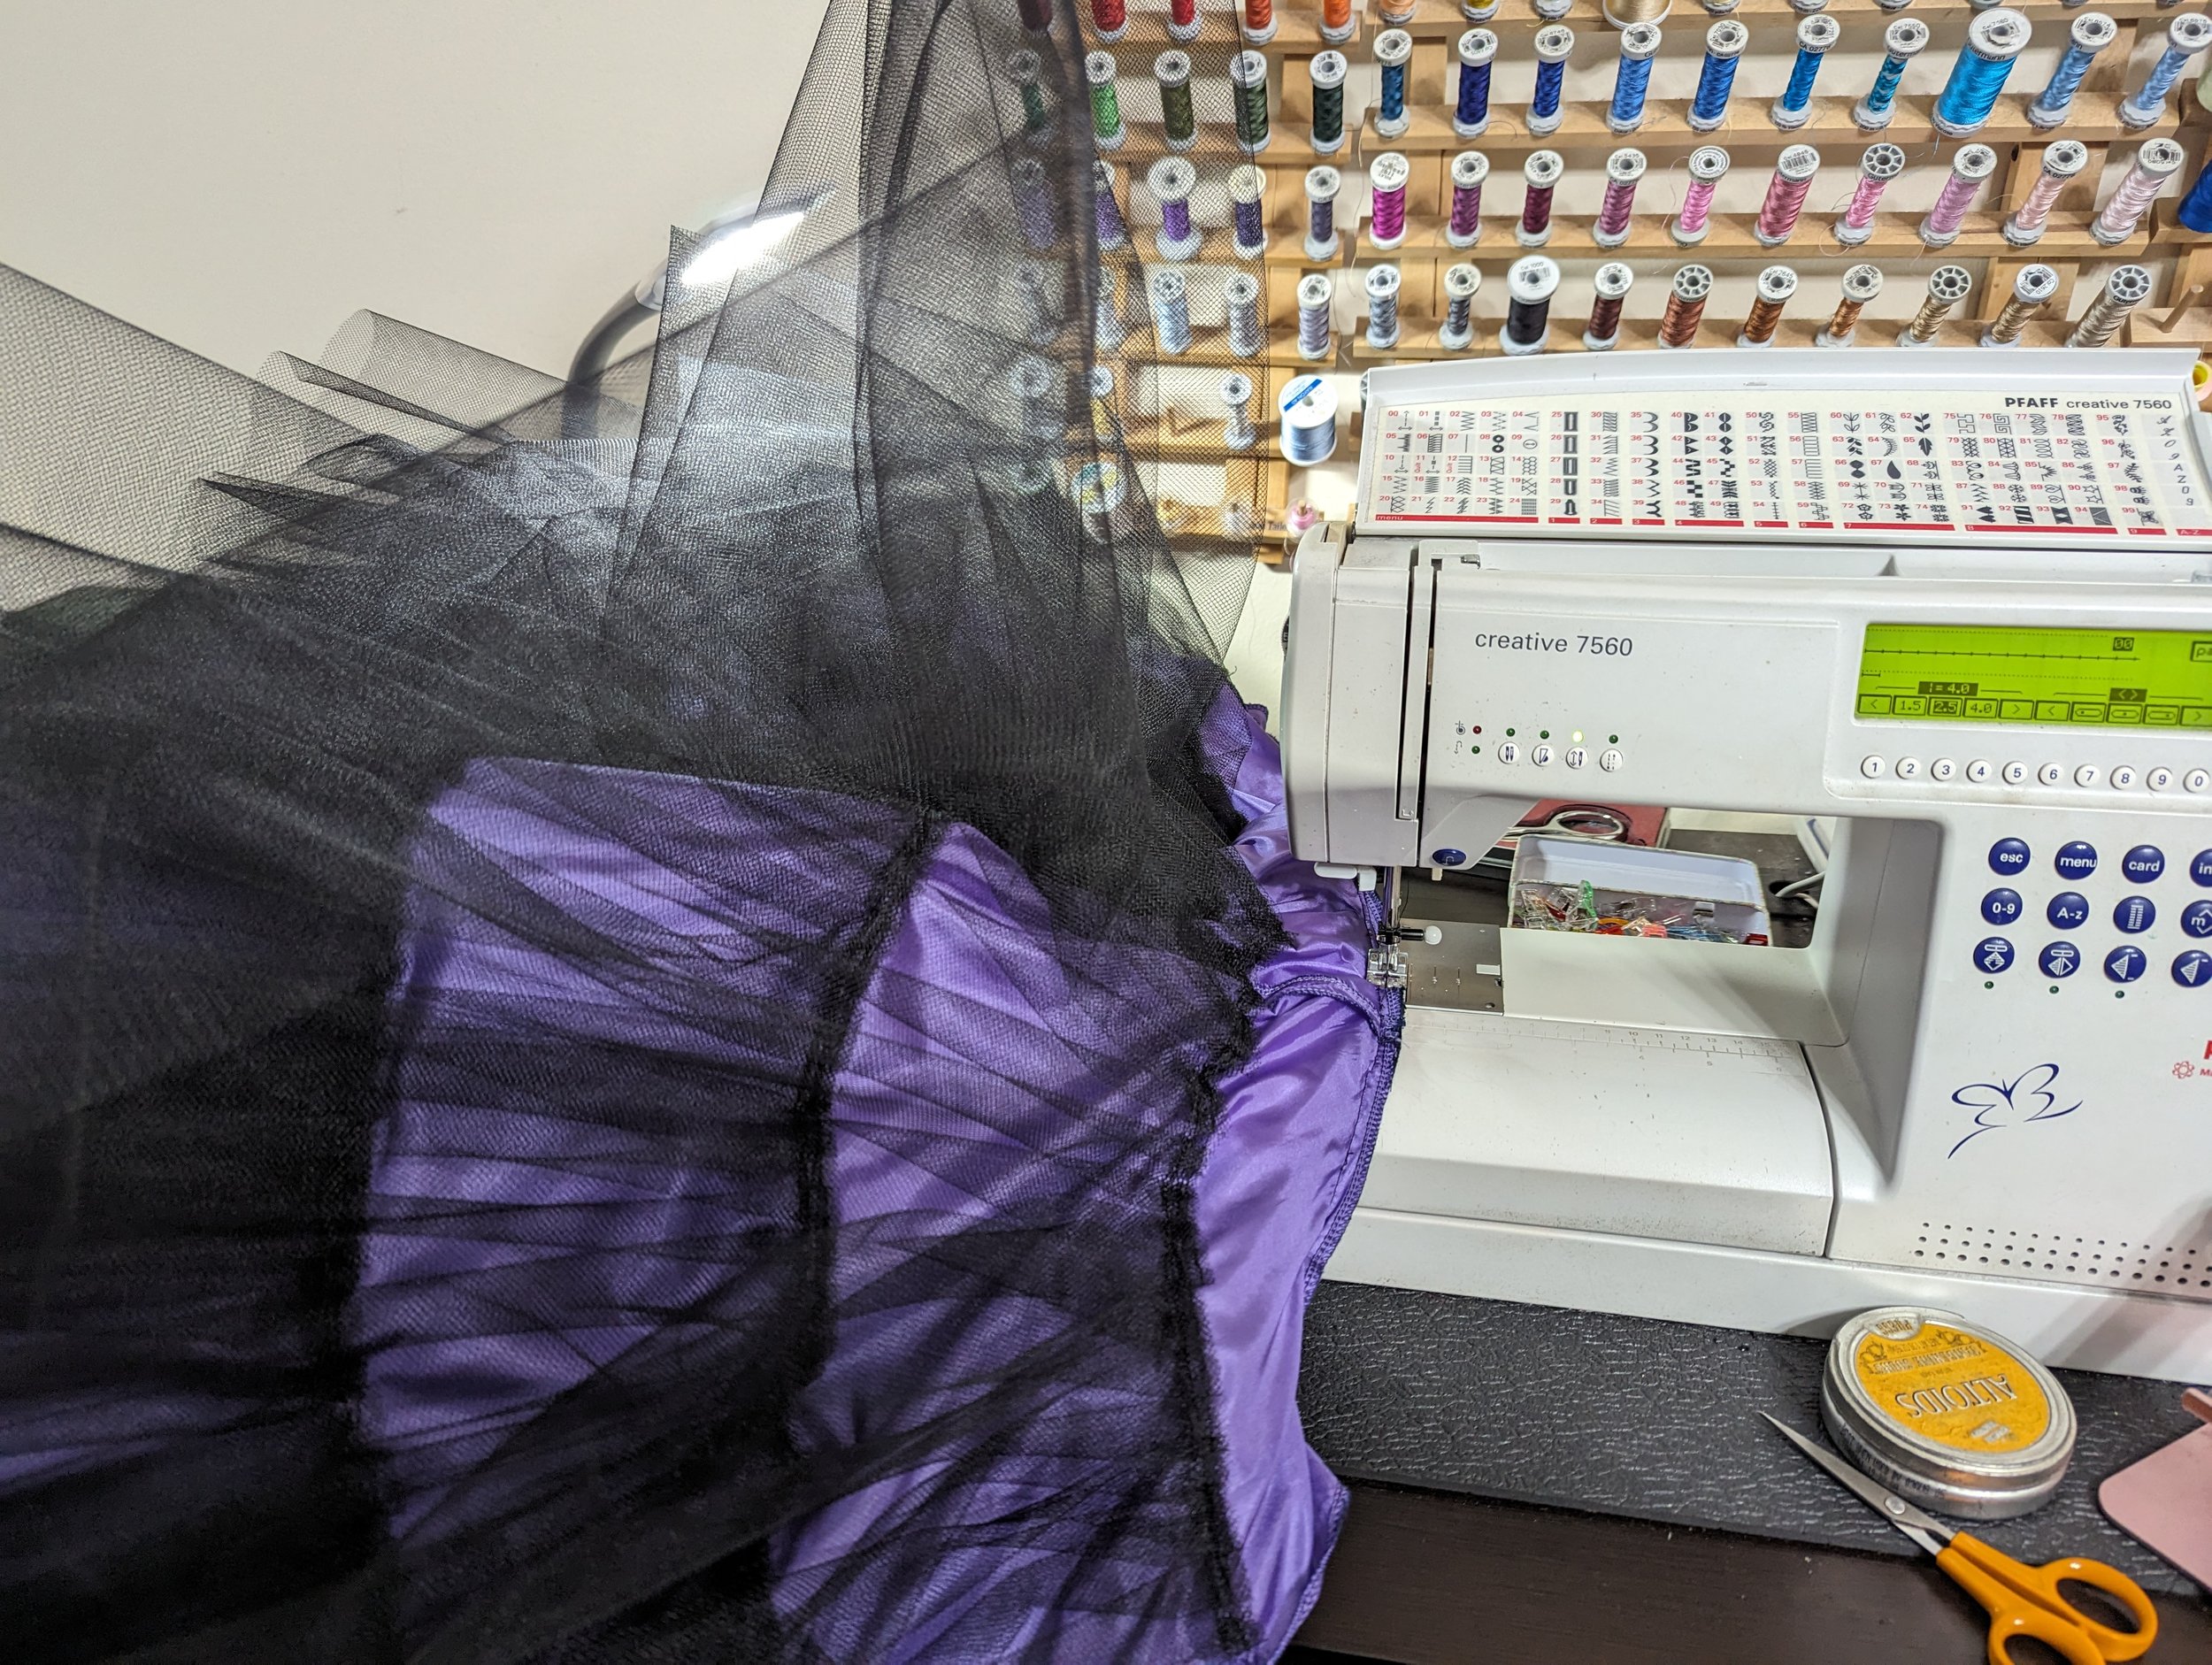
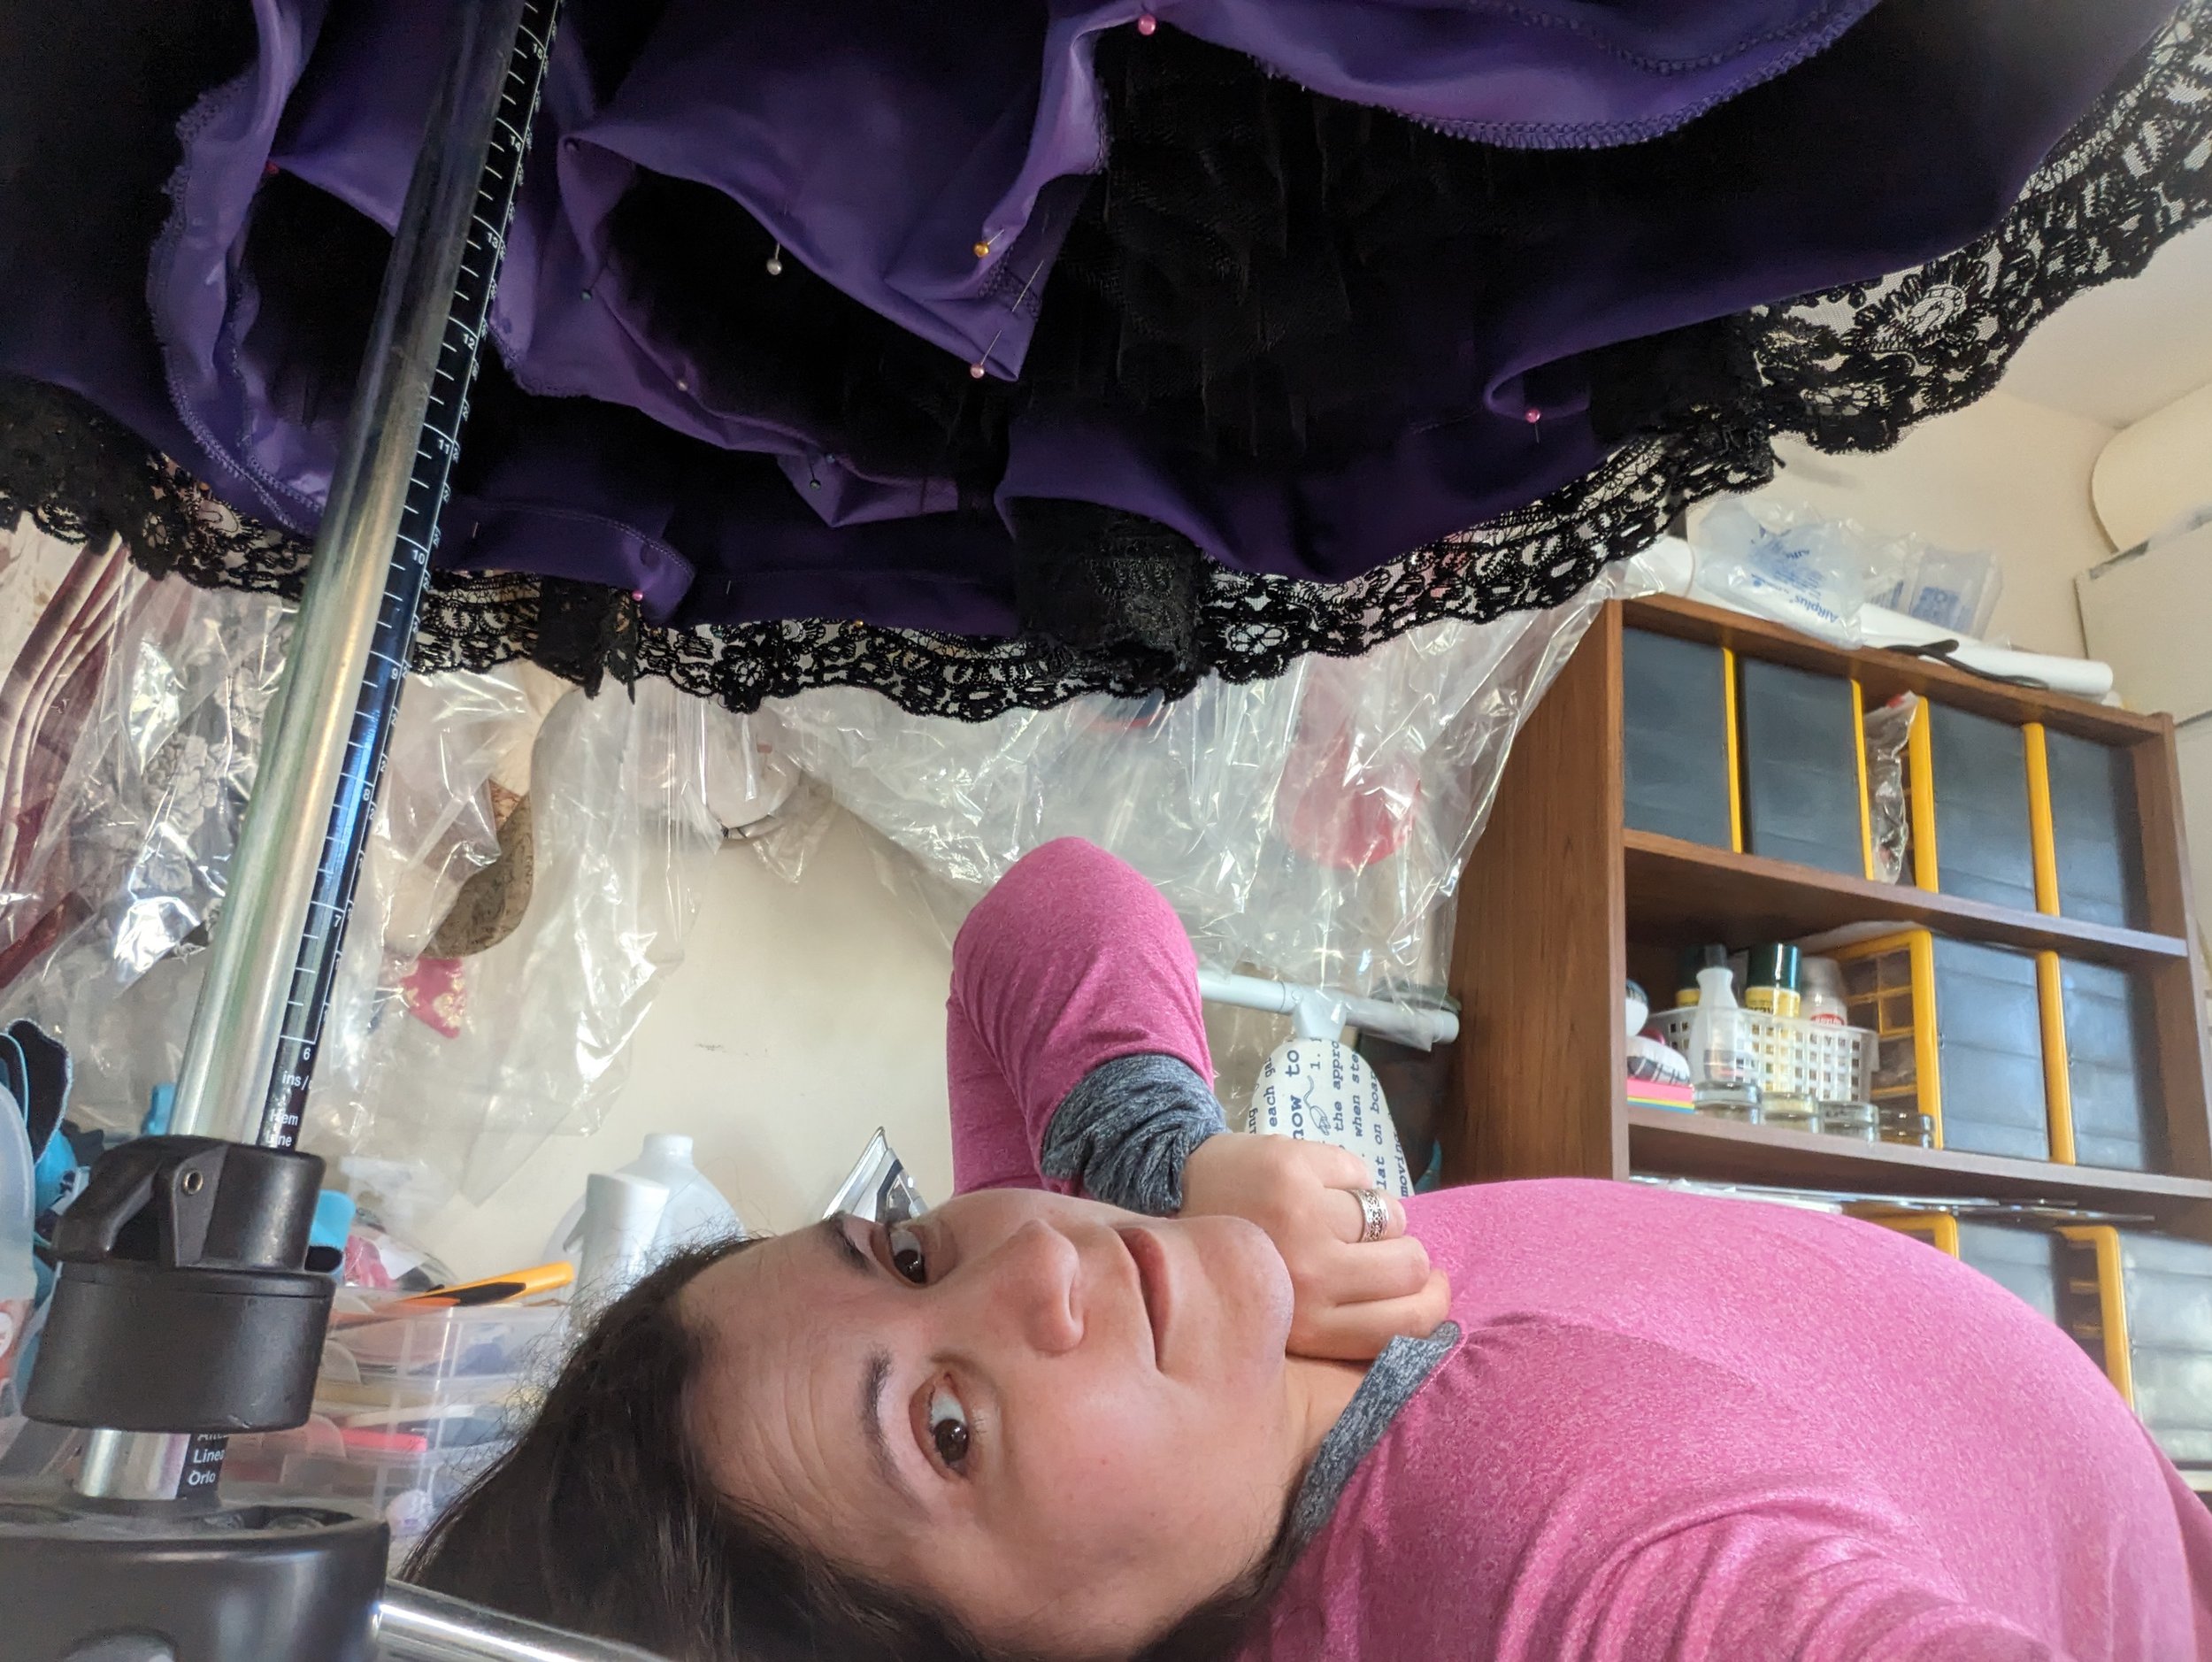
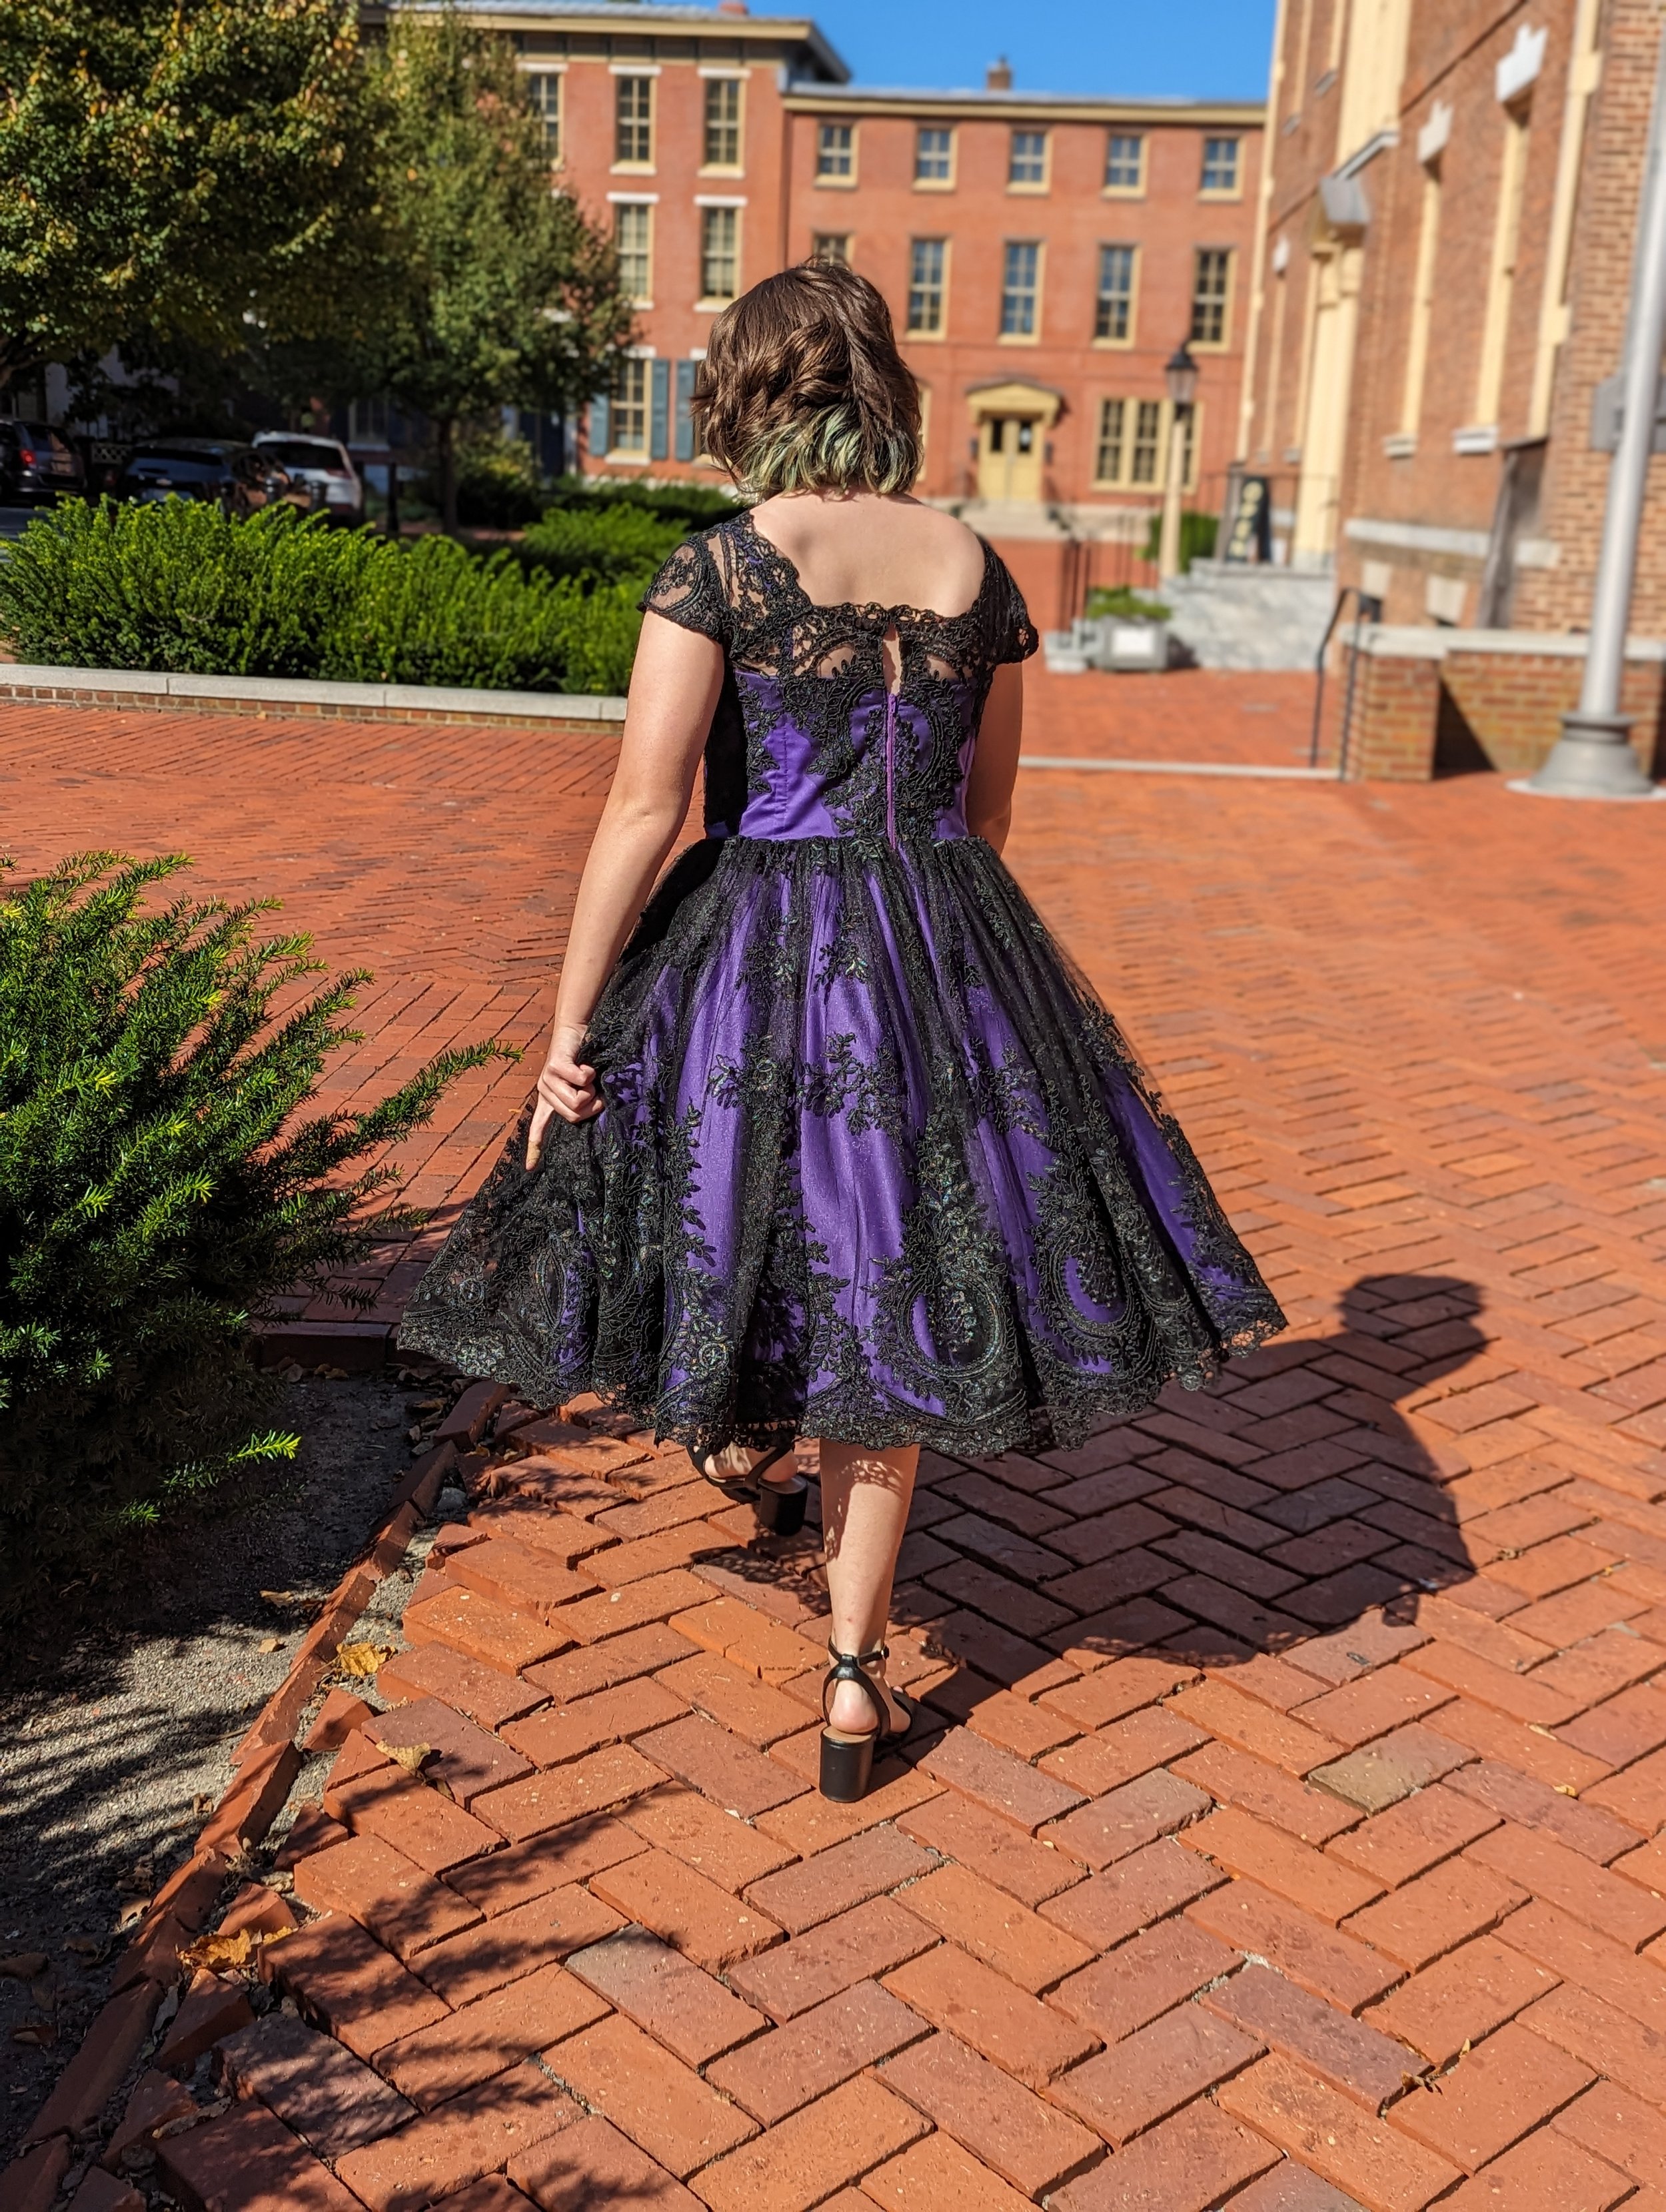
When I was finally at the step of sewing together the bodice and skirt, it was such a relief. I have a couple photos that show how much volume there was to deal with. I moved my shelves and serger that are normally over there for more room. I had basted the bottom of the bodice together, leaving about 1.5” free at the end next to the back seam. When I sewed them together, I sandwiched the bodice between the skirt and lining, and sewed everything together except for 1.5” at the ends. Then I switched to sewing the exterior skirt to exterior bodice, and lining skirt to lining bodice. My first time sewing the waist seam, I accidentally switched the direction of the lining and ended up with the tulle facing the legs. So I had to rip that out and switch it.
Finally, I hemmed it. Circle skirts settle over time, so I had been hanging it on the dress form for days. After finishing the waist seam, I let it hang again over night. Then I pinned the outer and lining satin layers. I crawled around on the floor at first, then tried it up on my table, but I had to lay backwards like pictured, so that only lasted half a skirt hem! After that I finished up on the floor and then sewed it. The final step was to hand sew on a hook and eye. And then I was done!
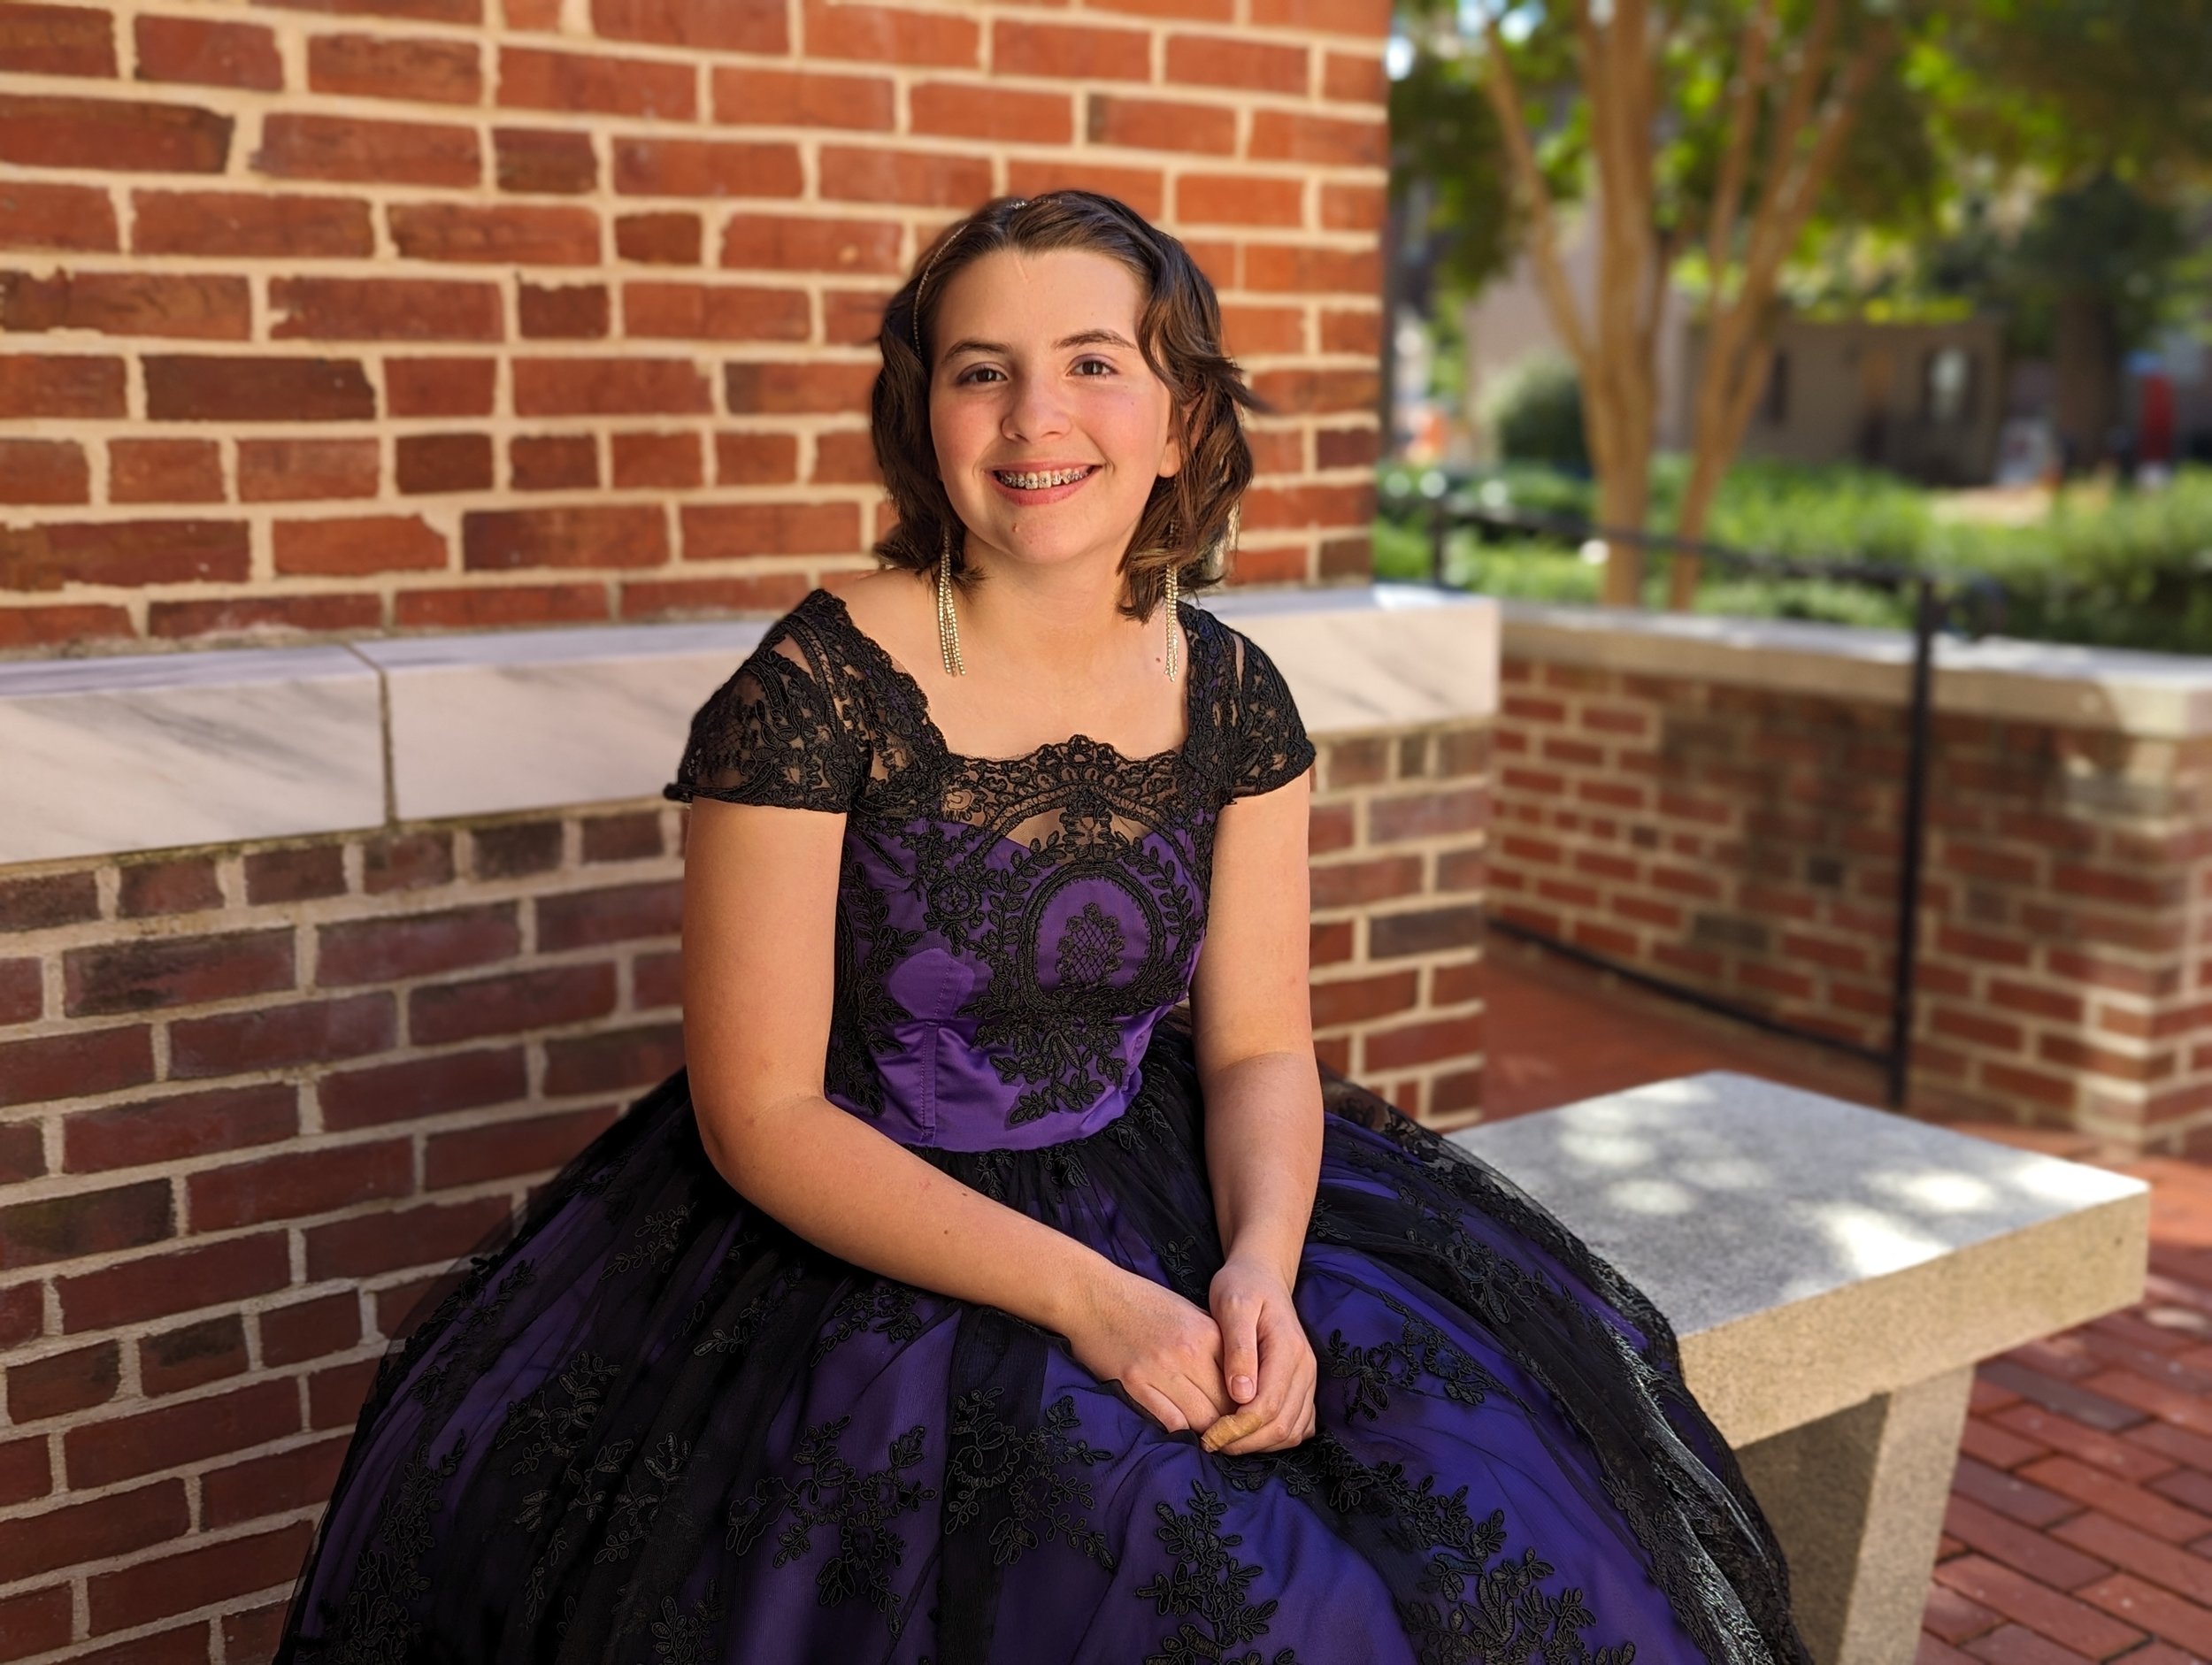
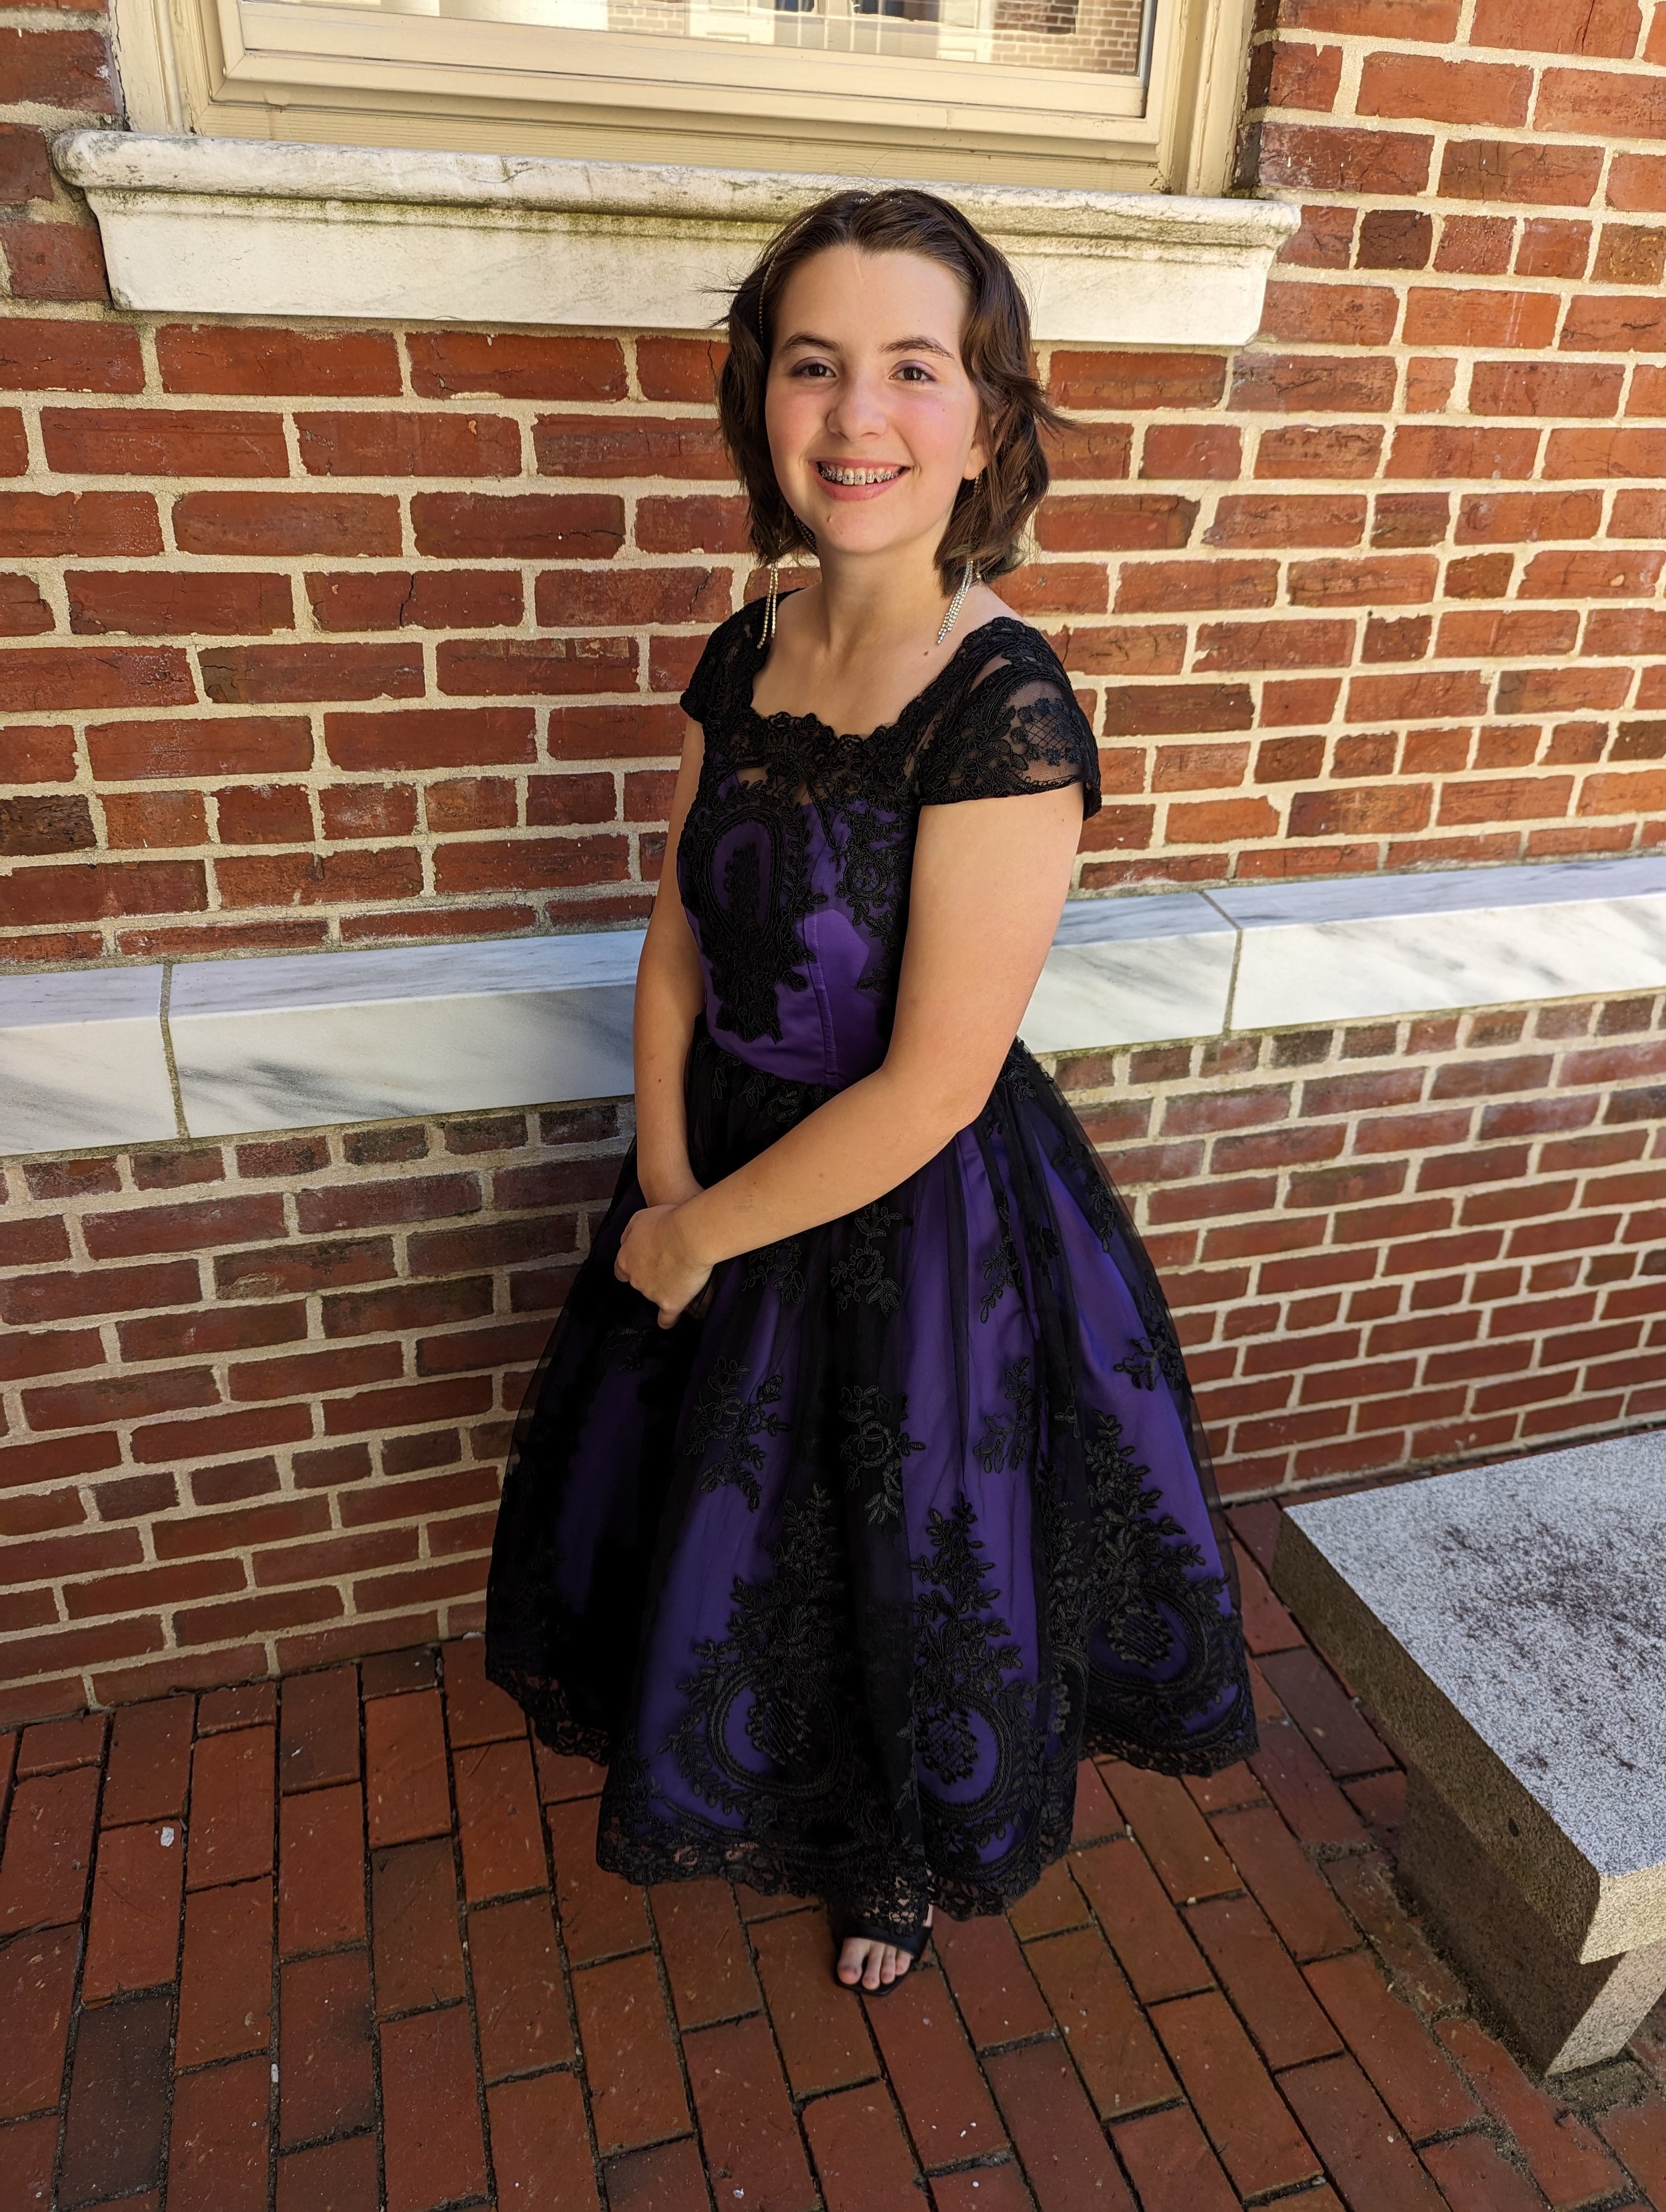
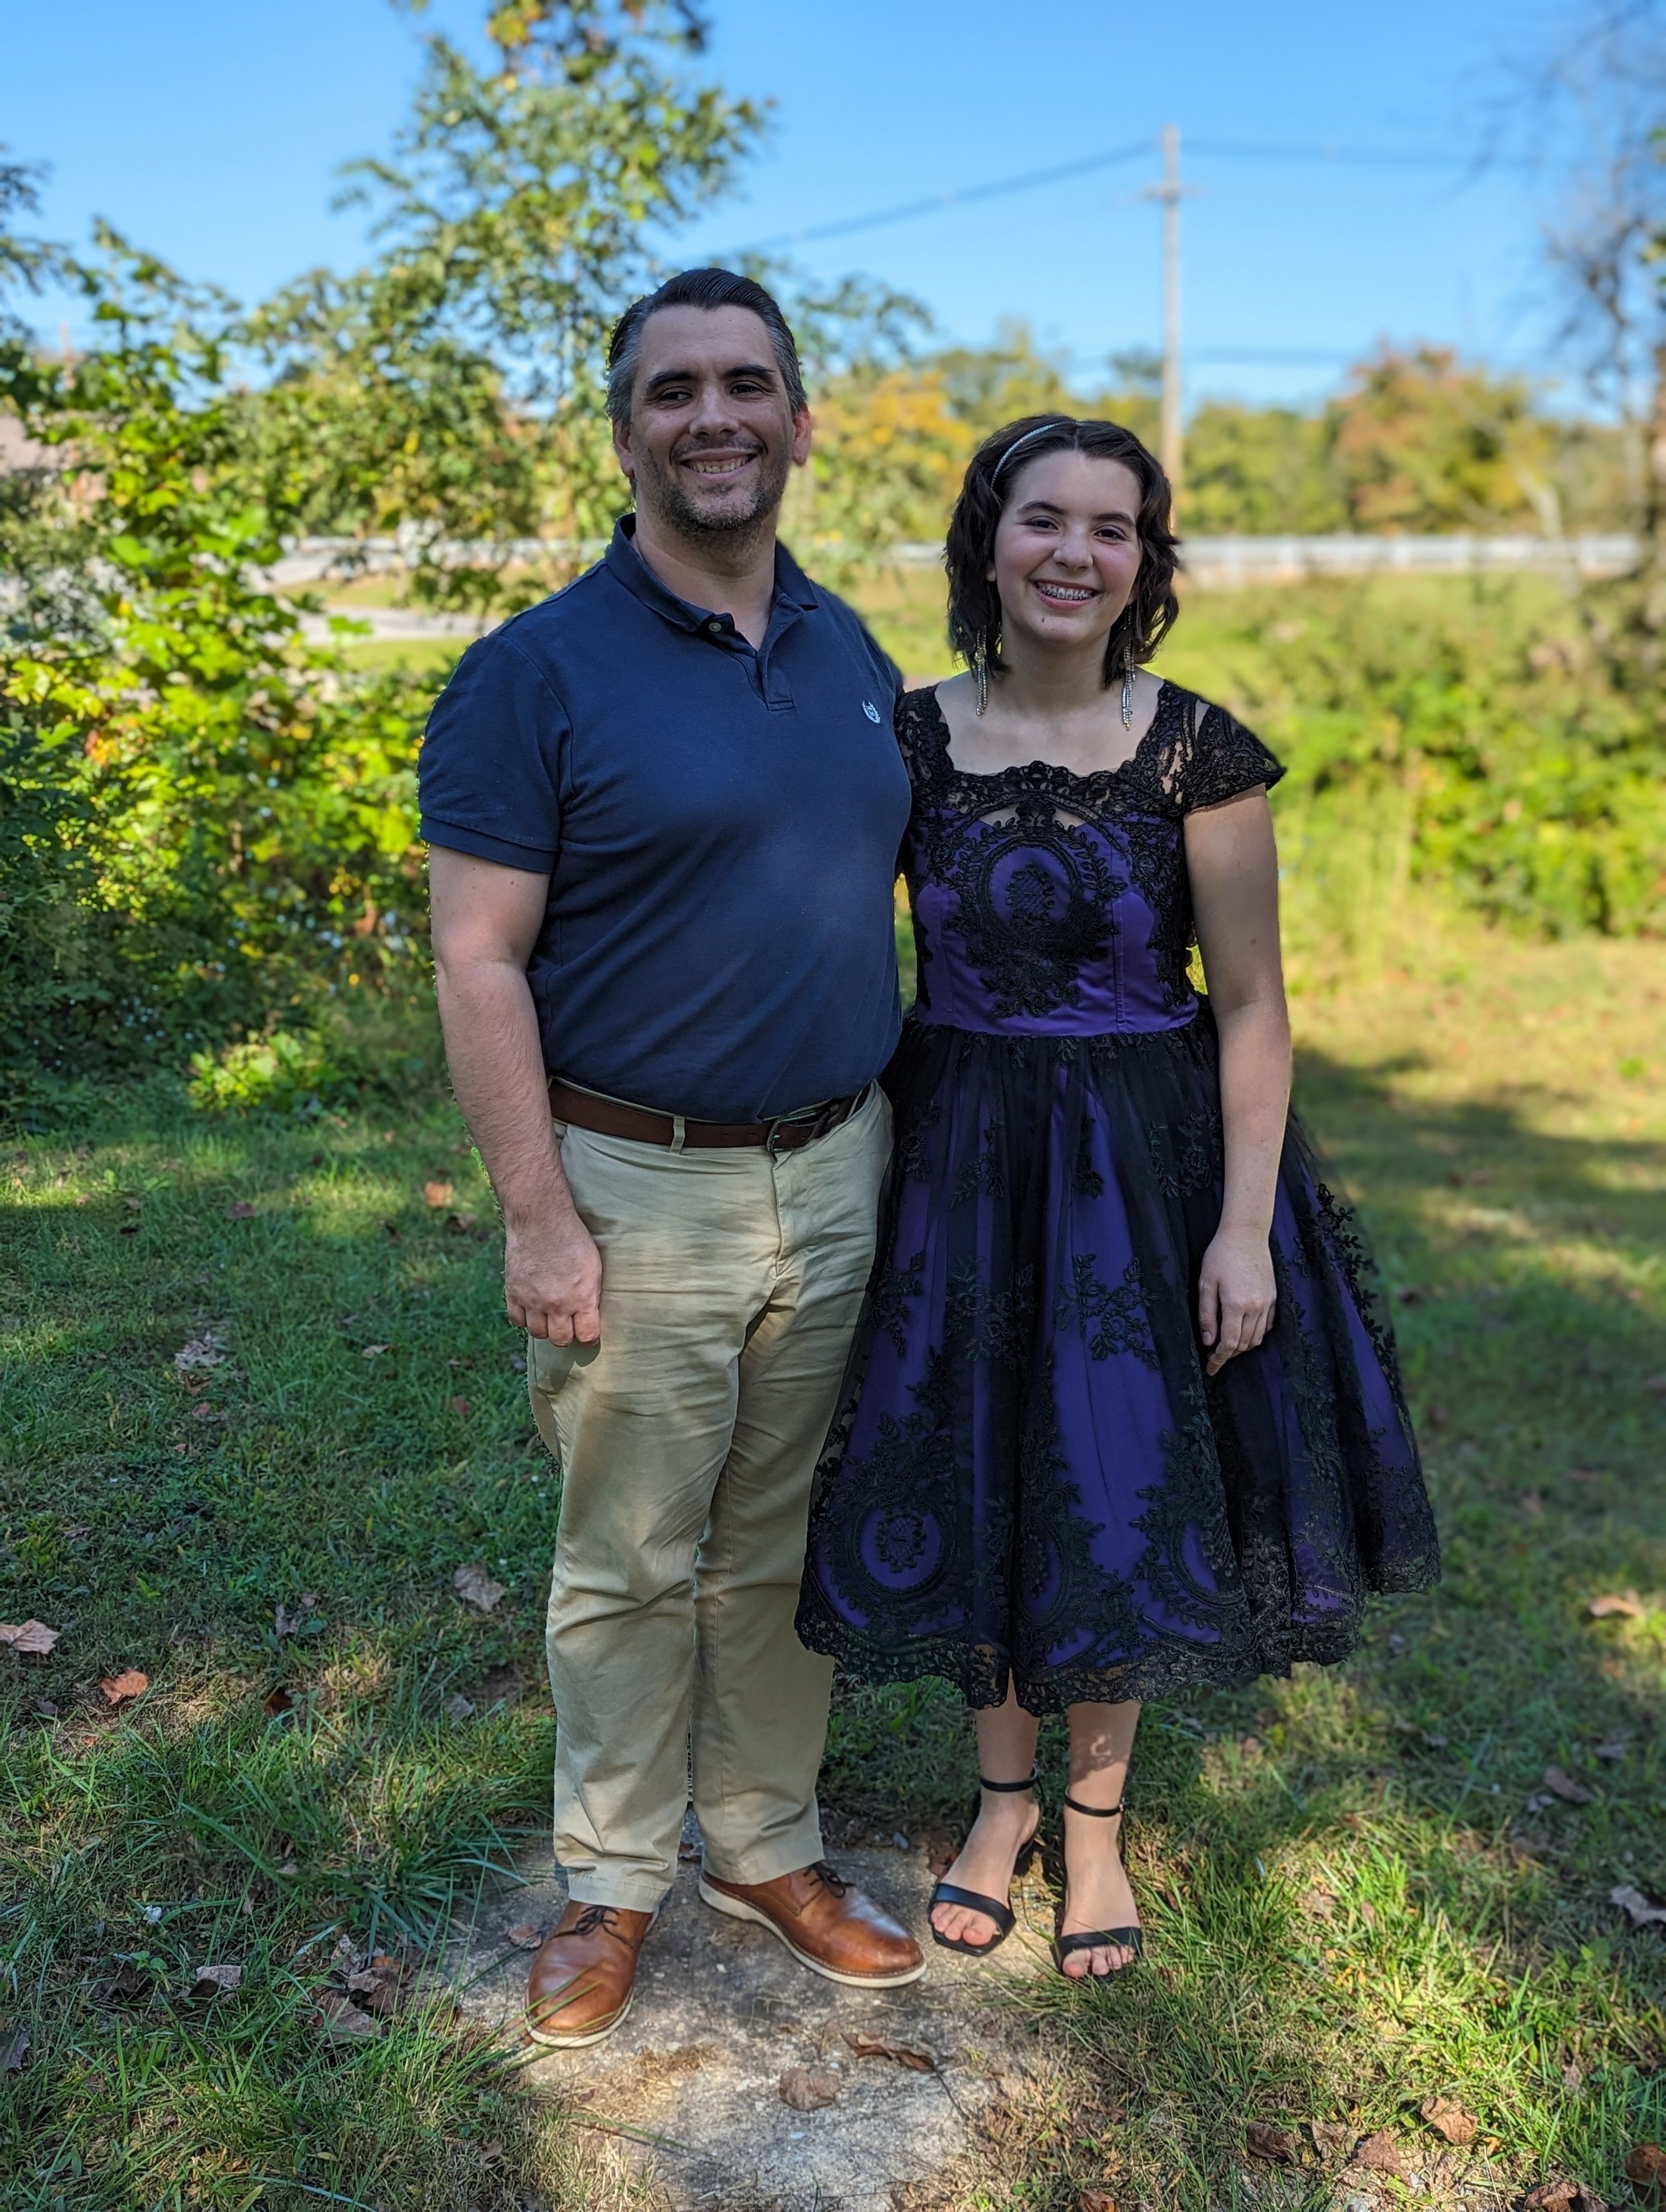
I finished on a Thursday and decided that this dress required its own photoshoot! I knew the weather would be bad on Saturday, so I took her out on her day off on Friday. We went to downtown Dover and took photos on The Green (historical district) and around the Courthouse. We also went to a nearby park. Since she is in marching band and had the Homecoming game in the evening, our only free time was early in the afternoon with lots of sun. However, I was able to find some shady spots and got some great photos. I planned on editing these, but I got plenty of great photos straight off the phone. I also got some cute pictures with her date on Saturday, but I don’t like posting other people’s kids on my blog. Be prepared for a ton of photos!


Now, for a price breakdown. I know people are interested in that! Was it worth it? Did I save money? The answers to that are:
Definitely
Cheaper by a small amount
When you count the hours and hours I put in, which I didn’t calculate, I spent much more than the dress was worth online. However, I had a lot of fun. It taught me new skills which I can use for the future, and was a great experience for me and my daughter. She really felt like a princess and had so many compliments. Plus she was really comfortable and loved the pockets! (And I was happy with its level of modesty). She enjoyed Homecoming, which was also her first date, and can’t wait to find other occasions to wear this dress. I’m already suggesting easier patterns for the future, but I know I can do more complicated projects too if I have enough time and money. I suggested, and my husband and daughter all agreed, that I can make her one formal dress a year for high school, and if she wants a second (like for Prom), she will need to pay for the materials. All prices below include shipping. I included the price I paid for packages of things, even if I didn’t use the whole thing. Thankfully some of those things, like boning and petersham ribbon, I can use the extra in the future too. I didn’t count the cost of things I had on hand, like all my satin for test bodices. I have tons of extra from making stockings.
Price Breakdown
Lace (3 yards)- $64.15
Satin (4 yds), lining fabric (4 yds), petticoat netting (13 yds)- $64.90
Corset top pattern- $4.58
Petersham ribbon- $13.63
Clip to close ribbon- $3.50
Boning- $10.49
Bodice underlining (broadcloth), lining (sateen), and zipper- approx. $10
Strapless bra- $15
Hook and eye- $2.39
Total: $188.64
Beat it by $5!